EasyManuals Logo

Epson Stylus Photo TX659 User Manual

Epson Stylus Photo TX659
166 pages
To Next Page IconTo Next Page
To Previous Page IconTo Previous Page
Page #91 background imageLoading...
Page #91 background image
Epson Stylus Photo PX650/TX650/TX659/PX660/PX660 Premium/Artisan 635 Revision C
DISASSEMBLY AND ASSEMBLY Disassembling the Printer Mechanism 91
Confidential
4.4.5 PF Motor
Parts/Components need to be removed in advance
Upper Housing / Scanner Unit / Panel Unit / M/B Cover / Waste Ink Tray Assy /
Middle Housing / Printer Mechanism / PF Encoder / PF Scale
Removal procedure
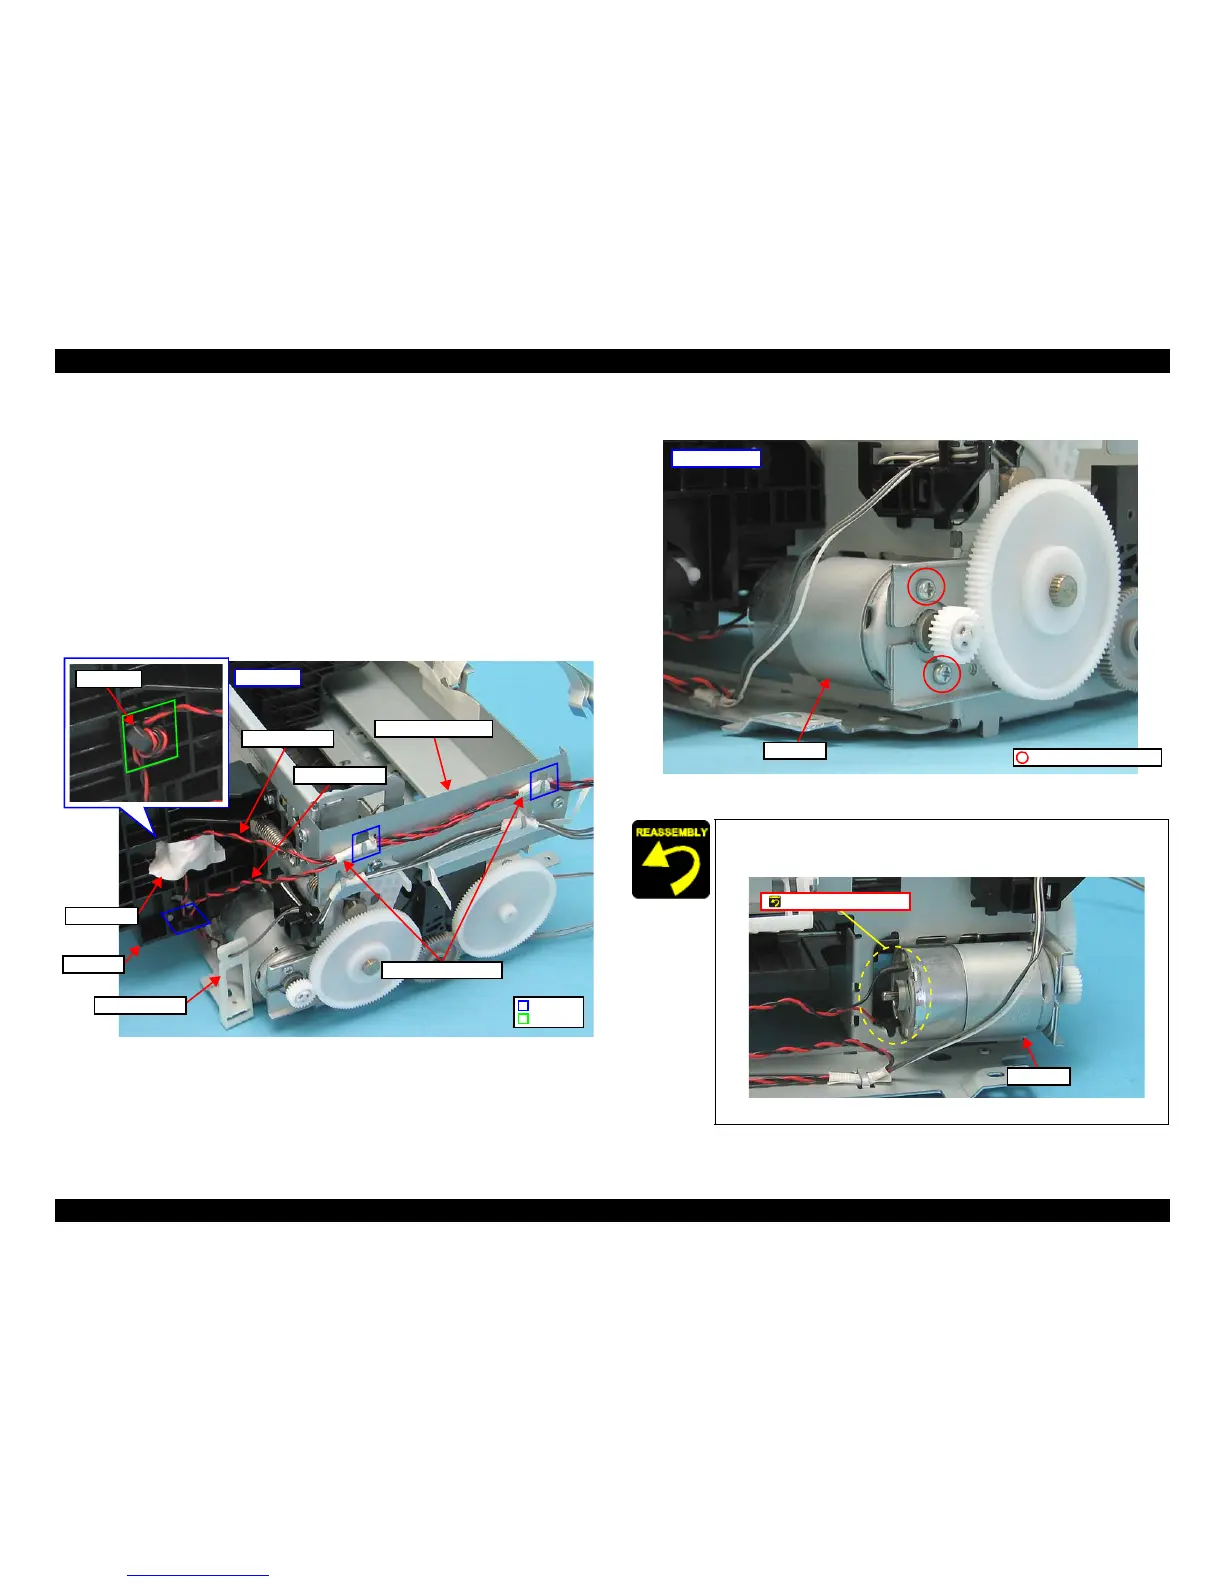
1. Peel off the acetate tape that secure the ferrite core of the PF Motor Cable.
2. Release the PF Motor Cable and the CR Motor Cable from the hooks (x2) of the
Cable Holder Frame and the hook of the ASF Unit.
3. Remove the Harness Holder.
Figure 4-64. Removing the PF Motor (1)
4. Remove the screws (x2) that secure the PF Motor, and remove the PF Motor.
Figure 4-65. Removing the PF Motor (2)
Ferrite core
Acetate tape
PF Motor Cable
Hook
Groove
CR Motor Cable
Harness Holder
Left side
Cable Holder Frame
ASF Unit
Acetate tape (20mm)
When installing the PF Motor, make sure to set it with the
black wire up.
Figure 4-66. PF Motor
C.P.S. 3x6 (4±1 Kgfcm)
PF Motor
Rear left side
PF Motor
With the black wire up.

Table of Contents

Questions and Answers:

Question and Answer IconNeed help?

Do you have a question about the Epson Stylus Photo TX659 and is the answer not in the manual?

Epson Stylus Photo TX659 Specifications

General IconGeneral
BrandEpson
ModelStylus Photo TX659
CategoryPrinter
LanguageEnglish

Related product manuals