Epson Stylus Photo PX650/TX650/TX659/PX660/PX660 Premium/Artisan 635 Revision C
DISASSEMBLY AND ASSEMBLY Disassembling the Printer Mechanism 98
Confidential
4.4.10 CR Unit
Parts/Components need to be removed in advance
Upper Housing / Scanner Unit / Panel Unit / M/B Cover / Waste Ink Tray Assy /
Middle Housing / Printer Mechanism / Linear Scale / PF Scale / PF Encoder / APG
Unit
Removal procedure
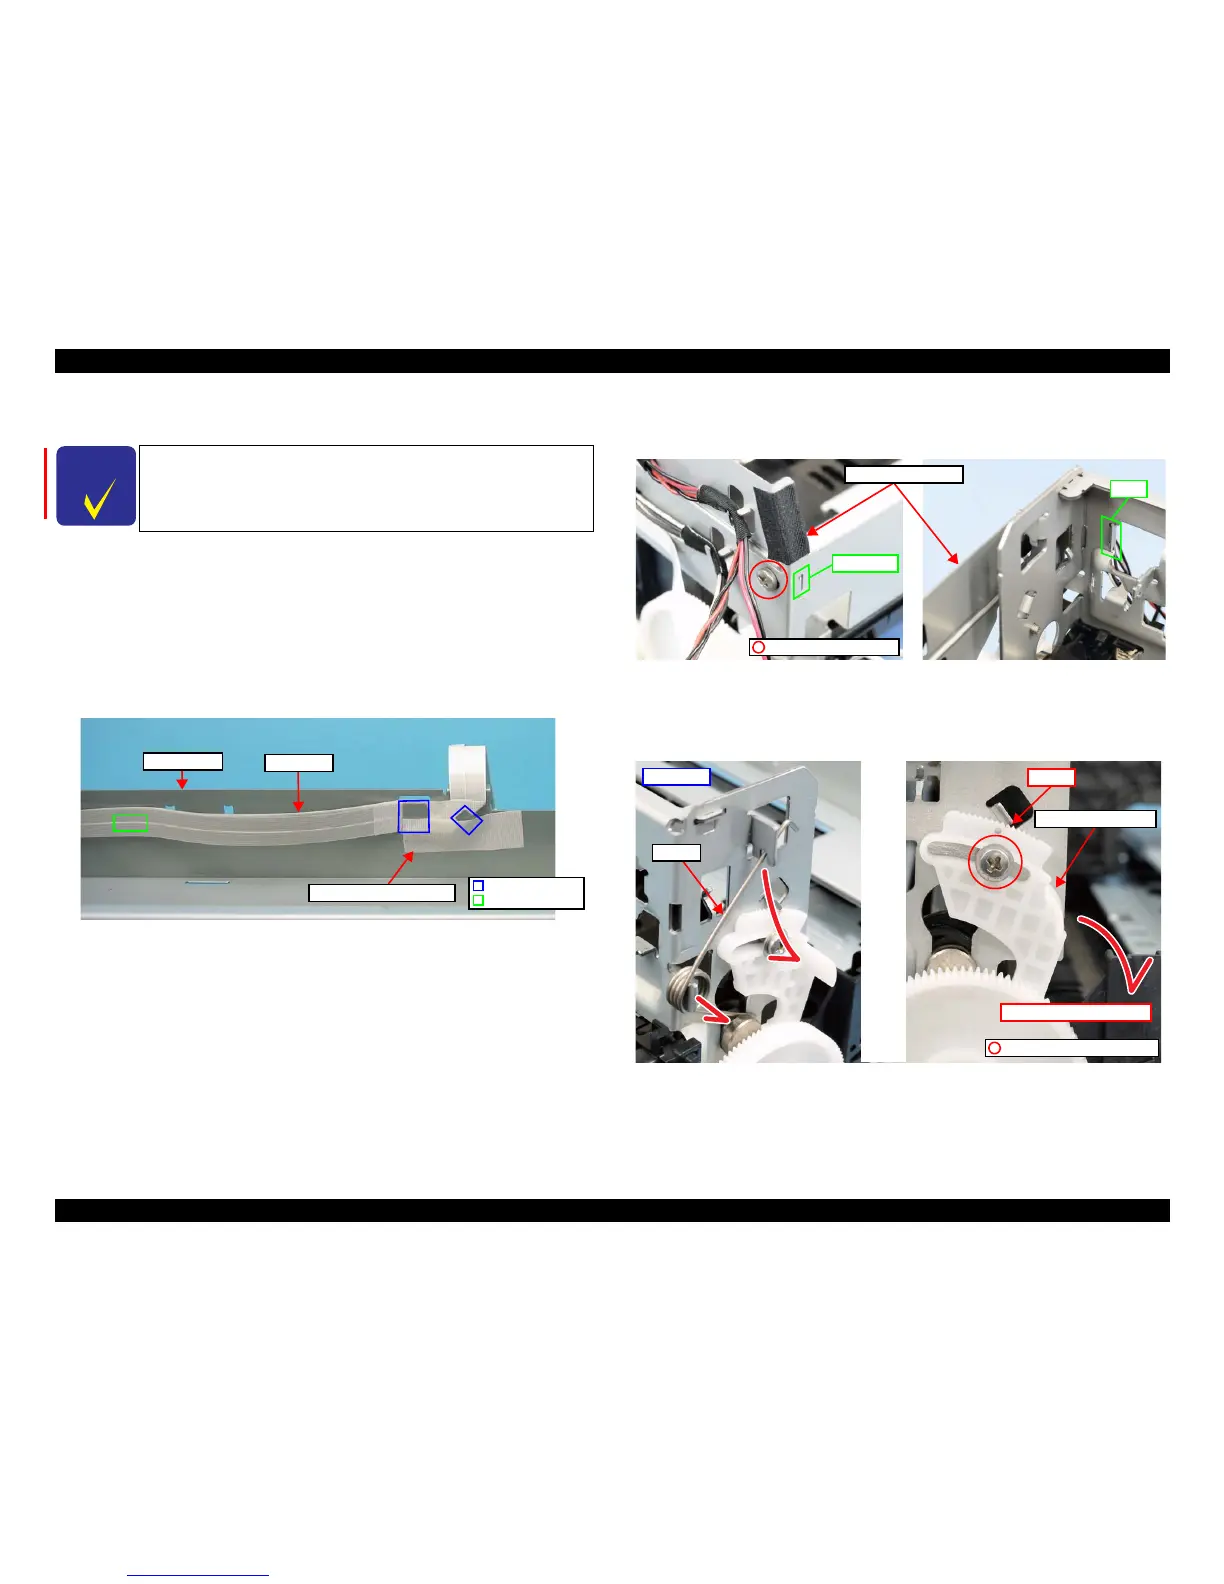
1. Remove the Driven Pulley from the Main Frame. (See Figure 4-82.)
2. Peel off the acetate tape, and release the Head FFC from the Front Frame.
Figure 4-86. Removing the CR Unit (1)
3. Remove the screw that secure the Cable Holder Frame, and remove the Cable
Holder Frame.
Figure 4-87. Removing the CR Unit (2)
4. At the left side of the printer, remove the spring, and mark the contact point on the
Parallelism Bush with the frame. Then loosen the screw, and turn the Parallelism
Bush toward the front.
Figure 4-88. Removing the CR Unit (3)
The disassembly/reassembly procedures for Epson Stylus Photo
PX660/PX660 Premium/Artisan 635 differ from those for Epson
Stylus Photo PX650/TX650/TX659. See "8.2.2.5 CR Unit" (p.155)
for the procedures.
 Loading...


