Configuring Media | 9
Adjusting the Paper Feeding Position
1. Press Menu, press d to highlight PAPER SETUP, and press Menu.
2. Press d to highlight PAPER SETUP, then press Menu.
3. Select the paper configuration number (1 to 30) for the loaded media, then press .
4. Select PAPER FEED ADJUST, press Menu, select LINE FEED ADJUST, and press Menu again.
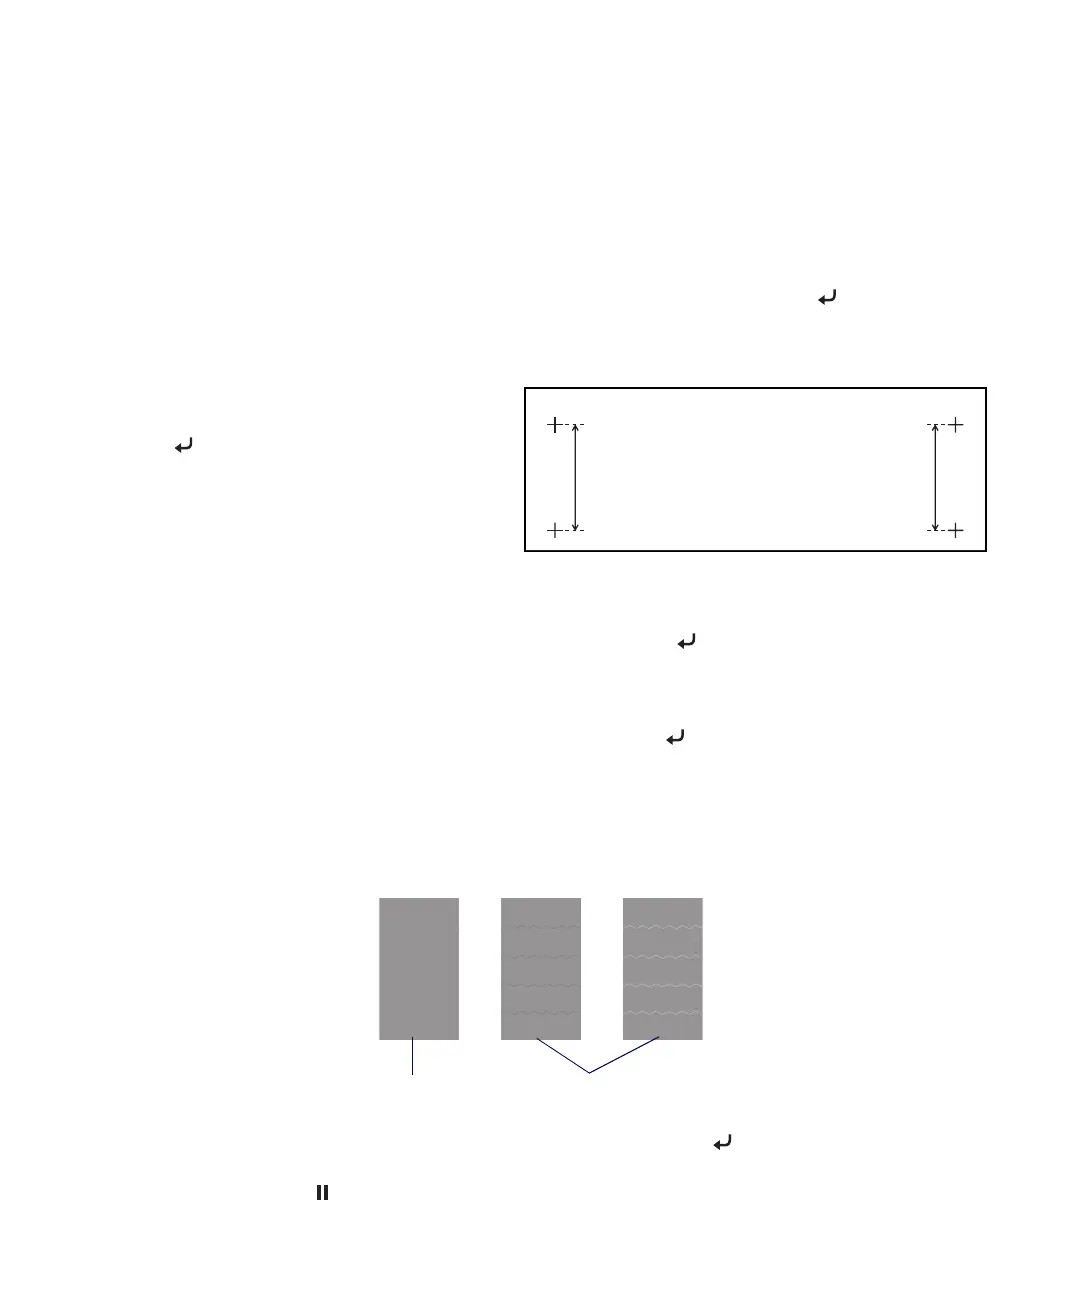
5. Press u or d to set the feed length to
500mm (recommended), press Menu, and
press to print an initial adjustment
pattern like this:
6. Cut off the printed pattern so you can more
easily measure it. See page 7 for instructions.
7. Using a ruler with measurements in millimeters, measure the distance between the two + (plus) signs.
8. Press u or d to select the distance you measured, then press the button.
9. Press u to return to the Paper Feed Adjust menu.
10. Select PRINT SAMPLE PATTERN, press Menu, and press the button to print sample patterns.
11. Cut off the printed patterns so you can more easily examine them. See page 7 for instructions.
12. Examine the sets of patterns to identify which one has the most consistent printing pattern, with no
black or white lines running through it.
13. Press u or d to select the number of the best pattern, then press the button to save the setting.
14. When done, press the Pause button.
Best pattern Patterns displaying lines

 Loading...


