Cutting Off and Removing Prints | 7
Cutting Off and Removing Prints
1. Make sure READY appears on the LCD display.
2. Press u or d to adjust the cutting position, if necessary. (When you are using the Auto Take-Up Reel,
you cannot feed the media backward.)
3. Open the front cover.
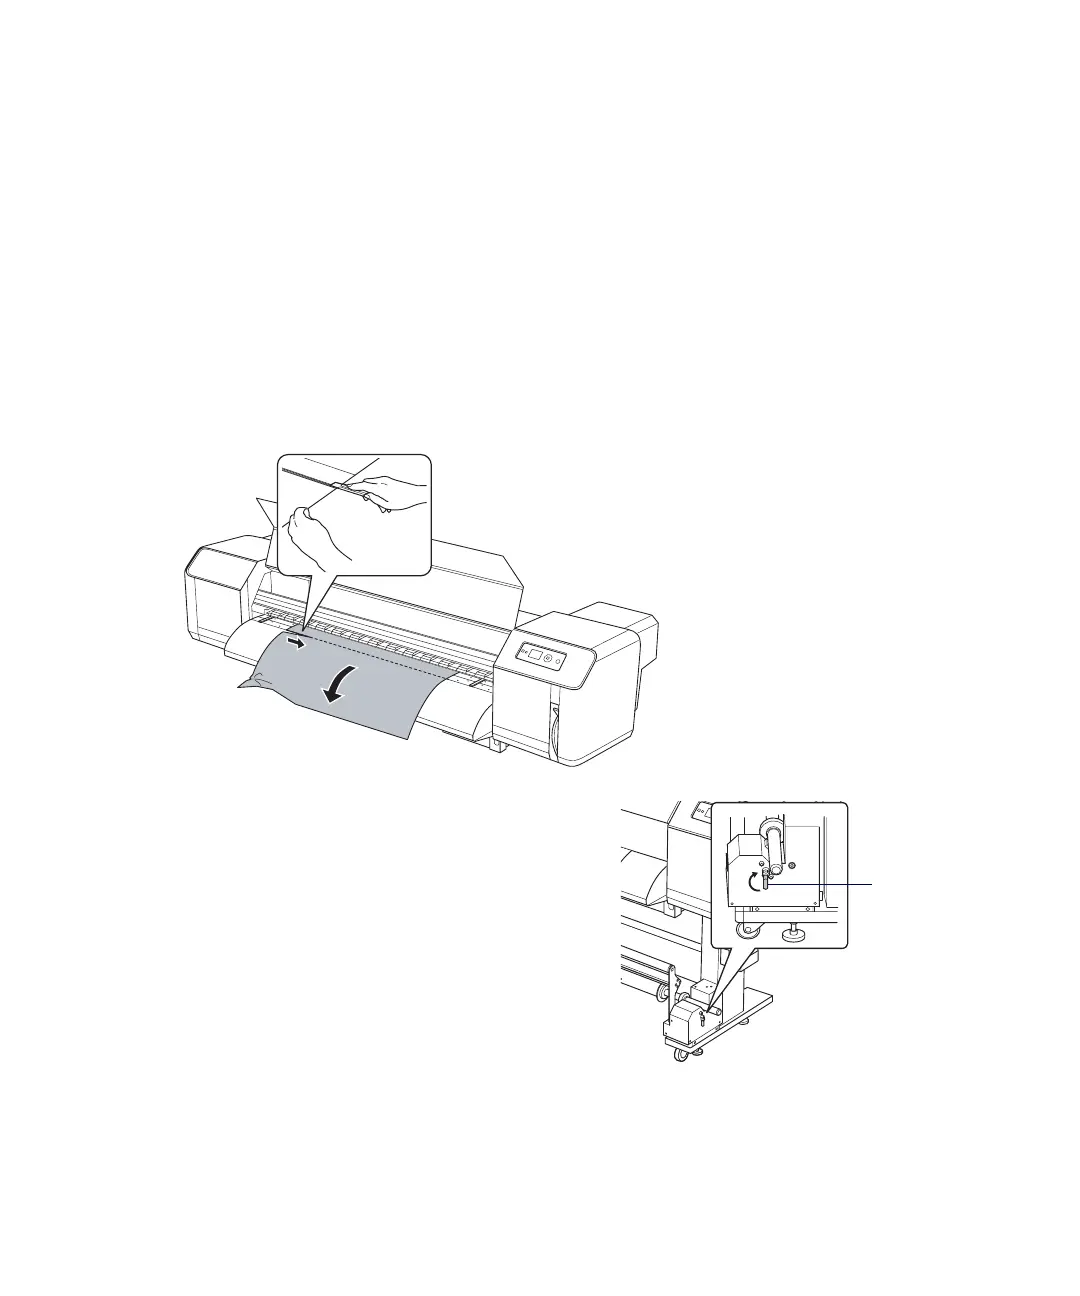
4. Hold your print and pull slightly to remove any slack.
5. Using a razor blade or other cutting tool, cut off your print along the cutting groove
6. If you are using the Auto Take-Up Reel, the scroller
rotates to take up your printed media. To stop media
take-up, set the switch on the top of the reel controller to
OFF.
7. Flip the scroller release lever up to the FREE position.
8. Lift the entire scroller bar off of the printer, remove the
paper holders from one end, then remove the media and
core from the scroller bar.
9. Place an empty take-up core onto the scroller bar. Then
replace the scroller bar, set the scroller release lever to the
SET position, and turn the Auto Take-Up Reel back on.
WARNING: Do not
place your fingers in the
path of the cutting tool
to avoid injuring
yourself.
Scroller release
lever

 Loading...


