EasyManuals Logo

Epson SureColor P6000 Quick Reference

Epson SureColor P6000
46 pages
To Next Page IconTo Next Page
To Previous Page IconTo Previous Page
Page #34 background imageLoading...
Page #34 background image
Replacing ink cartridges | 33
6.
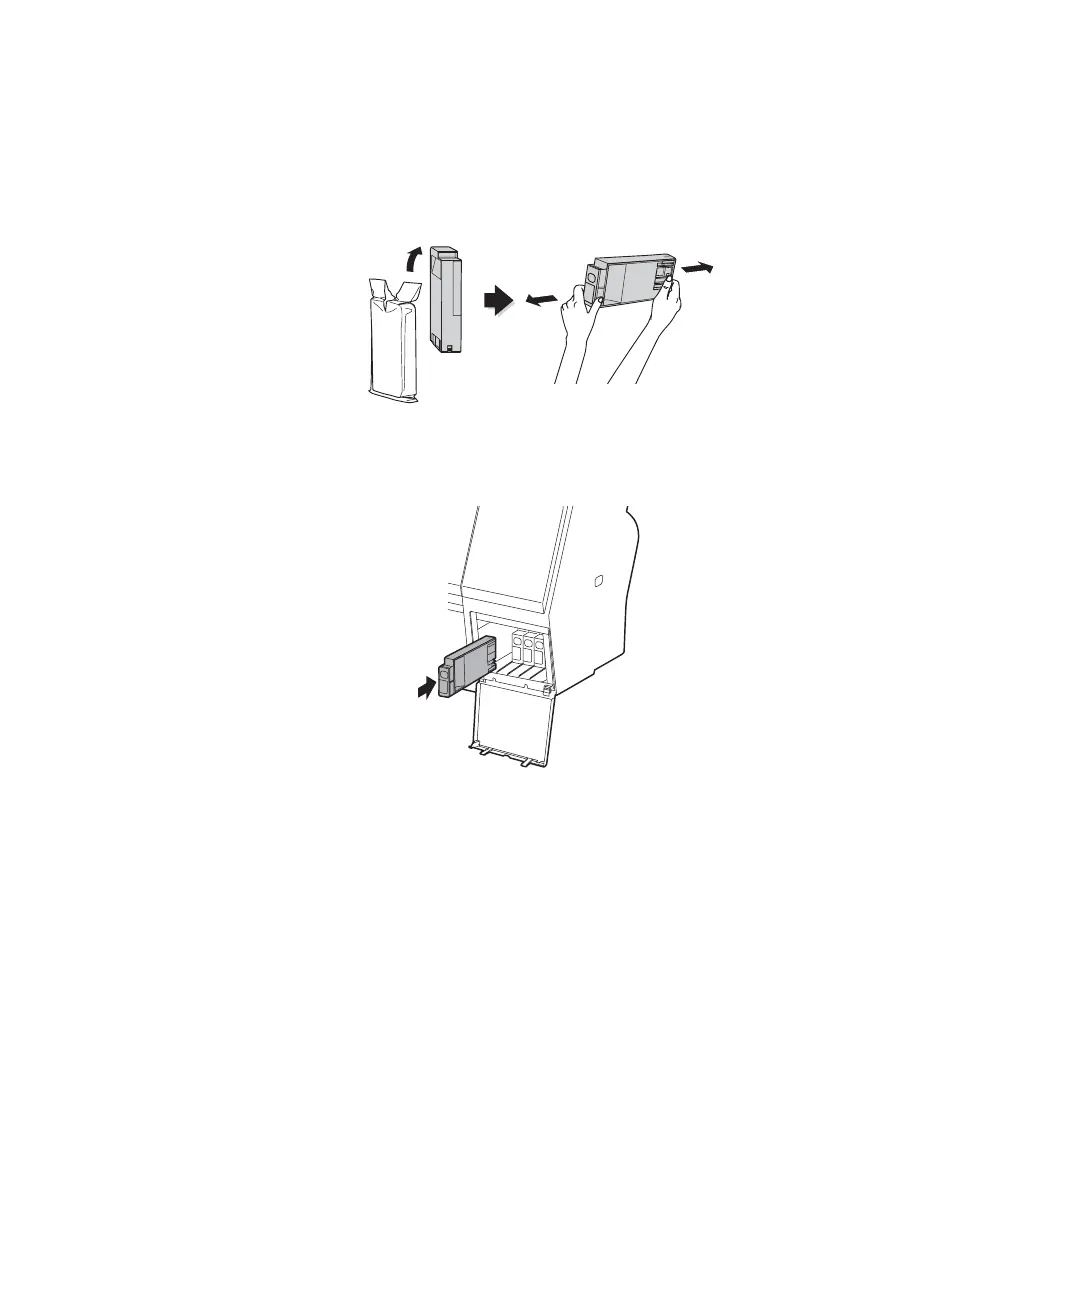
Make sure the replacement cartridge is the correct color and remove it from its package. Gently shake
the cartridge for about 5 seconds before installing it, but be careful not to touch the chip on the
cartridge.
7. Hold the cartridge with the arrow pointing toward the printer. Then insert the cartridge into the slot
until it clicks into place. Don’t force it in.
Caution: Do not remove and re-insert cartridges more often than necessary. Doing so can compromise the
needle valve seal and allow air to enter the ink tubes, causing nozzle damage.
Note: If the ink cartridges are not used on a frequent basis, it is recommended that you remove the
cartridges every 3 months, shake them for 10 seconds, and re-insert them.

Other manuals for Epson SureColor P6000

Questions and Answers:

Question and Answer IconNeed help?

Do you have a question about the Epson SureColor P6000 and is the answer not in the manual?

Epson SureColor P6000 Specifications

General IconGeneral
Maximum Print Resolution2880 x 1440 dpi
Number of Ink Colors8
Maximum Media Width24 inches
Ink TypeUltraChrome HD pigment ink
Media HandlingRoll and sheet
ConnectivityUSB 2.0, Ethernet, Wireless
Printer TypeLarge-format printer
Media TypesPhoto Paper, Fine Art Paper, Canvas
Media Sizes8.3" to 24" wide

Related product manuals