EPSON TM-U220
4 - EPSON TM-U220 5/03
9. For Type A only
, feed the paper using the FEED button so
that the spool takes up the paper.
10. Close the paper roll cover; then tear off the roll paper.
Note: Do not open the roll paper cover during printing or paper
feeding.
Be sure to cut roll paper with the manual cutter after each paper
feeding.
Replacing the Ribbon Cassette
CAUTION: The print head becomes very hot during printing. Let
it cool before replacing the ribbon.
Never turn the ribbon cassette knob in the opposite
direction to the arrow on the cassette.
Note: Use the EPSON ERC-38 ribbon cassette.
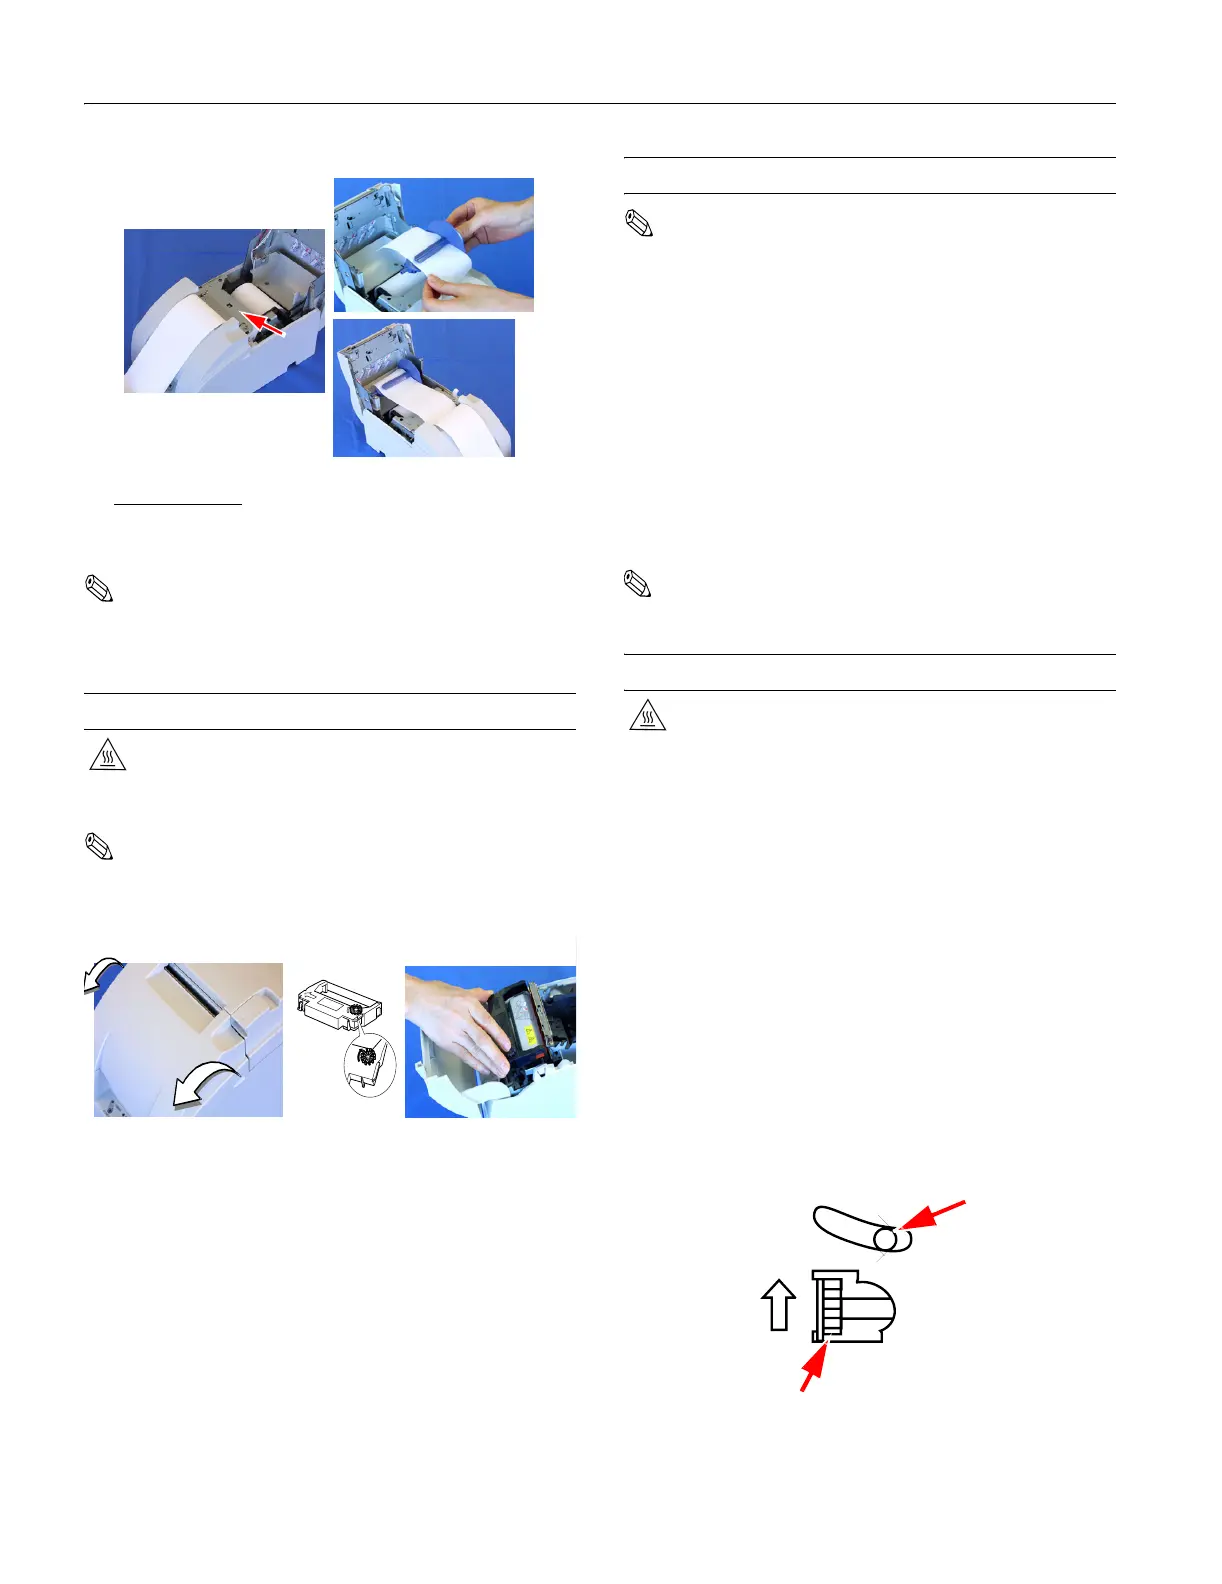
1. Open the ribbon cover using the tabs on each side of the
cover, as shown on the left below.
2. To remove an old ribbon, lift the left side of the cassette first
and then the whole cassette.
3. Turn the knob of the new ribbon cassette two or three
times, as shown in the center above.
4. Insert the ribbon as shown at the right above. Be sure the
ribbon is between the print head and platen, and push the
ribbon cassette down until it clicks.
5. Again turn the knob two or three times to take up slack.
Testing the Printer
Note: Load paper, and close the paper roll cover.
1. Be sure the printer is off and printer cover closed properly.
2. Hold down the
FEED button, and turn on the printer. (You
can also start the self-test by sending the command
GS ( A.
3. The self-test prints the printer settings and then prints the
following. (The
PAPER OUT light flashes.)
If you want to continue SELF-TEST printing, please
press the FEED button.
4. Press the FEED button to continue printing. The printer
prints a pattern using the built-in character set.
5. The printer prints “
*** completed ***” when the test ends.
(If the printer has an autocutter, it cuts the paper.) The
printer can receive data as soon as it completes the self-test.
Note: To pause the self-test, press the FEED button. Press FEED again
to continue the self-test.
Removing a Paper Jam
CAUTION: The print head becomes very hot during printing. Let
it cool before clearing a jam.
1. Open the paper roll cover using the tab, as shown at the top
of the previous page.
2. For a Type A printer, remove the take-up spool, and open
the unit.
3. Remove the jammed paper, put the roll paper back in the
printer, and close the cover. Do not pull jammed paper
forcefully or use tools.
4. to clear an autocutter jam, follow the steps below.
Clearing the Autocutter (Types A and B)
1. Turn the power off, open the roll paper cover, and remove
the jammed paper.
2. Use a pen or small screwdriver to turn the knob on the
autocutter in the direction of the arrow until
❍ appears in
the window.
3. Close the roll paper cover.
For Type A only:

 Loading...


