A
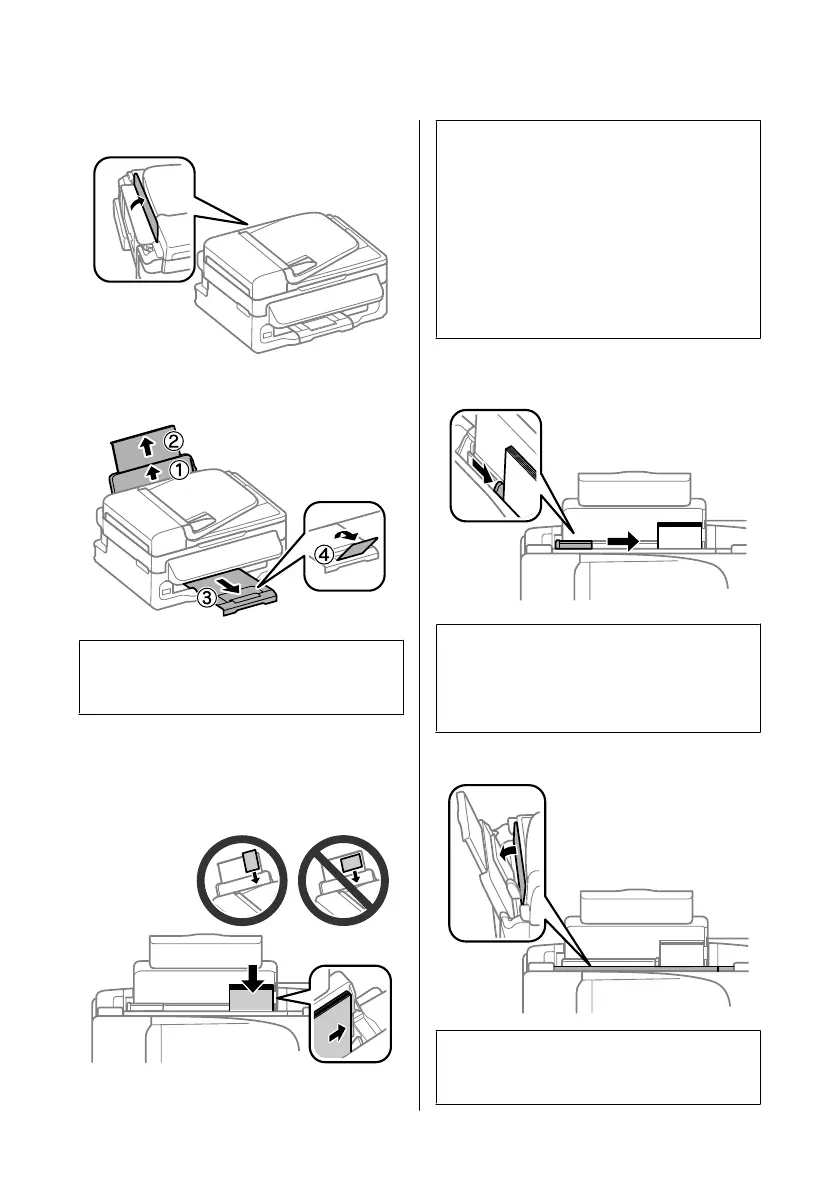
Flip the feeder guard forward.
B
Slide out the paper support and the output tray
and then raise the stopper.
Note:
Leave enough space in front of the product for the paper
to be fully ejected.
C
Slide the edge guide to the left.
D
Load paper with the printable side up, against the
right side of the rear paper feed.
Note:
❏ Fan and align the edges of the paper before loading.
❏ The printable side is often whiter or brighter than the
other side.
❏ Always load paper into the rear paper feed short edge
first, even when you are printing landscape
-oriented pictures.
❏ You can use the following sizes of paper with binding
holes: A4, A5, A6, Legal, Letter. Load only 1 sheet of
paper at a time.
E
Slide the edge guide against the left edge of the
paper, but not too tightly.
Note:
For plain paper, do not load paper above the H arrow
mark inside the edge guide.
For Epson special media, make sure the number of sheets
is less than the limit specified for the media.
F
Flip the feeder guard back.
Note:
For instructions on loading media other than plain
paper, see the PDF User’s Guide.
Basic Guide
Paper and Media Handling
6

 Loading...