20
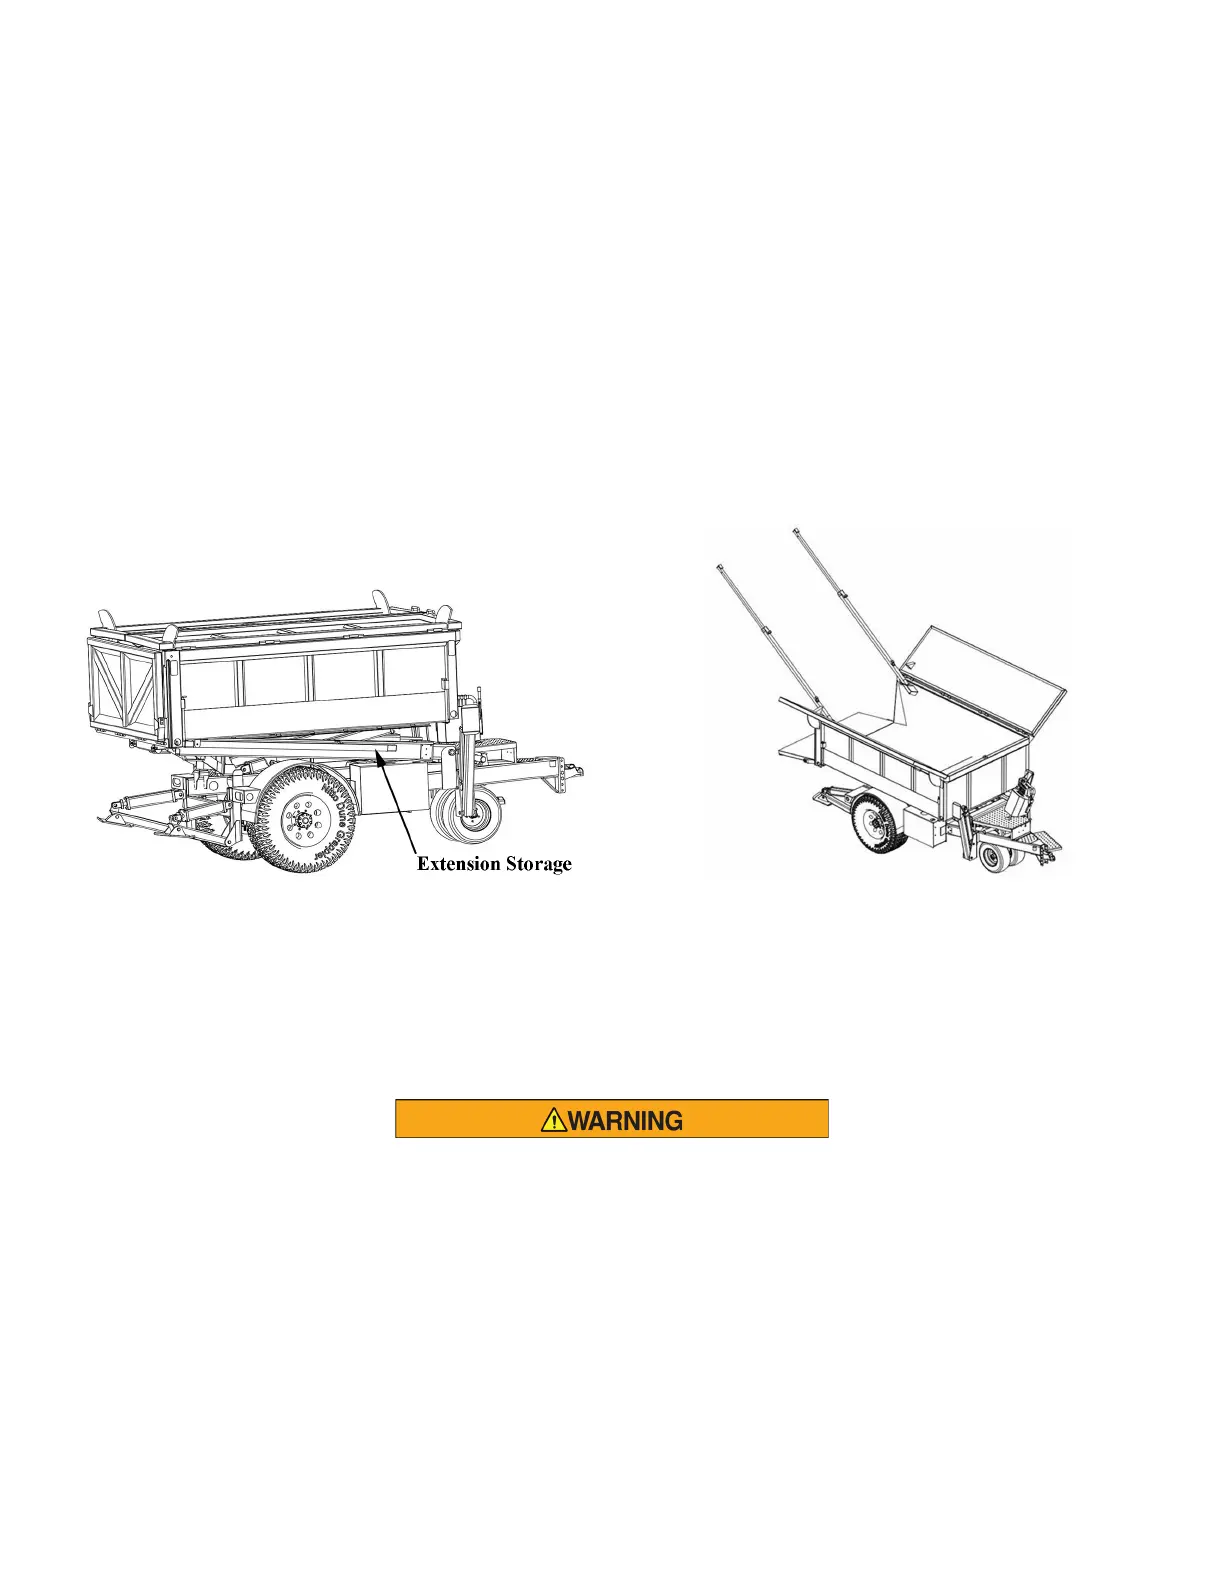
Optional rear extension rails extend the reach of the Equipter in situations that the standard reach is
insufficient. Two sheets of plyboard (not included) are placed on the rails to extend reach approximately 8
ft. The rails are stored on the side of the dump bed for transport.
Remove the two rails stored on the side of the mainframe (see illustration). Insert the 1-1/2 inch square
tubes into the longer 2 inch square rails and place the 5/16 inch pins or bolts through the holes in the
tubes and rails. Insert the other end of the 2 inch square rails into sockets on each side of the dump box
tailgate.
Place first 4 8 ft. sheet of 5/8 inch plyboard on the top of the rails and down against the open flaps.
Place plyboard holders over the rails and overlapping the plyboard. Place the 5/16 inch pins or bolts on
the bottom side of the rails.
Position the second sheet of plyboard by sliding it into the inserts on the 1-1/2 inch square tubes.
EXTENSION RAILS
Figure 28. Rear Extension Rails Stored Figure 29. Rear Extension Rails Installed
Lower the plyboard down into the plyboard holder overlapping the first sheet of plyboard. For added
safety place four 2 inch screws through the holes provided in the plyboard holder.
Position the second sheet of plyboard by sliding it into the inserts on the 1-1/2 inch square tubes.
Never remove or replace rails or spouting
guard from storage unless dump box is in the
transport position.
If rear extension rails are used never extend
the lift or roll back beyond half of their full
extension.
Extension rails are only to be used as a
debris slide. Never allow debris to build up
(weight limit 150 lbs.).