NOTE: If your meter does not work properly, check the fuses and batteries to
make sure that they are still good and that they are properly inserted.
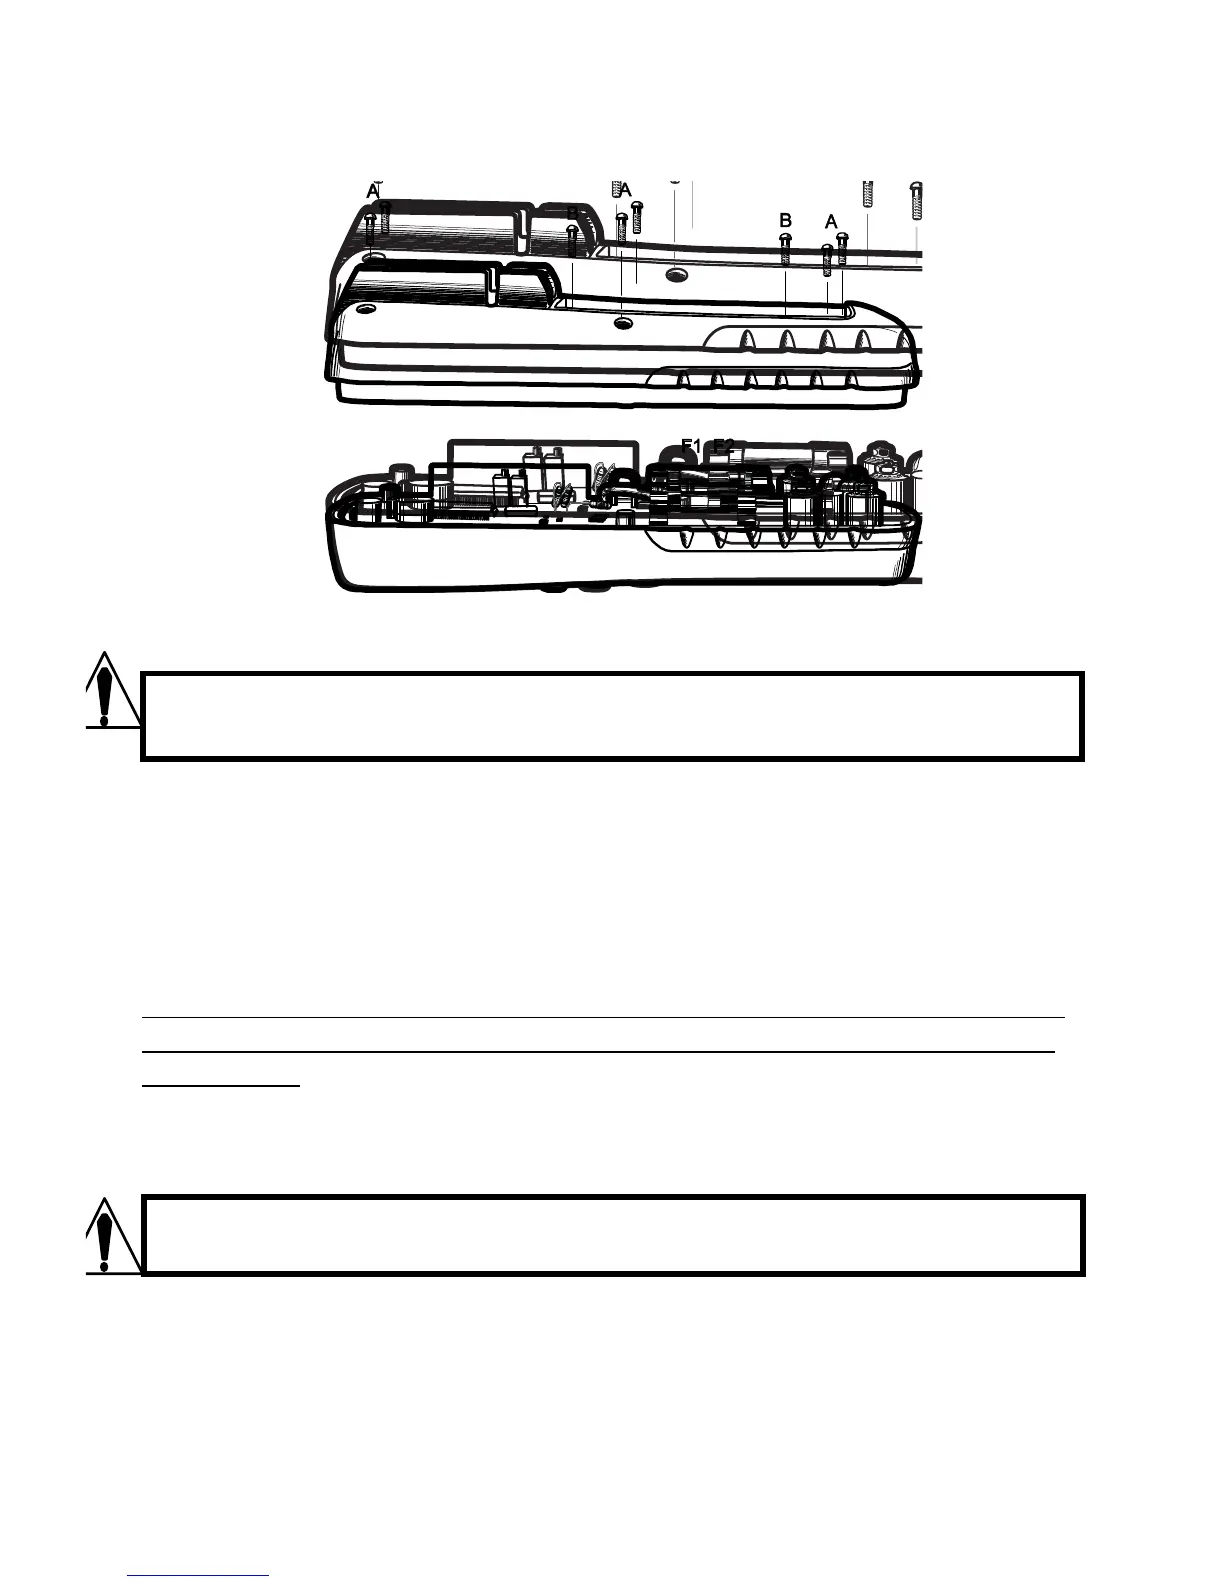
REPLACING THE FUSES
WARNING: To avoid electric shock, disconnect the test leads from
any source of voltage before removing the rear cover (fuse door).
1. Disconnect the test leads from the meter and any item under test.
2. Remove rear cover by loosening the 6 screws (A) with a Phillips
head screwdriver. Lift rear cover away from the front half. Battery
cover does not need to be removed.
3. Remove the old fuse from its holder by gently pulling it out.
4. Install the new fuse into the holder.
Always use a fuse of the proper size and value (0.5A/1000V Ceramic
fast blow for the 400mA range, 10A/1000V Ceramic fast blow for the
10A range).
5. Put the fuse door back in place. Insert the screw and tighten it
securely.
WARNING: To avoid electric shock, do not operate your meter until
the fuse door is in place and fastened securely.
NOTE: If your meter does not work properly, check the fuses and batteries to
make sure that they are still good and that they are properly inserted.
SPECIFICATIONS