-- 7 --
bt16d12e
6OPERATION
General safety regulations for the handling of the equipment can be found on
page 3. Read through before you start using the equipment!
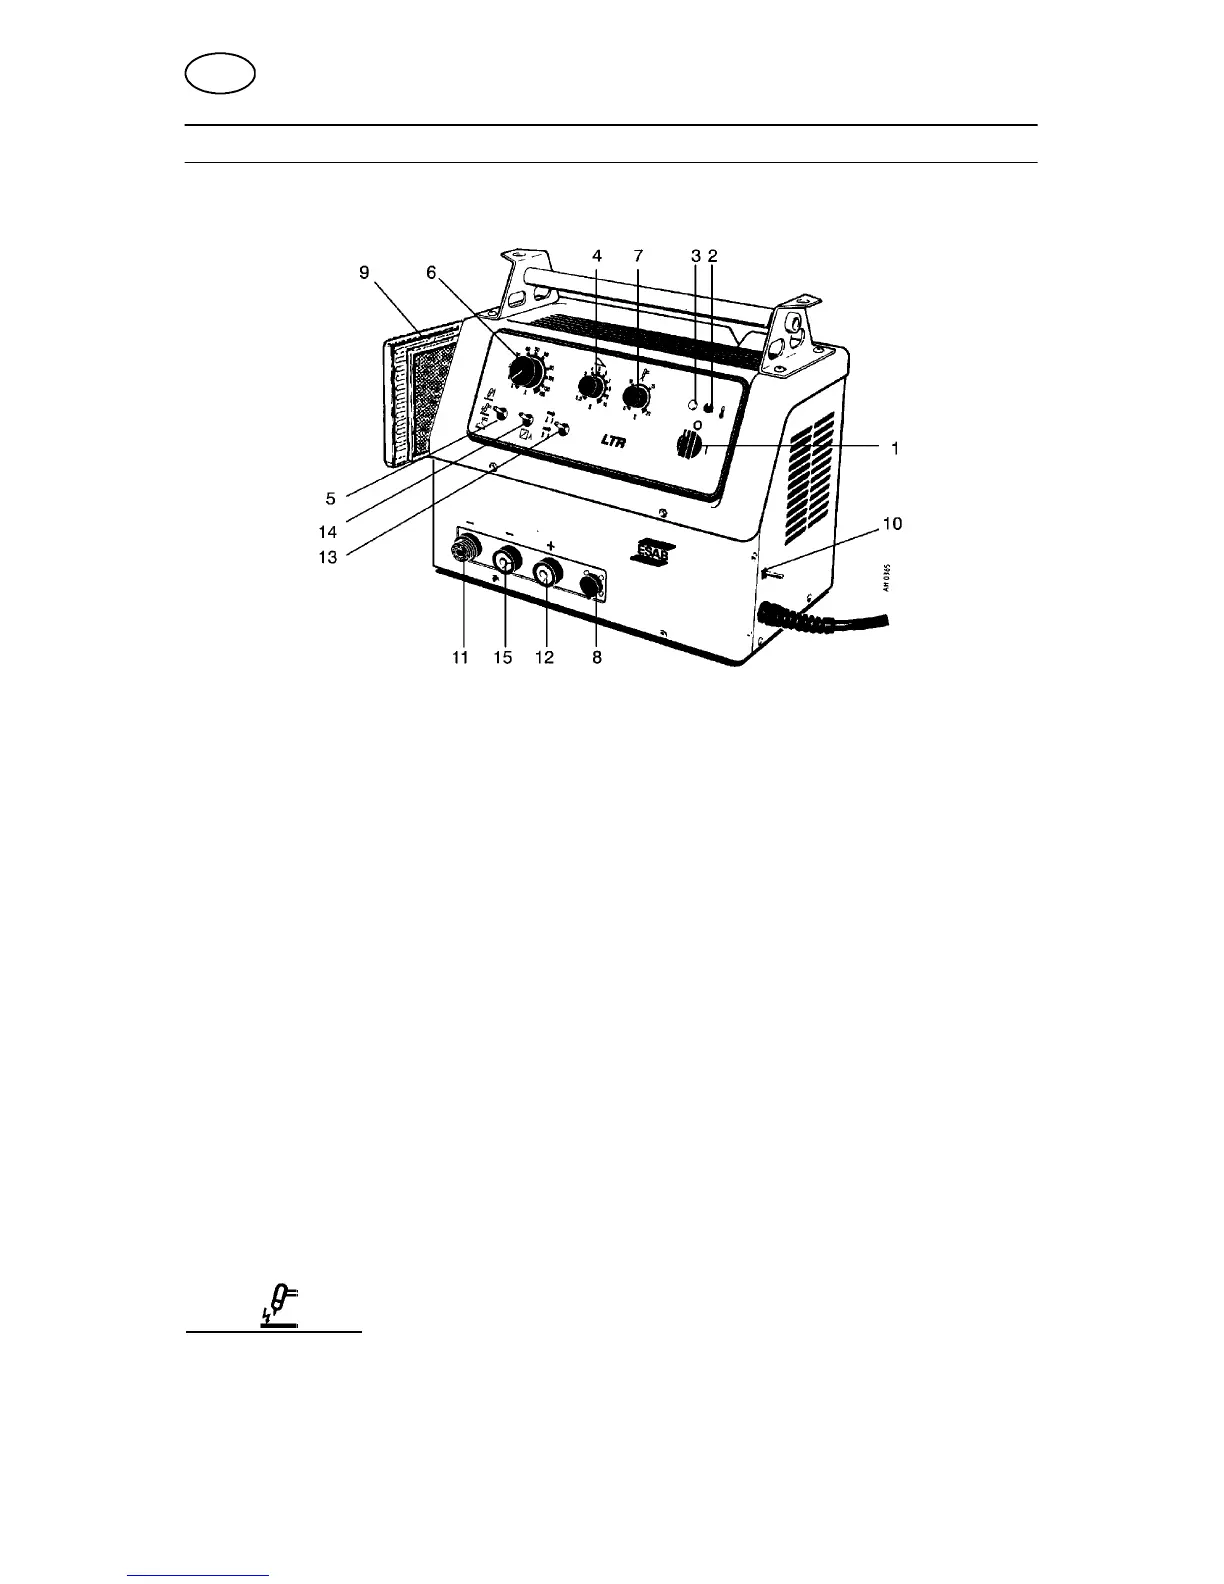
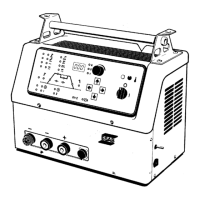
1 Mains power switch on/off 8 Remote control connection
2 Yellow indicating lamp 9 Dust filter
3 White indicating lamp 10 Gas nipple (connection of gas cylinder)
4 Slope--down time 11 Connection for TIG torch
5 Lift--Arc/HF--unit/MMA 12 Connection for return cable when TIG welding
6 Current setting 13 2/4--stroke
7 Gas post--flow 14 Remote control switch
The welding cable and return cable should be connected to 12 and 15 with MMA--welding.
S Using the remote control socket on the machine the current can be remotely
regulated in TIG and MMA modes.
S Selector switch is used to select remote control operation.
S PHA5 remote control unit allows use of pulsed current in TIG mode.
When the main power switch is switched on the white indicating lamp, on the front,
comes on.
To take your mind off the risk of overloading the machine it has been equipped with
an integrated thermostat that trips if the temperature becomes too high.
When this occurs the welding current is cut out and the yellow indicating lamp comes
on. When the temperature has dropped the thermostat automatically resets.
Mode = HF
When the torch trigger is pressed the gas starts flowing. The high frequency unit is
switched on and produces a spark between the electrode and the work piece, which
ionises the gas and ignites the arc. Once the arc is stable the HF unit is
automatically switched off.
GB