18
Technique
1. Set the output current control as required. Once the arc is struck the current can be lowered as required.
2. Switch on the unit
3. Switch on the gas flow to ‘purge’ the gas lines, adjust the gas flow for a 12-15 cu.ft/hr (6-7.5 ltrs/per min.) indication
on the flow meter.
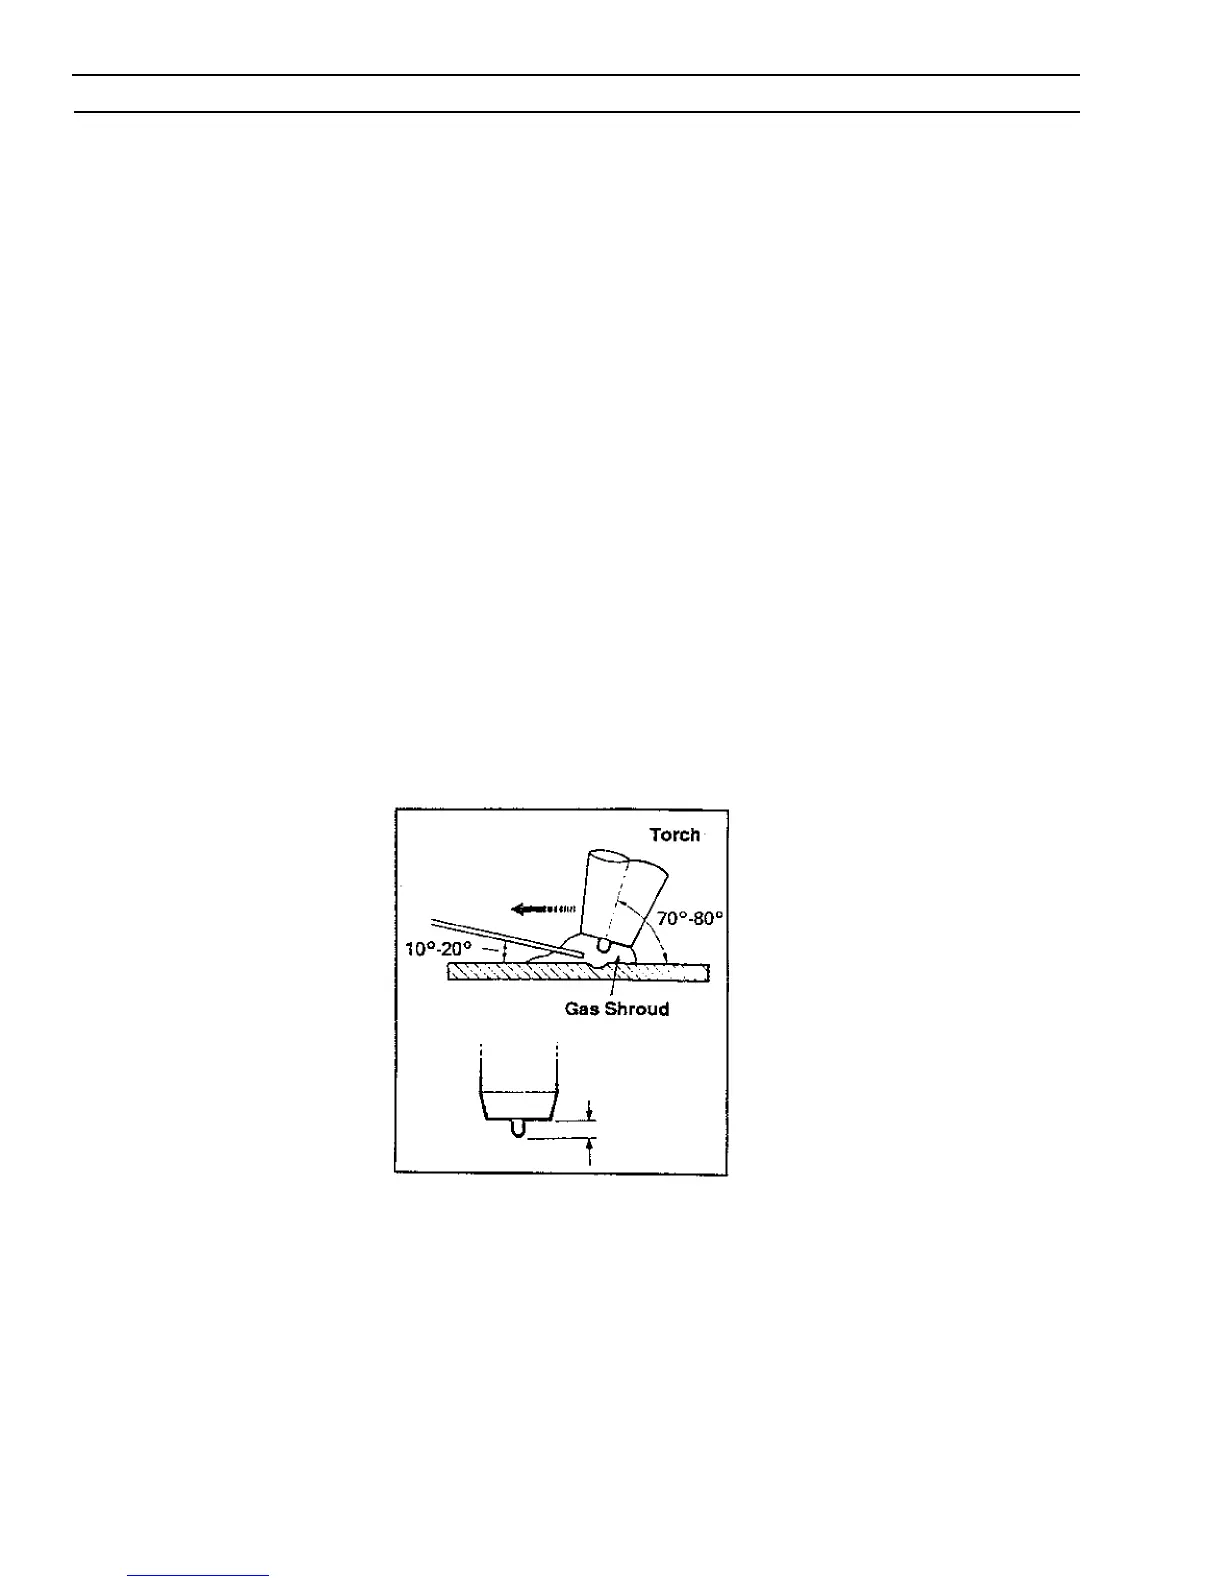
4. Adopt a good welding position and hold the torch and filler rod at the correct angles. Holding the rod and torch at
these angles is necessary to ensure satisfactory results.
5. Position the torch over the welding area, about 1” (25mm) above. Warn bystanders to shield their eyers and lower
your headscreen.
6. Strike the arc by scratching the tungsten electrode on the workpiece in the same manner as that described for manu-
al metal arc. Improved striking will be obtained by striking the arc on a carbon block and then transferring the arc to
the workpiece.
7. Wait for a pool to form and, when the edges of the molten material flow together, move the torch from right to left
(right handed welder) adding filler wire as necessary. (Keep the filler rod tip inside the gas shroud).
Figure 3.4 -
Torch and filler rod angles and Electrode stick-out
SECTION 3 OPERATION
1/16” - 1/4”
(4 - 7mm)