EasyManua.ls Logo

ESAB MIGMASTER 250 - User Manual

ESAB MIGMASTER 250
64 pages
Print Icon
To Next Page IconTo Next Page
Loading...
Instruction Manual
F15-087-P 03/2008
Welding Package
MigMaster 250

Other manuals for ESAB MIGMASTER 250

Questions and Answers

  • S
    Steven JordanAug 19, 2025
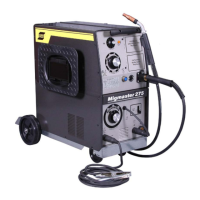
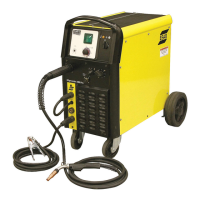
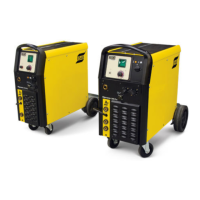
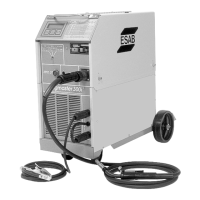
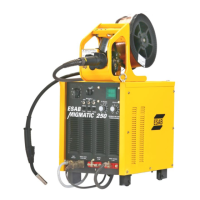
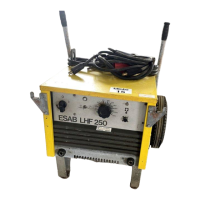
    Why does my ESAB Welding System produce a stringy irregular bead with poor penetration?
    • A
      Amy TylerSep 12, 2025
      If you're experiencing a stringy or irregular bead with poor penetration while using your ESAB Welding System, here are a few things to check: * Ensure all welding cable connections are secure, as a loose connection can cause this issue. * The problem might be that the controls are not set properly for the metal gauge thickness, so try resetting the controls properly. * Double-check that you're using the correct polarity. * If the torch is moved too fast, slow down the torch movement along the seams. * Also, a malfunctioning capacitor bank could be the cause; inspect the capacitors for low leakage resistance.
  • V
    Vanessa RoyAug 21, 2025
    How to troubleshoot motor not running on ESAB Welding System?
    • E
      Emily SmithAug 21, 2025
      If the motor of your ESAB Welding System isn't running, here's what you can check: * Start by checking the fuse. If it's blown, make sure the motor isn't binding before you replace the fuse. * Check the continuity across the speed potentiometer (POT) and wiper contact. The voltage from the center tap to the MIN end should vary from 0 to 5.4 VDC as you rotate the potentiometer clockwise. * Inspect the wiring for continuity. With the power ON, verify that there's 30 volts d.c. across input terminals 8 and 9 on the feeder printed circuit board connector (PL1). * Press the torch trigger and check the voltage across the motor (Pins 4 to 7) of the speed control board; it should vary from 1 to 24 VDC as you rotate the speed control potentiometer clockwise.
  • M
    Michael MeyerAug 23, 2025
    What to do if wire does not feed and motor is not running in ESAB MIGMASTER 250?
    • D
      Dawn DuncanAug 23, 2025
      If the wire isn't feeding and the motor isn't running (drive roll isn't turning) on your ESAB Welding System, consider these possible causes: * **Motor:** With the wire speed dial set to 10, press the trigger. If voltage appears across the motor leads but the motor still doesn't run, inspect the motor gears and commutator areas. * **Power switch S3 and fuses:** With S3 ON, check if the voltage across terminals 1 and 3 is 24 VAC. If it is, the switch and fuses are likely good. * **Speed Potentiometer (POT):** Verify that there's 1K ohms across the POT outside terminals. * **Malfunctioning speed control board:** Check the board voltages as per Para 5.3.1 b. and c.
  • S
    Samantha FinleyAug 26, 2025
    What to do if wire does not feed but motor is running in ESAB MIGMASTER 250?
    • K
      Karen SimmonsAug 26, 2025
      If the wire isn't feeding but the motor is running (drive roll turns) on your ESAB Welding System: * Straighten the wire, or feed the wire until it is clear and then cut it off. * Address any freezing, or remove the contact tip, feed the wire until it is clear, cut the end free, and replace the tip. * Consider replacing the liner.
  • L
    larrymooreAug 27, 2025
    What to do if there is no weld or control power in my ESAB MIGMASTER 250?
    • N
      Nancy ThomasAug 27, 2025
      If your ESAB Welding System isn't providing any weld or control power, start by checking for voltage at the primary input. If voltage is present, inspect the primary input cable and power switch (S3) for faulty connections; repair or replace as necessary. Also, check the line fuse and replace it if blown. If the fuse blows again, it's recommended to contact an ESAB representative.
  • J
    James ShortAug 30, 2025
    How to troubleshoot if the motor does not run on my ESAB MIGMASTER 250?
    • D
      drichardsonAug 30, 2025
      If the motor in your ESAB Welding System isn't running, begin by checking for a blown fuse and replace it if necessary. Before replacing the fuse, ensure the motor isn't binding. Then, check for continuity across the speed potentiometer (POT) and wiper contact, ensuring the voltage from the center tap to the MIN end varies from 0 to 5.4 VDC as you rotate the potentiometer clockwise. Also, check the wiring for continuity. With the power ON, check the feeder printed circuit board connector (PL1). Finally, press the torch trigger and check for voltage across the motor (Pins 4 to 7) of the speed control board; it should vary from 1 to 24 VDC as you rotate the speed control potentiometer clockwise.
  • E
    Elizabeth CarterSep 1, 2025
    Why is the welding current erratic on my ESAB MIGMASTER 250 Welding System?
    • D
      David HernandezSep 1, 2025
      If your ESAB Welding System has erratic welding current, first check the workpiece grounding connection to ensure it's properly connected. Then, inspect all welding connections for any looseness. Finally, verify that you're using the correct polarity.
  • E
    erica96Sep 3, 2025
    What to do if there is no welding power in my ESAB MIGMASTER 250?
    • K
      Kevin JohnsonSep 3, 2025
      If your ESAB Welding System isn't providing welding power, give the thermostat 15 minutes to cool down with the fan running. If there's still no power, contact an ESAB representative. Also, check the diodes in the main rectifier for shorts and replace them if needed. Finally, check all wiring for any opens.
  • N
    nfloresSep 5, 2025
    What to do if the wire does not feed but the motor is running in my ESAB MIGMASTER 250?
    • J
      Jennifer HarperSep 5, 2025
      If the wire in your ESAB Welding System isn't feeding but the motor is running (drive roll turns), check for kinks or binding on the wire reel; straighten the wire or feed it until clear, then cut it off. Also, check if the wire is freezing to the contact tip (burnback); free the freeze, or remove the contact tip, feed the wire until clear, cut the end free, and replace the tip. Finally, inspect the liner for clogs and replace it if necessary.
  • J
    John ParkerSep 7, 2025
    Why is the welding output voltage or current too low on my ESAB MIGMASTER 250 Welding System?
    • J
      Jeffrey CollinsSep 7, 2025
      If the welding output voltage and/or current is too low on your ESAB Welding System, ensure you are using the correct voltage. Also, verify that your welding cables are of the correct size and length.

Summary

Section 1 Safety Precautions

General Safety Precautions

Summarizes safety information from references, urging reading before installation/operation.

Fires and Explosions

Hazards from heat, arcs, slag, sparks, and prevention measures.

Electrical Shock Hazards

Risks of contact with live parts and ground, warnings for damp areas.

Electric and Magnetic Fields (EMF)

Dangers of EMF, effects on pacemakers, minimization procedures.

Fumes and Gases

Hazards from fumes, gases, and shielding gases; ventilation requirements.

Cylinder Handling

Safe handling of gas cylinders to prevent rupture and gas release.

Equipment Maintenance

Importance of qualified personnel and proper maintenance to prevent injury.

Additional Safety Information

References to external publications for more safety practices.

Meaning of Symbols

Explains the meaning of danger, warning, and caution symbols used in the manual.

Section 2 Introduction

General Machine Overview

Provides overview, handling, and description of the Migmaster 250.

Components and Accessories

Details on torch, controls, running gear, optional accessories, modules, and meters.

Wire Feed System and Nozzles

Information on wire feed accessories, spool spacers, and torch nozzles.

Section 3 Installation

Location and Site Preparation

Guidelines for selecting a proper installation site and preparing the area.

Electrical Input and Connections

Detailed instructions for electrical connections, voltage selection, and grounding.

Secondary Outputs and Torch Connections

Connecting secondary outputs for polarity and attaching the torch.

Wire Feeder System Setup

Installation and setup of the wire feeder, drive rolls, and spool.

Gas Supply and Cable Connections

Connecting shielding gas and welding cables.

Optional Module and Meter Installation

Steps for installing optional control modules and digital meters.

Section 4 Operation

Controls Overview

Identification and function of the main controls on the welding machine.

Power Switch and Voltage Control

Function of the power switch and explanation of voltage adjustment controls.

Welding Connections and Setup

Secondary connections, contactor control, wire feed speed, and spool gun setup.

Welding Modes and Operations

Details on spot, stitch, continuous welding, and anti-stick features.

Operating Procedures and Safety

General operating procedures and specific safety measures during operation.

Pre-Weld Setup and Welding Techniques

Pre-weld checks, setup procedures, and welding operation guidance.

MIG Process Selection Guide

Guide to selecting voltage and wire feed settings for different materials.

Section 5 Service

Maintenance and Inspection

General maintenance, inspection, and cleaning procedures.

Power Source and Component Servicing

Servicing details for rectifier, fan motor, transformer, and 24V circuits.

Wire Feeder Service and Troubleshooting

Maintenance for wire feeder, drive roll adjustment, and motor troubleshooting.

Troubleshooting Guide and Valve Replacement

Detailed troubleshooting table and solenoid valve replacement.

Section 6 Replacement Parts

General Information on Parts

Guidelines for ordering replacement parts, including serial number usage.

Ordering Replacement Parts

Recommendations for ordering genuine ESAB parts and obtaining customer service.

Addendum Section

History of Revisions

Details the changes and updates made in different editions of the manual.

Notes

Notes (Continued)

Revision History

Customer Services

ESAB MIGMASTER 250 Specifications

General IconGeneral
BrandESAB
ModelMIGMASTER 250
CategoryWelding System
LanguageEnglish

Related product manuals