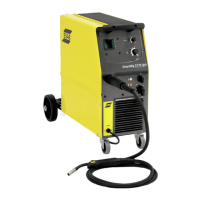
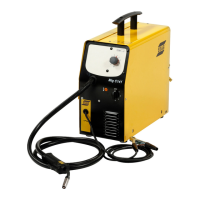
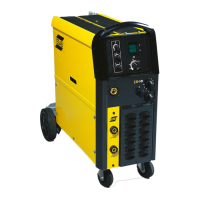
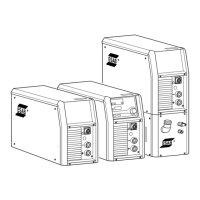
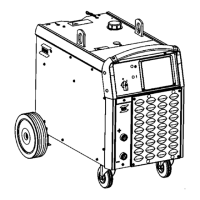
The ESAB Origo Mig C170 3ph, Mig C200 3ph, and Mig C250 3ph are step-controlled power sources designed for various welding applications. These compact units are suitable for welding with solid steel, stainless steel, or aluminum wire, as well as tubular wire with or without shielding gas. They offer the flexibility to weld with homogeneous wire/shielding gas or gasless tubular wire by switching the + and - connections on the wire feed unit's switching terminal.
Important Technical Specifications
Voltage:
- Mig C170 3ph: 400-415 V, 3~50/60Hz
- Mig C200 3ph: 400-415 V, 3~50/60Hz
- Mig C250 3ph: 230/400-415 V, 3~50/60Hz
Permissible Load at 40°C / 104°F:
- 100% duty cycle:
- Mig C170 3ph: 100 A
- Mig C200 3ph: 120 A
- Mig C250 3ph: 150 A
- 60% duty cycle:
- Mig C170 3ph: 130 A
- Mig C200 3ph: 150 A
- Mig C250 3ph: 190 A
- 35% duty cycle:
- Mig C170 3ph: 170 A
- Mig C200 3ph: 200 A
- Mig C250 3ph: 250 A
Setting Range (DC):
- Mig C170 3ph: 30-170 A
- Mig C200 3ph: 30-200 A
- Mig C250 3ph: 40-280 A
Open Circuit Voltage:
- Mig C170 3ph: 18.0-34.8 V
- Mig C200 3ph: 16.0-31.8 V
- Mig C250 3ph: 15.0-37.0 V
Open Circuit Power:
- Mig C170 3ph: 310 W
- Mig C200 3ph: 210 W
- Mig C250 3ph: 340 W
Power Factor at Max Load:
- Mig C170 3ph: 0.97
- Mig C200 3ph: 0.97
- Mig C250 3ph: 0.94
Control Voltage: 42 V, 50/60 Hz for all models.
Wire Feed Speed: 1.0-17 m/min for all models.
Burnback Time: 0.02-0.25 s for all models.
Spot Welding Time: 0.2-2.5 s for all models.
Welding Torch Connection: EURO for all models.
Wire Dimension Range:
- Fe, SS:
- Mig C170 3ph: 0.6-0.8 mm
- Mig C200 3ph: 0.6-1.0 mm
- Mig C250 3ph: 0.6-1.2 mm
- Al:
- Mig C170 3ph: 1.0 mm
- Mig C200 3ph: 1.0 mm
- Mig C250 3ph: 1.0-1.2 mm
- FCW:
- Mig C170 3ph: 0.8 mm
- Mig C200 3ph: 0.8-1.0 mm
- Mig C250 3ph: 0.8-1.2 mm
- CuSi:
- Mig C170 3ph: 0.8-1.0 mm
- Mig C200 3ph: 0.8-1.0 mm
- Mig C250 3ph: 0.8-1.0 mm
Max Diameter/Weight of Wire Bobbin: 300 mm/15 kg for all models.
Dimensions (LxWxH): 860x420x730 mm for all models.
Weight:
- Mig C170 3ph: 67.5 kg
- Mig C200 3ph: 72.5 kg
- Mig C250 3ph: 82 kg
Operating Temperature: -10 to +40 °C for all models.
Transportation Temperature: -20 to +55 °C for all models.
Enclosure Class: IP 21 for all models, indicating protection against solid objects and water, suitable for indoor use.
Application Classification: S for all models, indicating design for use in areas with increased electrical hazard.
Usage Features
Installation:
- The unit must be installed by a professional.
- Ensure cooling air inlets and outlets are not obstructed.
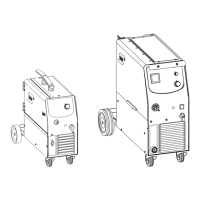
- Wheels are detached for packing and shipment and must be attached before use.
- Connect to the electricity mains with a network impedance of 0.268 (C250 3ph) ohm or lower to avoid flicker in illuminators.
- This product is intended for industrial use; domestic use may cause radio interference.
- Verify correct mains supply voltage and fuse size, and ensure a protective earth connection is made.
Operation:
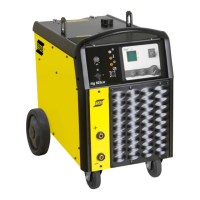
- Controls:
- Mains supply switch.
- Power ON/OFF indicator lamp.
- Orange overheating indicator lamp.
- Welding voltage switch.
- EURO-connector for welding torch.
- Connections for return cable (-) with high and low inductance options.
- Knob for spot welding (ON/OFF and time setting).
- Knob for wire speed setting.
- Optional digital instrument (V/A).
- Return cable with return clamp.
- Knob for burn-back time setting (on control board).
- Welding without gas: The unit supports welding with gasless tubular wire by switching the + and - connections on the wire feed unit.
- Wire feed pressure: Adjust the pressure rollers to ensure smooth wire movement without excessive pressure. Test by feeding wire against an insulated object: rollers should slip at 5 mm distance, and wire should feed and bend at 50 mm distance.
- Replacing and inserting wire:
- Open the side panel.
- Disconnect the pressure sensor by folding it backwards to slide up the pressure rollers.
- Straighten 10-20 cm of new wire and file away burrs.
- Insert wire into the feed roller track, outlet nozzle, and wire guide.
- Secure the pressure sensor.
- Close the side panel.
- Overheating protection: An orange indicator lamp illuminates if the internal temperature becomes too high, interrupting welding. The unit automatically resets once the temperature falls.
Maintenance Features
General:
- Regular maintenance is crucial for safe and reliable operation.
- All repair and electrical work must be performed by an authorized ESAB service technician using original ESAB spare and wear parts.
- Any warranty undertakings cease if the customer attempts repairs during the warranty period.
Wire Feed Unit:
- Regularly check for dirt and clean as needed.
- Periodically clean and replace worn parts of the wire feed mechanism to ensure trouble-free wire feed.
- Avoid setting pre-tensioning too high, as this can cause abnormal wear on the pressure roller, feed roller, and wire guide.
Brake Hub:
- The brake hub is factory-adjusted. If readjustment is needed, ensure the wire is slightly slack when wire feed stops.
- Adjusting braking torque:
- Turn the red handle to the locked position.
- Insert a screwdriver into the springs in the hub.
- Turn springs clockwise to reduce braking torque, or counter-clockwise to increase it.
- Ensure both springs are turned by the same amount.
Welding Torch:
- Regularly clean and replace wear parts of the welding torch for trouble-free wire feed.
- Blow the wire guide clean regularly and clean the contact tip.
Troubleshooting:
- No arc: Check mains switch, welding current/return cable connections, and current setting.
- Welding current interrupted: Check for thermal overload (orange lamp), main power supply fuses, and clogged air inlets/outlets. Ensure the unit is not overloaded.
- Poor welding performance: Check welding current/return cable connections, current setting, correct welding wires, main power supply fuses, and wire feed unit (proper rolls and pressure setting).
Spare Parts:
- Spare and wear parts can be ordered through an ESAB dealer.
- When ordering, provide product type, serial number, designation, and spare part number.
Accessories:
- Digital meter (0349 302 598)
- Transformer kit for CO2 heater (0349 302 250)
- Polarity change KIT (0349 309 310)
- Various wire feed rollers, inlet nozzles, insert tubes, and outlet nozzles are available as wear parts, specified by wire dimension and material (Fe, SS, Al, FCW, CuSi).
- For welding with aluminum wires, specific rollers, nozzles, and liners are required. A 3m welding torch with appropriate wear parts is recommended.