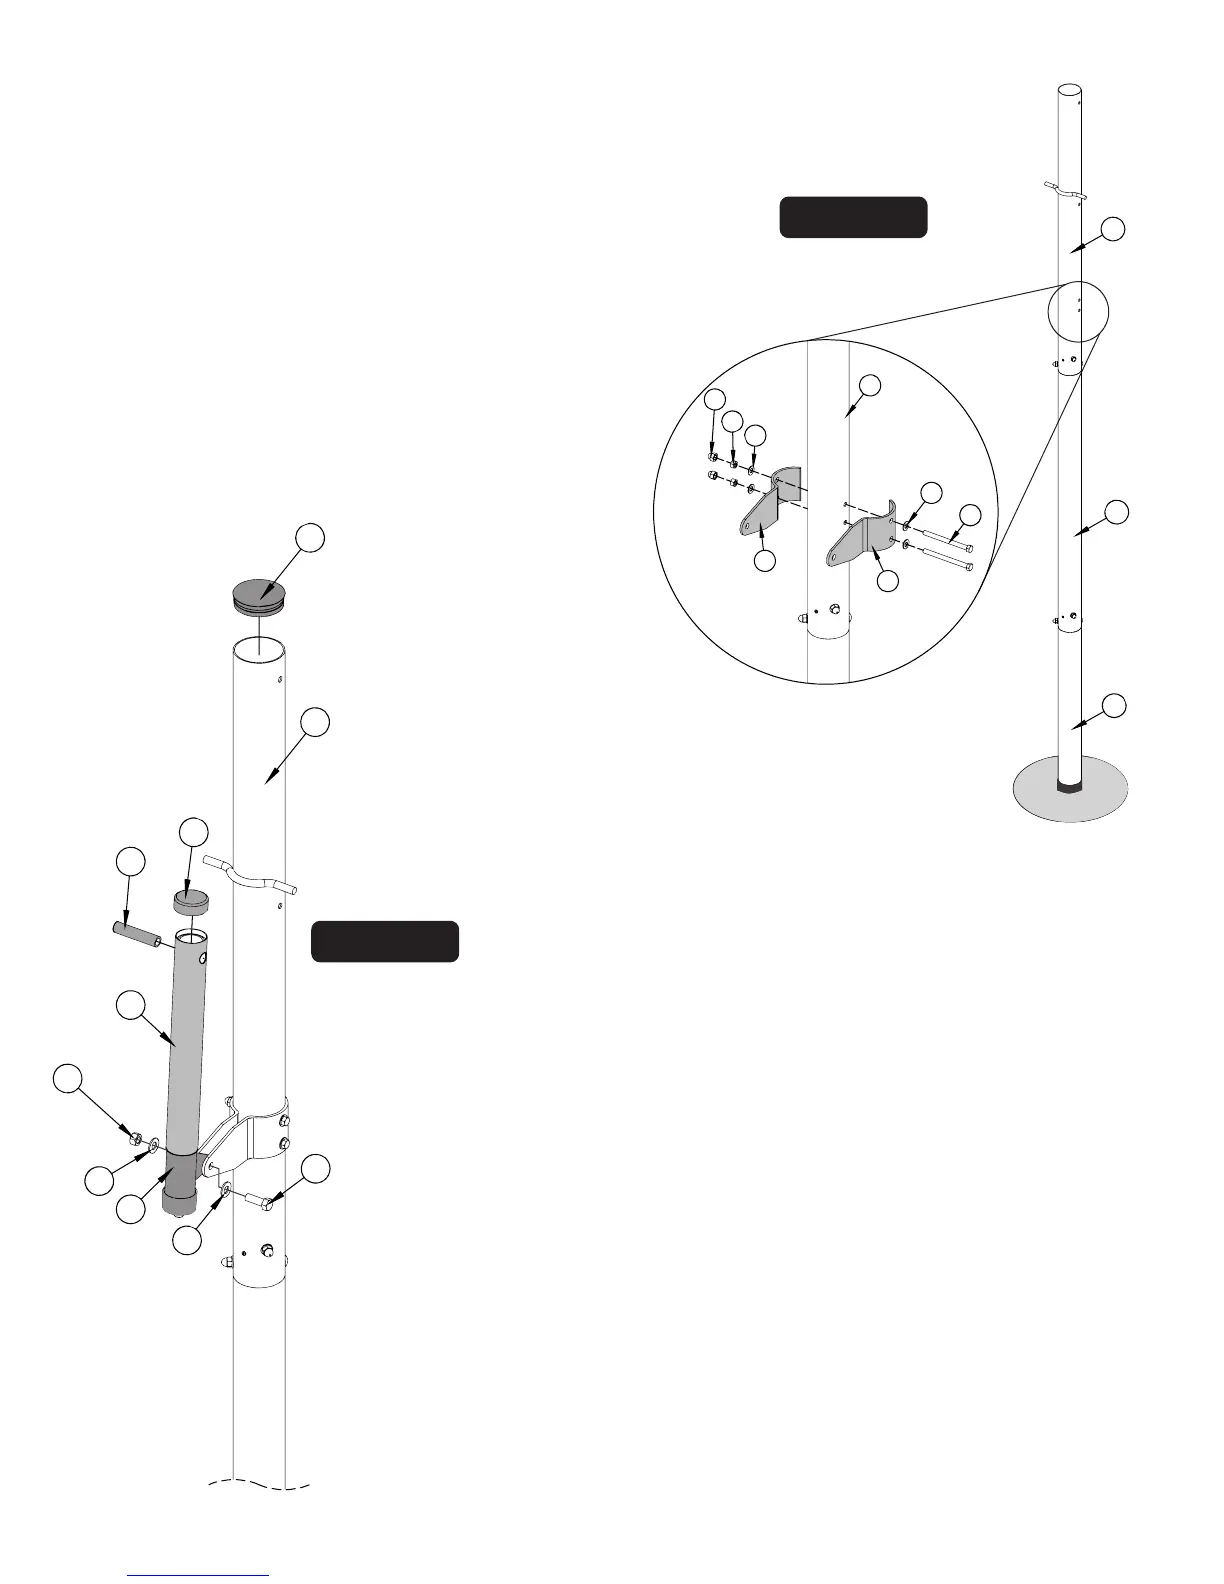
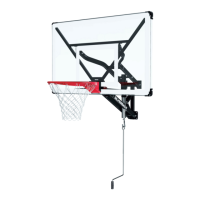
13. Attach post Ears (#30) to holes near the bottom of top
two lock nuts (#4) .
See Figure 6 & Detail 2.
and two plastic nut caps (#10)
IMPORTANT! BE SURE CONCRETE HAS BEEN
ALLOWED TO CURE FOR AT LEAST 2 DAYS.
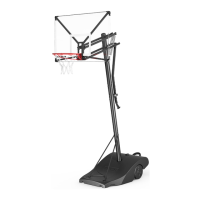
Figure 6
ASSEMBLY INSTRUCTIONS (Day 3)
Figure 7
Detail 2
8
14. Slide actuator sleeve (#15) over actuator (#16) and place
actuator cap (#13) on top. slide pivot tube (#14) through hole
near top of both the Actuator & Actuator Sleeve until equal
amounts stick out through both sides of actuator. See Figure 7.
15.
16. place pole cap (#1) onto top of top pole (#3).
Slide tab on actuator (#16) between post Ears (#30) and
Secure using one bolt (#19), two washers (#20) and one
lock nut(#21). See Figure 7. Tighten bolts tight.
Note: Pole cap may be pre-installed by the factory.
Note: If necessary, use a rubber mallet to tap in
Pivot Tube (#14)
3
12
2
25
18
18
4
10
30
30
3
1
19
20
21
14
13
15
16
20
3
post (#3) using two hex bolts (#25) four washers (#18)