Introduction
5
Using MAX 4
1 Plug small end of SmartCord into modular
jack on MAX 4 and large end of SmartCord
into your vehicle’s 12V accessory port
2 MAX 4 should power on automatically. If not,
press the device’s PWR button.
Software Updates
MAX 4 can only be updated by connecting directly
to Detector Tools Pro available at www.escortradar.
com/pages/update-your-device. If an update is
available, MAX 4 will prompt you to install the
update. If you refuse to perform the update, or
if the prompt times out, MAX 4 will check again
when it connects to Bluetooth
®
.
NOTE: The Defender Database updates
require rst registering MAX 4 to activate
the free 90-day Defender subscription.
Past the 90-day free trial, annual Defender
subscriptions are available to purchase at www.
escortradar.com/defender.
Using SmartCord USB
• MuteButton:
- Press to mute the audio for a specic alert.
- Press three times to lock out a false alert.
- Press twice while receiving a locked-out
alert to unlock.
- When connected to the Drive Smarter
®
app
press and hold the mute button on unit or
cord to manually report to other user
a veried X or K-band alert, or police oce
observing trac.
• AlertLight:Blinks red when receiving an alert.
• PowerLight: Lights green when device is
powered on.
• USBChargingPort: Charge smartphones,
tablets and other USB-charged devices.
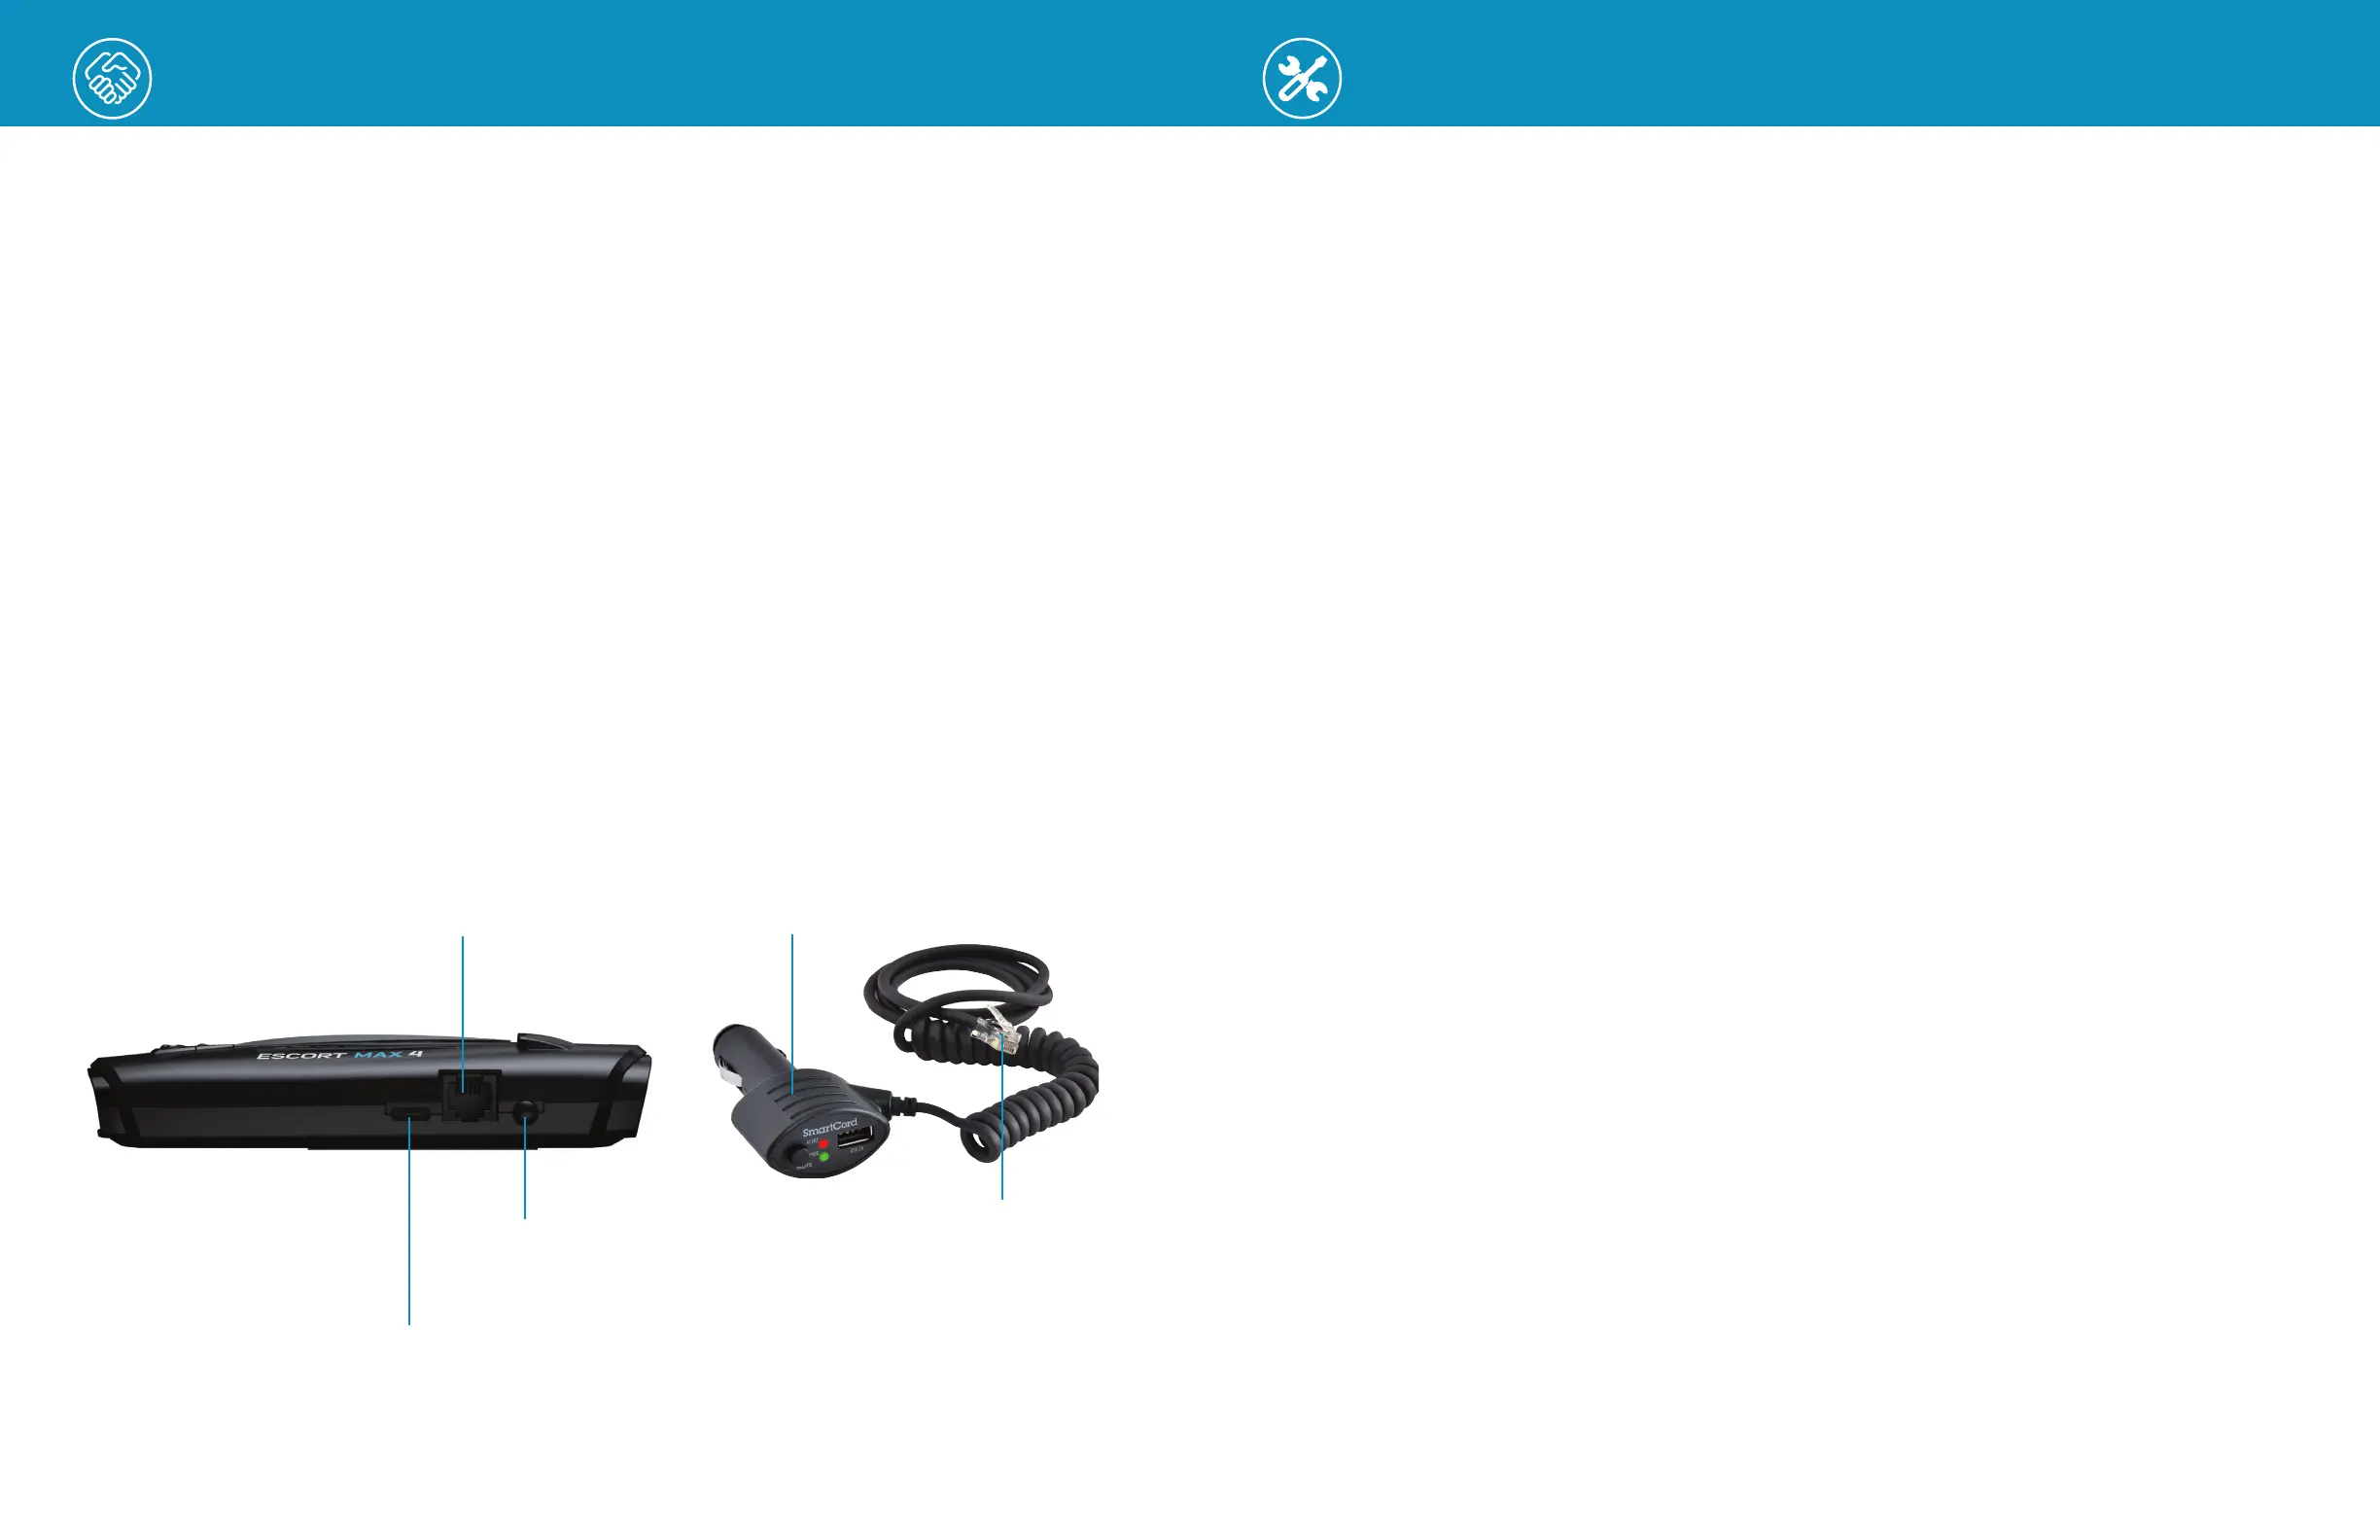
Modular Jack
Connects to SmartCord
powering your device
6
USB-C Jack
Connects to your computer via
USB-C cable
Earphone Jack
Connect to optional
3.5 mm stereo earphone
SmartCord USB Adapter
Connects to lighter/accessory
socket
Modular Connector
Plugs into detector jack
Installation
Your new detector comes with our patented EZ Mag Mount™. Simply attach the detector
onto the magnetic mounting bracket and ensure it’s connected securely. To remove the
detector from the mount, simply tilt the detector o of the magnetic mount.
Mounting Tips:
• Center of windshield between driver and passenger.
• Ensure clear view of road ahead and sky above.
• Avoid windshield wipers and heavily tinted areas.
To Mount the Detector in Your Vehicle:
1 Remove backing from EZ Mag Mount.
2
Firmly press the EZ Mag Mount onto the windshield and ip the locking clamp to secure.
3 Tilt the display end of the detector slightly upward and engage with the mounting
bracket. The EZ Mag Mount magnet holds the detector rmly in place.
4 To adjust view, loosen thumb wheel and adjust angle of mounting bracket. Tighten
thumb wheel to secure.
5 To remove the detector, simply lift the display end of the detector upward. The detector
will from the mount.
6 To remove the mount from windshield, release the locking clamp and pull the tab on top
of the EZ Mag Mount.
EZ Mag Mount Care Instructions:
To clean your EZ Mag Mount, simply rinse under warm water, gently wipe o any debris
and allow to air dry.
 Loading...