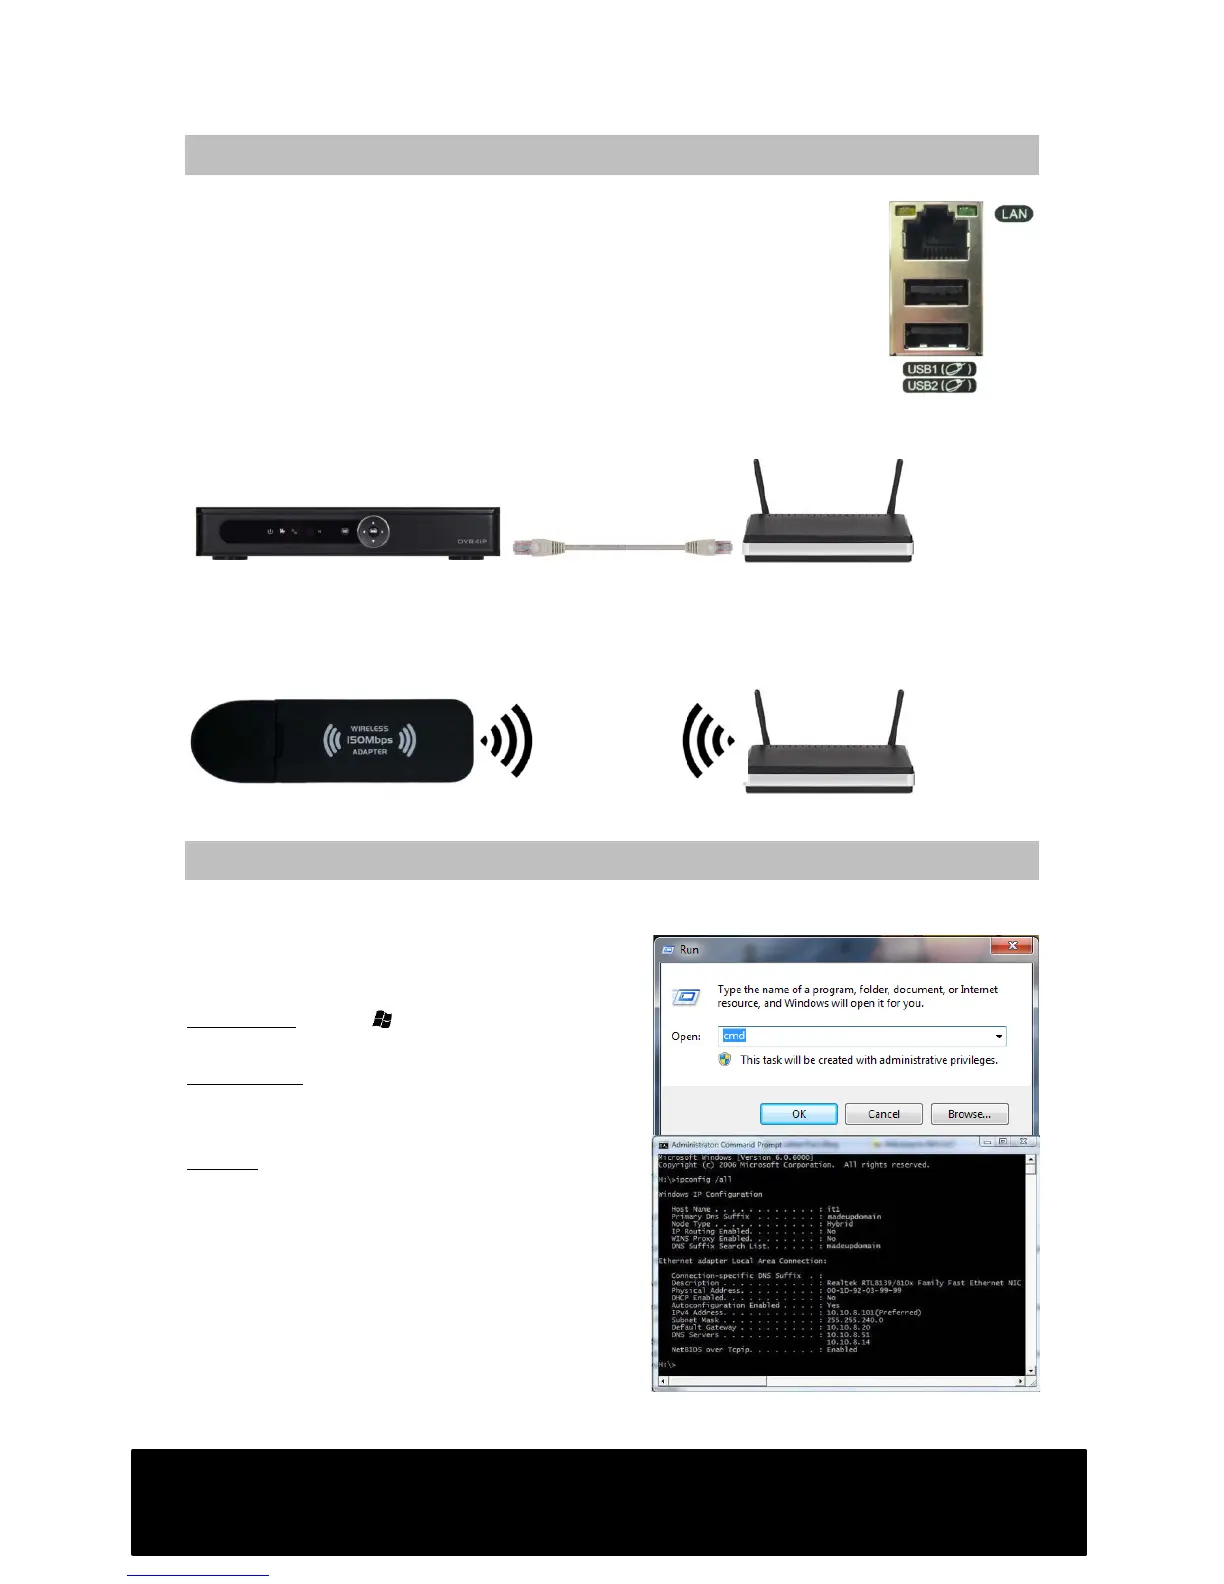
STEP 1 – Connect your DVR to your network
Wired connection or wireless?
It is recommended to use a wired connection whenever possible.
Wired connections are considerably faster and are not prone to
any interference or issues with distance. Only when a wired
connection is not possible should you use wireless adapter to
connect via Wi-Fi.
Wired connection
You will need to connect the LAN socket on your DVR to a socket on your router via
an Ethernet cable.
Wireless connection
Insert the wireless network adapter into one of the USB sockets on your DVR. Ensure
the DVR is powered down whilst this step is performed.
Proceed to step 2.
STEP 2 – Obtaining your network settings
Obtain your settings for your network either from a PC or mobile device via your Wi-Fi
by performing the following.
Retrieving settings from a Windows PC
Windows 8: Press :R on your keyboard,
type in “cmd” then press Enter.
Win 7/Vista: click on the Start Menu and
type “cmd” into the text input field then
press Enter.
Win XP:Click on the Start Menu, select
“Run”, type “cmd” and press Enter.
A new window (command prompt) will open.
Type “ipconfig /all” and press Return/Enter.
Your network info is now displayed.