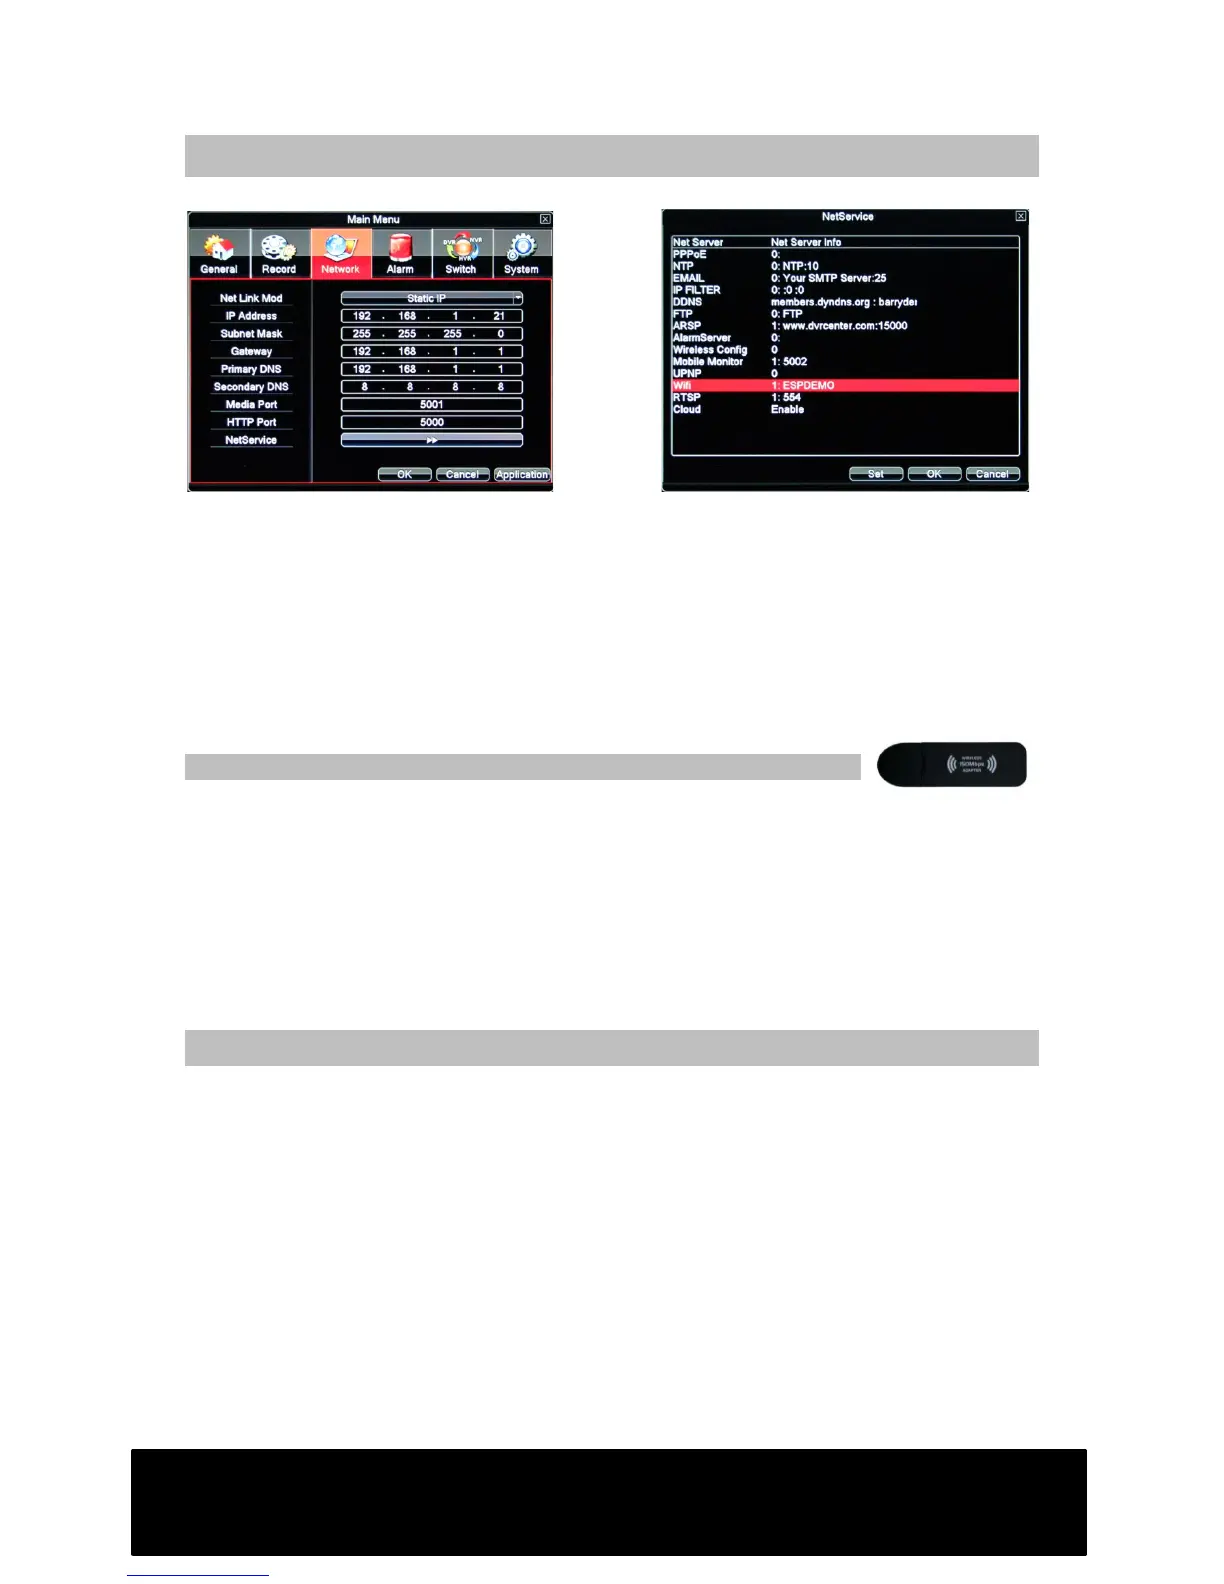
STEP 4 – Applying your network settings
1. Access your network settings page on your DVR.
2. Enter your chosen IP address, then add your subnest mask, default gateway
and DNS server addresses. (NB secondary DNS:8.8.8.8)
3. Set HTTP Port to 5000, set media port to 5001. Click “OK” and restart the DVR
when prompted.
4. Access network settings page, select “NetService”
5. Double-click on Mobile Monitor. Enable and set port to 5002. When complete,
click “OK” and restart the DVR when prompted.
Additional steps required for connection via Wi-Fi adapter
Ensure you connect your wireless adapter before turning the DVR on.
1. On your DVR, access MAIN MENU -: NETWORK -: NETSERVICE
2. Click on “Enable” followed by the “Search” button. Your Wi-Fi network should
appear in the list.
3. Click on your chosen Wi-Fi network, then enter your Wi-Fi network password.
4. Enter IP Address, Subnet Mask and Gateway as shown on the previous page.
Click “OK”.
How to access your DVR remotely
iPhone
1. Install the app MEyePro (V5) to your iPhone then launch the app.
2. Add a new device to the device list by pressing : as indicated by arrow (A)
3. Populate fields with DVR device details as follows:(B)
• Name – Your reference, can be anything
• Address – the IP address of your DVR
• Port – Mobile monitor port (see step 4)
• User ID/Name – Default:admin
• Password – your DVR login password – default: no password
4. Select save, press back, then select your device to show the cameras (C)