The time is set in 10minute sequences.
Attention: When baking in the time mode, do not use ingredients subject to spoilage like
milk, eggs, fruit, yoghurt, onions etc.!
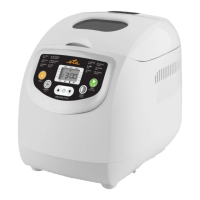
IV. FEATURES OF THE BREAD MACHINE
Audio signal function
The audio signal will sound:
- when any of the program buttons is pressed (1 x short or long beep),
- during the second kneading cycle in 1–KLASIK, 2–SPRINT, 5–WHOLE, 6–CAKE and
10–SANDWICH programs to signal that cereals, fruit, nuts or other
- ingredients may be added (12 beeps)
- when the program is ended (12 beeps)
- when activating the safety features (constant beep)
- during 1. hour of heating-up every 5 minutes (5 beeps) a and after finishing the heating-
up (1 beep).
Repeating the feature
In case of power failure it is necessary to turn on the device again. This is possible only if
the program was interrupted before the rst stage of baking. In such case it is necessary to
check the device regularly in order that the dough does not over-rise.
Safety features
If you wish to use the bread machine right after previous baking and if the temperature of
the inner space of the device is not too hot (over 40°C), after pressing the START/STOP
button the display will show HHH and a constant audio signal will sound (beep). The device
can not be turned on. Open the lid or take out the baking form and wait for the device to
cool off. The audio signal can be cancelled by pressing the START/STOP button.
V. PREPARATION FOR USE AND PROGRESS OF BAKING
Unpack the bread baker and accessories. Remove all adhesive foils, stickers or paper
from the appliance. Before rst use, wash the parts in contact with foods in hot water with
a detergent, rinse properly with fresh water and wipe or let it dry. Put all dried parts back to
the bread baker and let the lid open. Then, set the program 8-PEČENÍ (BAKING) and turn
it on for 10 minutes without ingredients inserted and then let the appliance cold. Potential
short and mild smoking is not a defect and a reason for complaint. Place the bread baker
on a at and dry surface (e.g. a table) at height min 85 cm, out of reach of children. Plug
the power cord A5 to an electric socket. Hold the pan E with both hands, slide it to the
appliance and push to lock it in the centre of the baking space B. We recommend greasing
the shafts and blades with suitable heat-resistant fat/margarine for easier removal of the
blades from the bread. Then, insert two kneading blades F on the shafts in the baking pan.
Slide the blades on the shafts with the at area down and either towards or apart each
other in the baking pan. Use the spoon and cup G, H to insert ingredients in order specied
in your recipe. Please always adhere to the basic rule - rst all liquid ingredients
followed by loose ingredients. Close the lid C. Using suitable buttons MENU (SELECT),
BARVA (COLOUR), VELIKOST (SIZE), ČAS (TIME), set the required program on the
control panel A. Then, press the START/STOP button. The appliance automatically mixes
and kneads the dough until proper consistence is reached. When the last kneading cycle
is completed, the bread maker heats to an optimum temperature to rise the dough. Then,
the appliance automatically sets temperature and time for bread baking. After baking, the