17
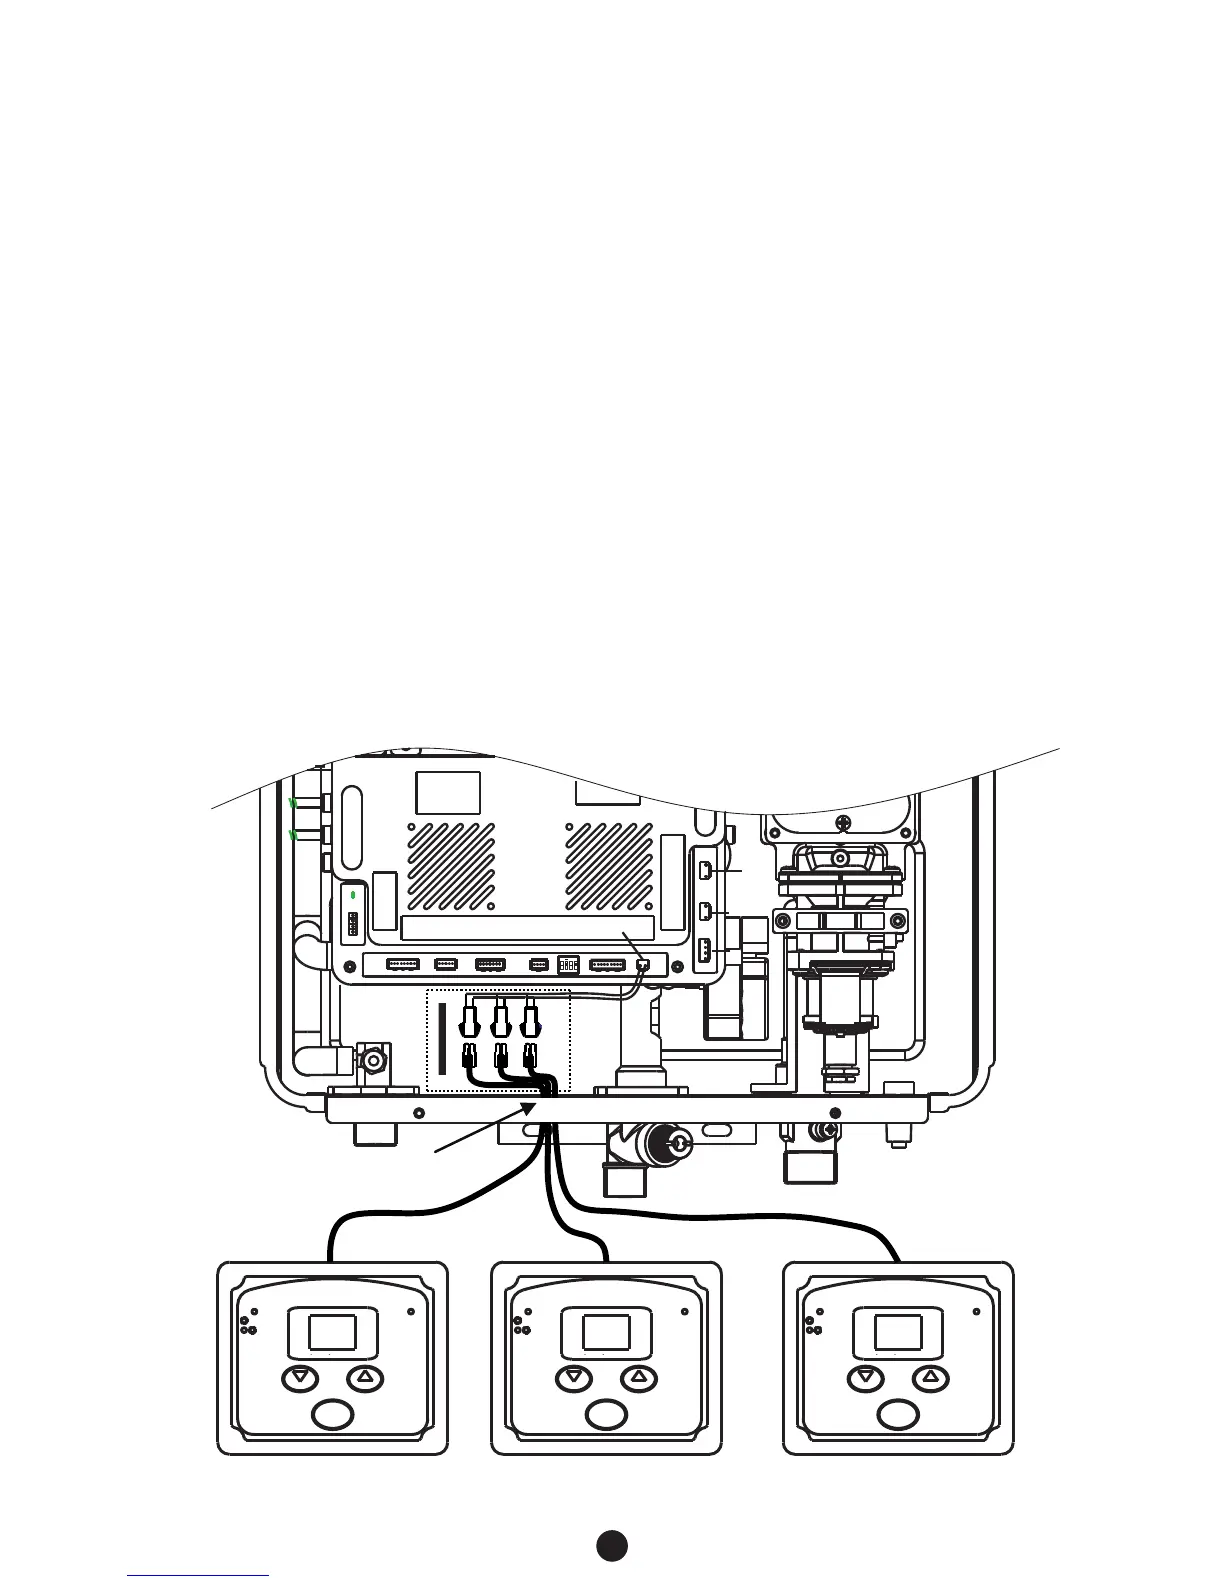
5.2 CONNECTION OF REMOTE CONTROLLER WIRING TO THE WATER HEATER
Remote controller terminal
°C
Power
Burning
Water temperature adjustment
ON/OFF
HEAT
COOL
Flashing Priority
°C
Power
Burning
Water temperature adjustment
ON/OFF
HEAT
COOL
Flashing Priority
°C
Power
Burning
Water temperature adjustment
ON/OFF
HEAT
COOL
Flashing Priority
1
2
3
4
ON SAB
Feed the remote wires though the
hole on the bottom of the case.
TYPICAL CABLE LAYOUT
1. Turn off the power supply to the water heater.
2. Remove the front cover from the water heater. There are 4 screws on the front cover.
3. Feed the remote wires through the hole on the bottom of the case.
4. Connect the first controller only and turn on the power supply to the water heater.
5. Turn off the first controller by pressing the on/off button (LED light will turn off).
6. Continue to connect any additional remote control wires to the remote terminals directly.
DO NOT jump or short-circuit wires otherwise the PCB may become damaged.
7. Return the front cover.
DO NOT turn on the remotes until instructed.
8. Activate the first remote by pressing & holding the ‘cool’ (down arrow) button for 5 secs until a
single beep sounds. Then press & hold the ‘heat’ (up arrow) button for 5 seconds until the LED
screen lights up.
9. Adjust the on screen value to set the ID (available ID’s include 00, 01, 02). Press the on/off
button to confirm
10. Repeat for all additional controllers.
11. Controllers can now be turned on and will operate as per the PRIORITY function (refer to p. 15)
0.0
. 0. 1. 0.
2
.