9.2.1. Carrying out teach-in for rst actuator (default setting on delivery)
To trigger the rst teach-in operation, the user must perform the following actions in the stipulated order:
1. Start teach-in operation
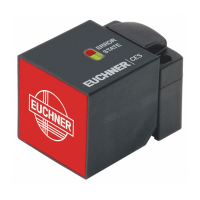
- Switch on operating voltage (STATE LED ashes at approx. 4Hz)
- Close door to be monitored (the actuator must be in the operating distance of the read head)
- Teach-in operation starts (STATE LED ashes at approx. 1Hz)
- Wait for acknowledgment of the teach-in operation (STATE LED goes out after approx. 60 seconds)
2. End teach-in operation
- Interrupt operating voltage for at least 10 seconds (code for the actuator taught-in is activated)
3. Check safety guard for effectiveness
9.2.2. Carrying out teach-in for a new actuator
A maximum of 8 teach-in operations can be undertaken. The number of teach-in operations already undertaken is signaled
after step 6 via the ashing sequence on the STATE LED (see 10. System status table on page 17, section State indication).
Faulty actuators can be replaced. Then a complete teach-in operation must be performed as per this section.
To trigger a further teach-in operation, the user must perform the following actions in the stipulated order:
1. Start teach-in operation
- Switch on operating voltage
- Close door to be monitored (the new actuator must be in the operating distance of the read head)
- Teach-in operation starts (STATE LED ashes at approx. 1Hz)
- Wait for acknowledgment of the teach-in operation (STATE LED goes out after approx. 60 seconds)
2. End teach-in operation
- Interrupt operating voltage for at least 10 seconds (code for the new actuator taught-in is activated)
The newly taught-in actuator is saved and the old actuator deactivated.
3. Check safety guard for effectiveness