8
Personal injury or property damage possible due to an
incompletely mounted bicycle rack.
• Driving with the bicycle rack not fully assembled may result in accidents.
• The moving parts of the bicycle rack do not represent a source of danger
when fully mounted.
• Mount the bicycle rack completely before starting your journey.
Personal injury or property damages caused by protruding parts.
• Parts protruding beyond the edge of the vehicle or rack may cause
personal injury or property damage during the journey.
• Only mount parts that do not protrude beyond the edge of the vehicle.
Personal injury or property damage possible due to a damaged
bicycle rack.
Damage to the rack, e.g. by bent parts, cracks or scratches, prevents the safe
operation of the rack.
• Do not mount the bicycle rack if it is damaged in any way.
• Follow the steps as described in the chapter on „Maintenance”.
Property damage due to opening tailgate.
• The tailgate could hit the bicycle rack and be damaged.
• Switch o the electric tailgate and operate it manually.
• Remove the bicycle rack before opening the tailgate.
Damages may be caused to the rack or bicycles if the exhaust outlet is close
by.
• Use an exhaust de ector if necessary.
Property damage caused by hot exhaust gases.
Personal injury or property damage due to loss of the bicycle rack
while driving.
A loose or faulty connection between the bicycle rack and trailer tow bar
can lead to the detachment of the bicycle rack.
• Replace a defective trailer tow bar.
• Clean the trailer tow bar of dirt, dust and grease.
The general operating permit must be carried in the
vehicle when the rack is mounted.
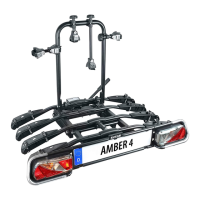
Do not travel with the bicycle rack empty. Store it in
the boot of your vehicle. This prevents increased fuel
consumption and protects the rack.
The driver is always responsible for ensuring that the
load and the load securing meet the regulations.
Personal injury or property damage due to overloading.
• Exceeding the maximum payload of the bicycle rack and the permitted
supporting load of the trailer tow bar or permitted overall weight may
lead to serious accidents.
• Always observe the speci cations regarding the maximum payload,
permitted supporting load and permitted overall weight of your vehicle.
Do not exceed these speci cations at any time.
6. OPERATING INSTRUCTIONS
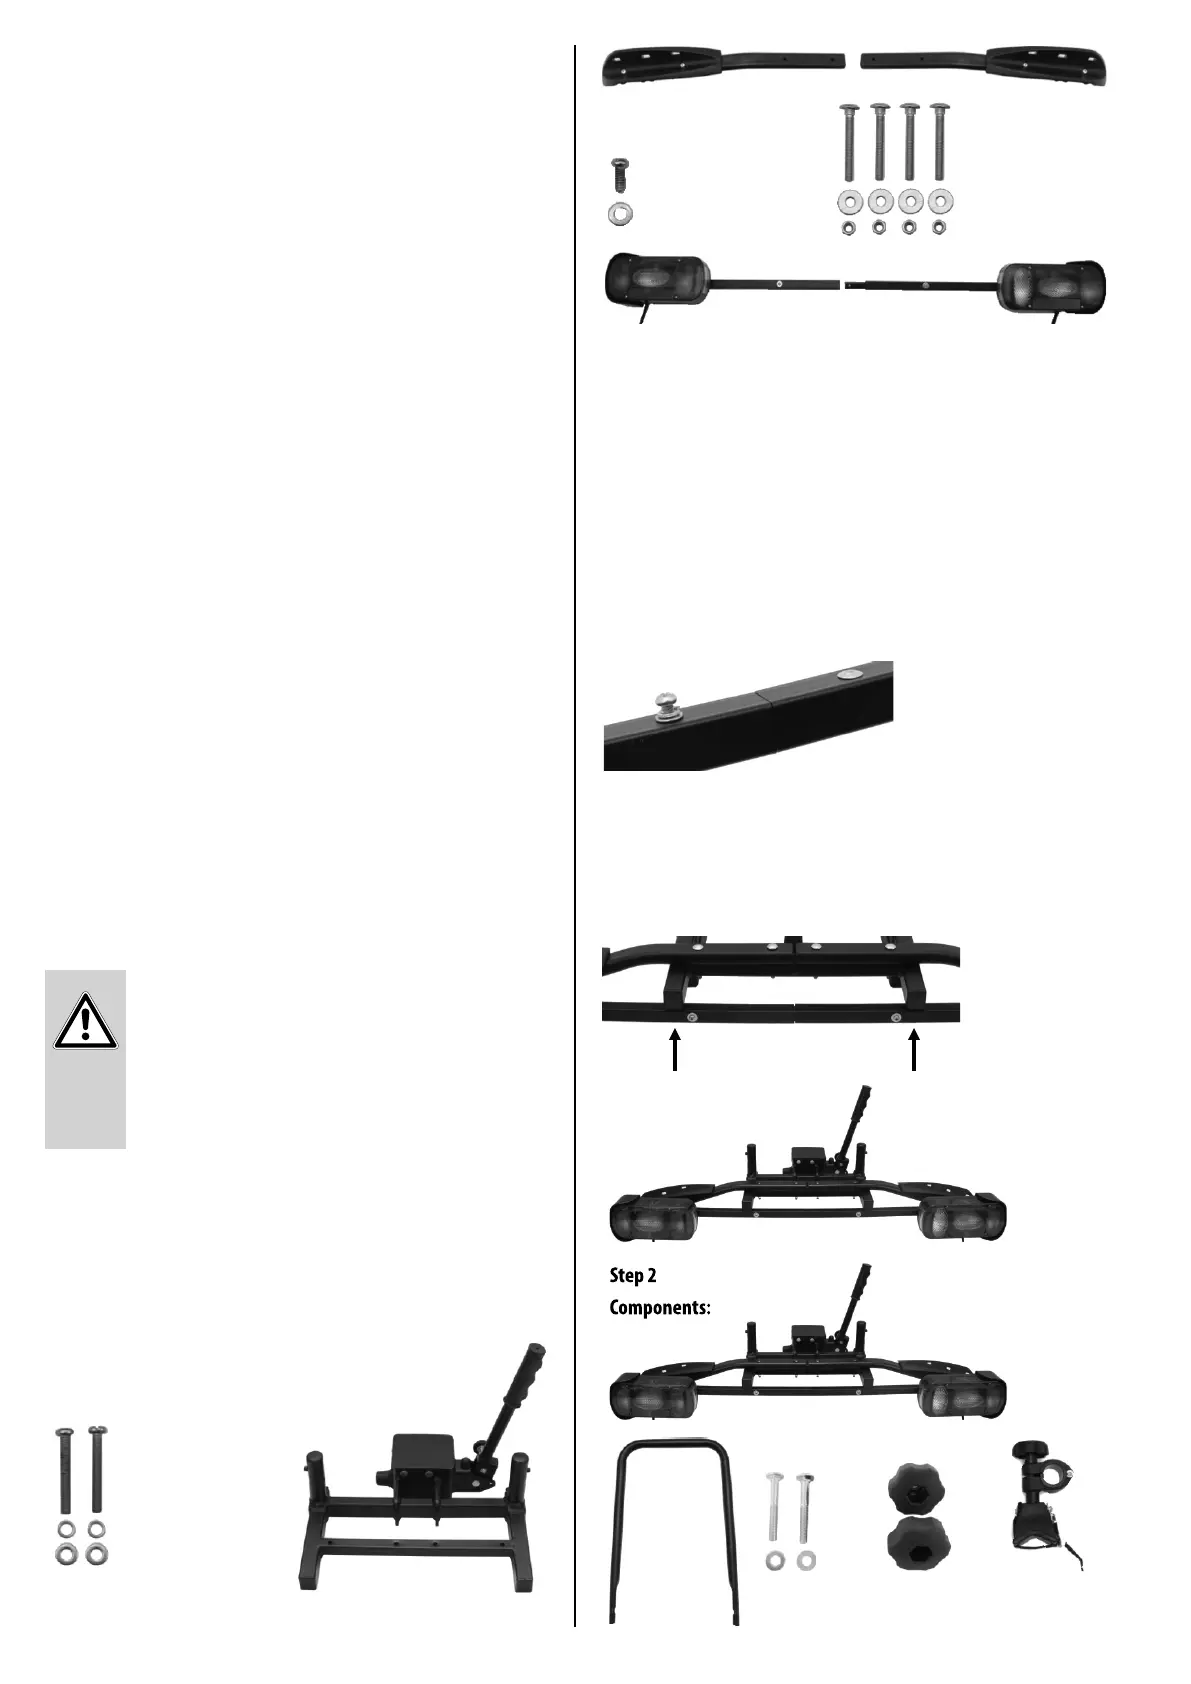
The bicycle rack must rst be assembled. Take all of the components out of
the packaging and set them out clearly. Every stage is described and clearly
shows which components are required for the assembly of the rack.
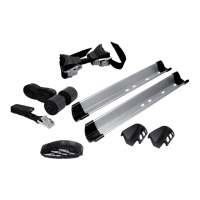
6.1.1 MOUNTING THE WHEEL RAILS
Place the wheel rail halves, with the plastic shells on the outside, parallel
on the base frame so that the drilled holes in the rail match the holes in
the base frame. Secure each wheel rail to the base frame with the two lock
screws M6 x 50, washers and self-tapping nuts M6.
6.1.2 MOUNTING THE LAMP MOUNT
Join the two halves of the lamp mount together. This is made easier by the
small guide element which is already mounted on one side. Push the rails
together and secure the connection with the cross-headed screw (M5x12)
and washer.
Insert the cross-headed screws M5 x 35 with spring washers and washers,
from below, through the vertical drilled holes of the lamp mount. Insert the
screws through the threaded holes on the underside at the end of the lamp
mount. Tighten the screws.
Make sure that the fog light is installed on the left side of the mount!
Cross-headed screw
M5 x 35
Cross-headed screw
M5 x 12
Lock screw M6 x 50
Base frame
Lamp mount set
Wheel rail halves
Step 1
Components:
6.1 MOUNTING THE BICYCLE RACK
Step 2
Components:
Result of Step 1
U-tube
Knob nut M8 Frame holderLock screw
M8 x 60
 Loading...