1. Avoid placing the robot and the base under direct sunlight.
2. Be sure to keep the charging area dry.
NOTES
NOTES
Charging
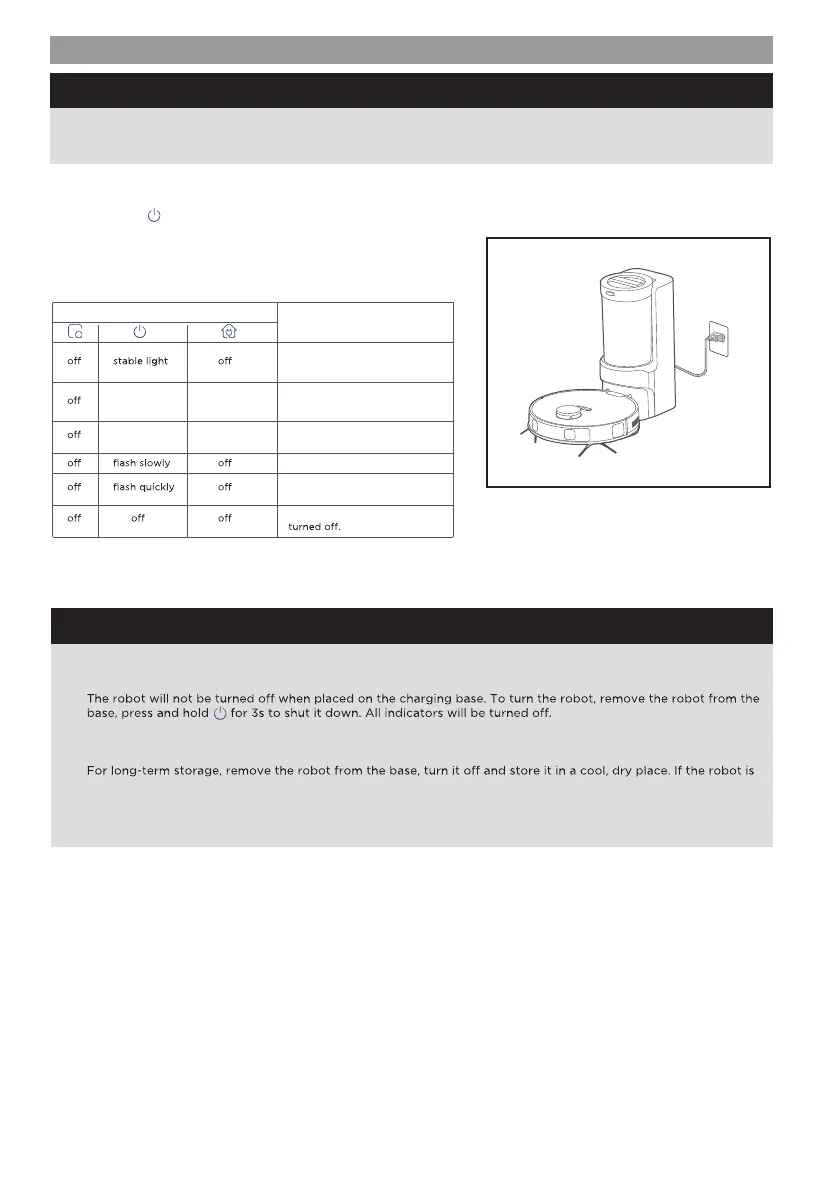
Press and hold " " for 3 seconds to power on the robot vacuum.
After the power indicator turns on, press the recharging button or
manually put the robot back into the self-emptying base for charging,
as shown. We recommend you charge the robot for at least 6 hours
before using it for the first time.
1) Robot is in standby mode, or
2) Cleaning in progress, or
3) Robot is fully charged.
stable light stable light
battery level ≥ 20%, robot has
finished its mission and is going
to recharge
Status
stable light flash quickly
battery level < 20%, robot is
going to recharge
Robot is charging
Error has occurred, see
"Troubleshooting".
Indicator Light
Robot is in sleep mode or
When the battery level is too low, the robot cannot be turned on. Please manually put the robot onto the
charging base.
To ensure the optimal performance of the lithium-ion battery, please keep the robot charged.
If you manually put the robot vacuum into the base, ensure that the charging contacts of both the robot and the
base are connected.
not used for more than 3 months, allow it to get charged for at least 12 hours before using. To preserve the
battery lifespan, we suggest you fully charge the battery at least once every six months.
1.
2.
3.
4.
5.