10
After Sales Support
(AU) 1300 886 649 (NZ) 0800 836 761 | info@tempo.org
Getting Started (Cont.)
Wall-mounting the heater
Your new flame effect heater can be mounted onto a wall, if you choose to, or
assembled onto the base supplied. If wall-mounting the heater, please use the
mounting instructions below and on the following pages as a guide, or consult
qualified personnel, if required.
IMPORTANT!
• Only mount this flame effect heater on a structurally sound, heat-
resistant wall area that is strong enough to hold the weight of the heater.
If in doubt, consult a builder. Do not mount this heater on the ceiling!
• The instructions below are for wall-mounting the flame effect heater onto
a masonry wall. Please obtain expert advice if you intend to wall-mount
the appliance onto any other type of wall.
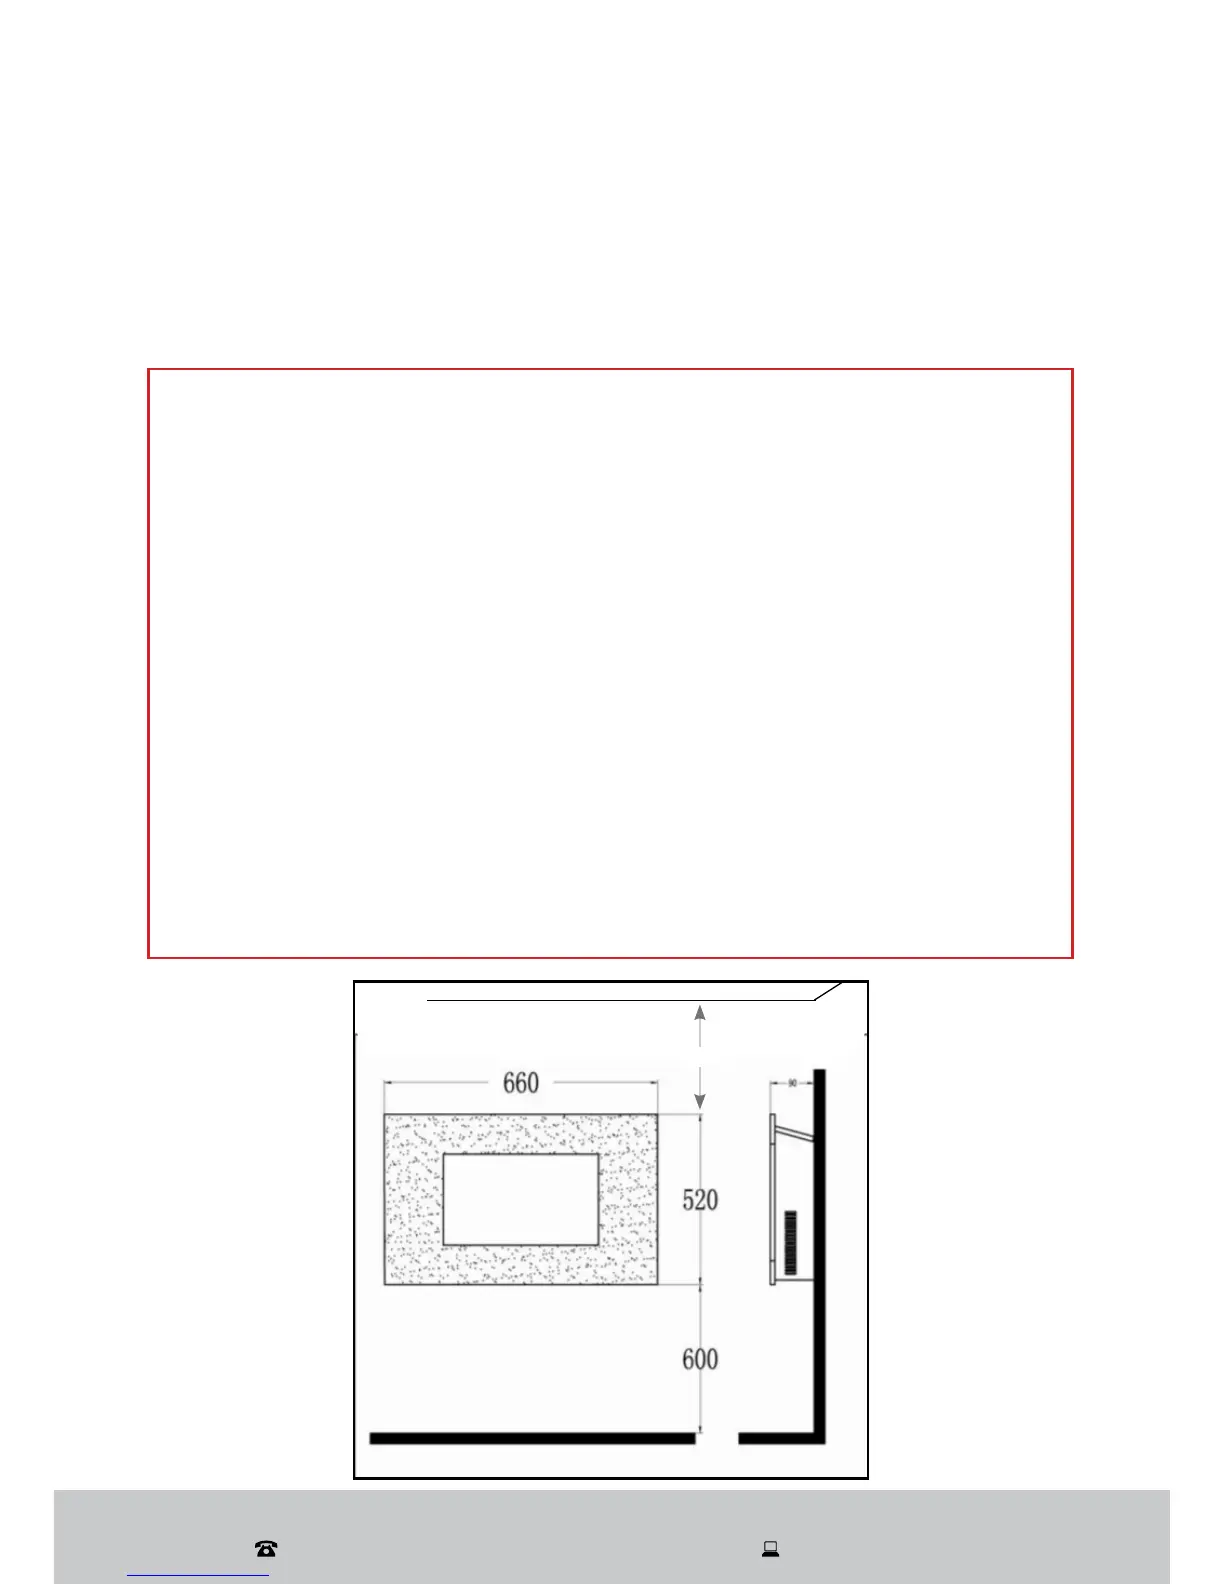
• When wall-mounting the flame effect heater, make sure to maintain a
minimum clearance of 1m below the ceiling and 0.5m at the sides. The
appliance requires a minimum height of 300mm above floor level; however,
installing it at 600mm above floor level will result in optimum viewing of the
fuel bed (Fig. 1).
• Take care when drilling holes and ensure that no power cables, gas or
water pipes are behind the installation site.
• Do not use the heater or connect it to the mains power supply until it
is completely assembled, installed and adjusted, and you have read
all instructions.
(measurements in mm)
1000
Fig. 1