42
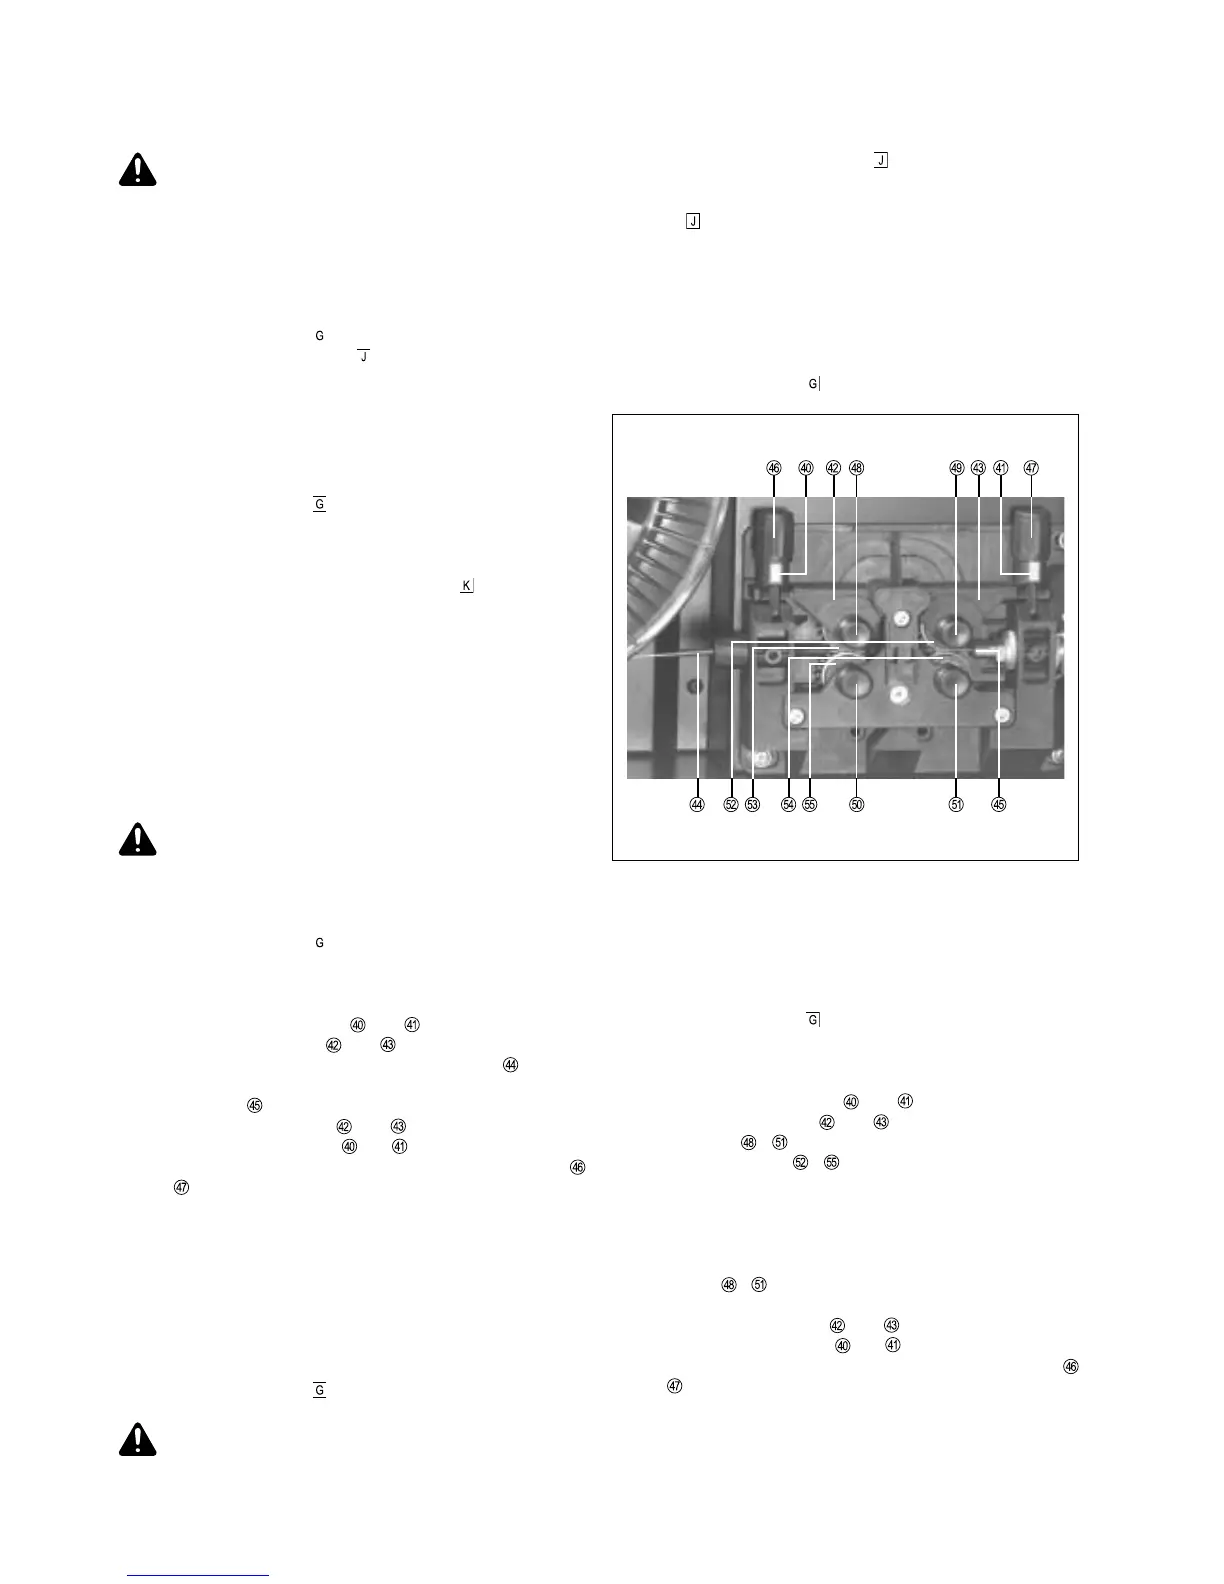
Changing the feed rollers
In order to achieve satisfactory wire travel, the feed rollers must
be suitable for the diameter and alloy of the wire to be welded.
- Shift the mains switch into the “O” position
- Open the wire-spool cover (DS III) or the left side panel of the
TotalArc² 3000 power source
- Remove the left side panel of the power source
- Pivot the clamping devices and forwards
- Pull the pressure levers and upwards
- Pull out axles -
- Remove feed rollers -
- Insert new feed rollers
N.B.! Insert the feed rollers in such a way that you can still see
and read the designation for the wire diameter.
- Push axles - back in again - the anti-twist lock of each
axle must latch into place
- Push the pressure levers and downwards
- Pivot the clamping devices and into the vertical position
- Set the contact pressure by means of the clamping nuts
and
- Close the wire-spool cover or side panel
Fig.8 4-roller drive
Warning! The coolant circulation must be checked at
regular intervals while the machine is in operation - it
must be possible to see that the return-flow to the
reservoir is working correctly.
Setting the shielding-gas rate
- Plug in the mains plug
- Shift the mains switch into the "I" position
- Press the “Gas test” button
- Turn the adjusting-screw on the underside of the pressure
regulator until the manometer indicates the desired flow-
rate
Mounting the wire spool
- Shift the mains switch into the “O” position
- Open the wire-spool cover (DS III) or the left side panel of the
TotalArc² 3000 power source
- Take off the side panel from the power source
- Mount the wire spool onto the spool holder - the right way
round
- Latch the locking bolt into the opening provided on the body
of the spool
- Adjust the braking force with the clamping screw
- Replace the wire-spool cover or side panel
N.B.! The brake should always be adjusted so that the wire
does not continue unreeling after the end of welding - but
without overtightening the clamping screw, as this would cause
motor overload.
Warning! Make sure that the wire-spool is sitting firmly
on the spool holder.
Feeding in the wire electrode
- Shift the mains switch into the “O” position
- Open the wire-spool cover (DS III) or the left side panel of the
TotalArc² 3000 power source
- Remove the left side panel of the power source
- Pivot the clamping devices and forwards
- Pull the pressure levers and upwards
- Insert the wire electrode though the infeed tube of the 4-
roller drive and around 5 cm into the infeed tube of the
welding torch
- Push the pressure levers and downwards
- Pivot the clamping devices and into the vertical position
- Set the contact pressure by means of the clamping nuts
and
N.B.! Set a contact pressure that is high enough to ensure
smooth wire feed, but not so high that the wire electrode is
deformed.
- Arrange the hosepack in as straight a line as possible
- Detach the gas nozzle from the torch
- Unscrew the contact tube
- Plug in the mains plug
- Shift the mains switch into the "I" position
Warning! During the wire-infeed operation, hold the
welding torch facing away from your body.
- Press the wire-inching button until the wire electrode
protrudes out of the end of the torch
- To end the wire-infeed operation, release the wire-inching
button
N.B.! The wire spool must not continue to unreel after you
release the torch trigger. Re-adjust the brake if necessary.
- Screw in the contact tube
- Fit the gas nozzle
- Close the wire-spool cover or side panel
- Shift the mains switch into the “O" position