22 23
Rear-facing
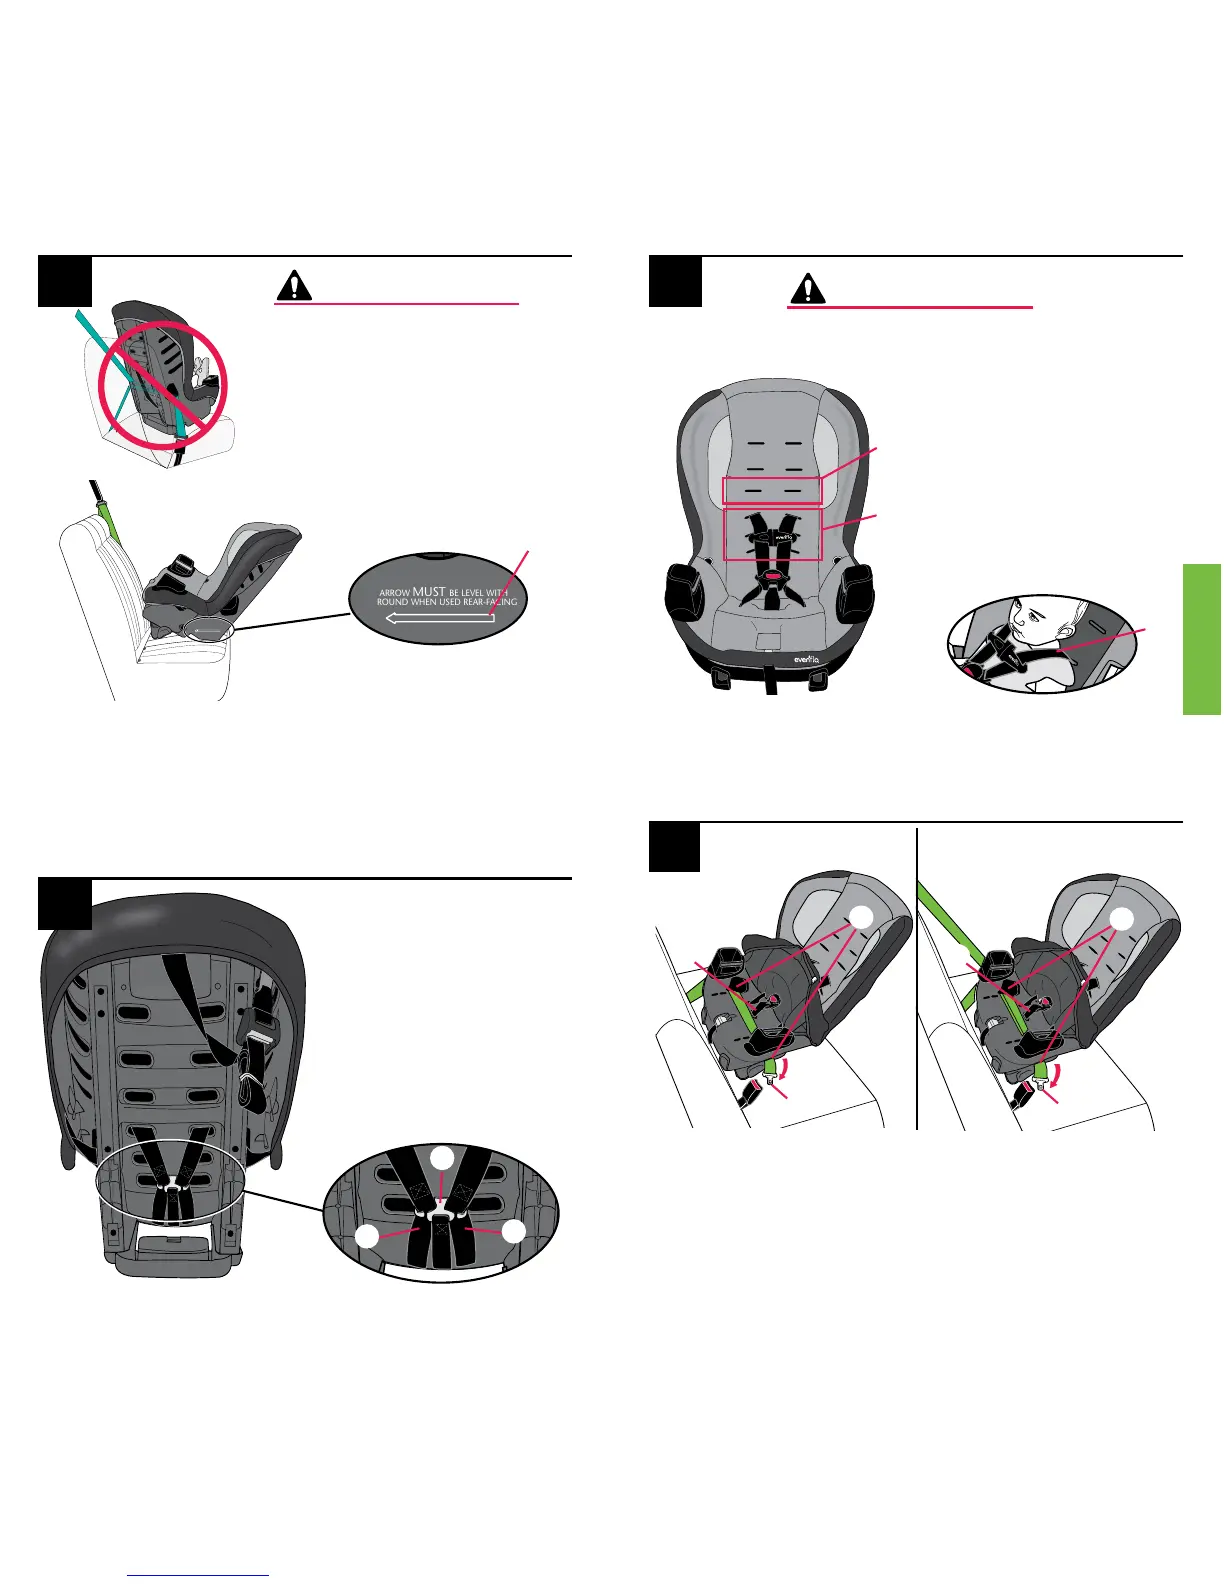
Rear-facing Installation with Seat Belt
Attach the harness
straps
B
to the splitter
plate
C
using the
infant position (page 37)
on the harness straps.
As your child grows, you
can attach the harness
straps
B
to the splitter
plate using the pockets
at the end of the straps.
2
1
Infants MUST always ride facing the rear of the
vehicle. The back of the child restraint supports and
protects the baby and absorbs crash forces.
Adjust the child restraint to the recline position (page
38).
Place the child restraint in your vehicle rear-facing.
Adjust the restraint so that the level arrow
A
is level
with the ground.
NEVER turn a child restraint
forward-facing with a child who
weighs less than 10 kg (22 lbs).
Crash forces may cause serious
injury or death.
WARNING
A
Make sure the harness
straps are in one of the
three lower strap slots
D
.
The harness straps MUST
start at shoulder height
or lower, using the strap
slots closest to your child’s
shoulders
E
, as shown.
3
DO NOT use the two upper harness slots rear-facing. The
harness may not properly restrain the child during a crash.
WARNING
D
E
4
Lap Belt Only
Lap & Shoulder
Belt Combination
Pull the seat pad off of the front of the child restraint.
Route the vehicle seat belt
G
through the rear-facing
belt path
H
and continue through the opposite opening
of the child restraint. IMPORTANT: Make sure the seat
belt
G
is in front of the crotch strap
I
, and it lies flat
without twisting, as shown. Fasten the vehicle seat belt, as
shown, depending on your type of seat belt. Reconnect
the seat pad to the front of the child restraint.
I
H
G
H
I
U.S. Customers Only: For a taller child, the fourth set
of harness slots
F
can be used. Note: These slots MUST
start at shoulder height or lower and be the closest slots
to your child's shoulders.
F
IMPORTANT: Make sure both harness straps are
installed completely on the splitter plate, as shown.
Rear-facing Installation with Seat Belt
C
B
B
G