9 HOMEDEPOT.COM
Please contact 1-877-527-0313 for further assistance.
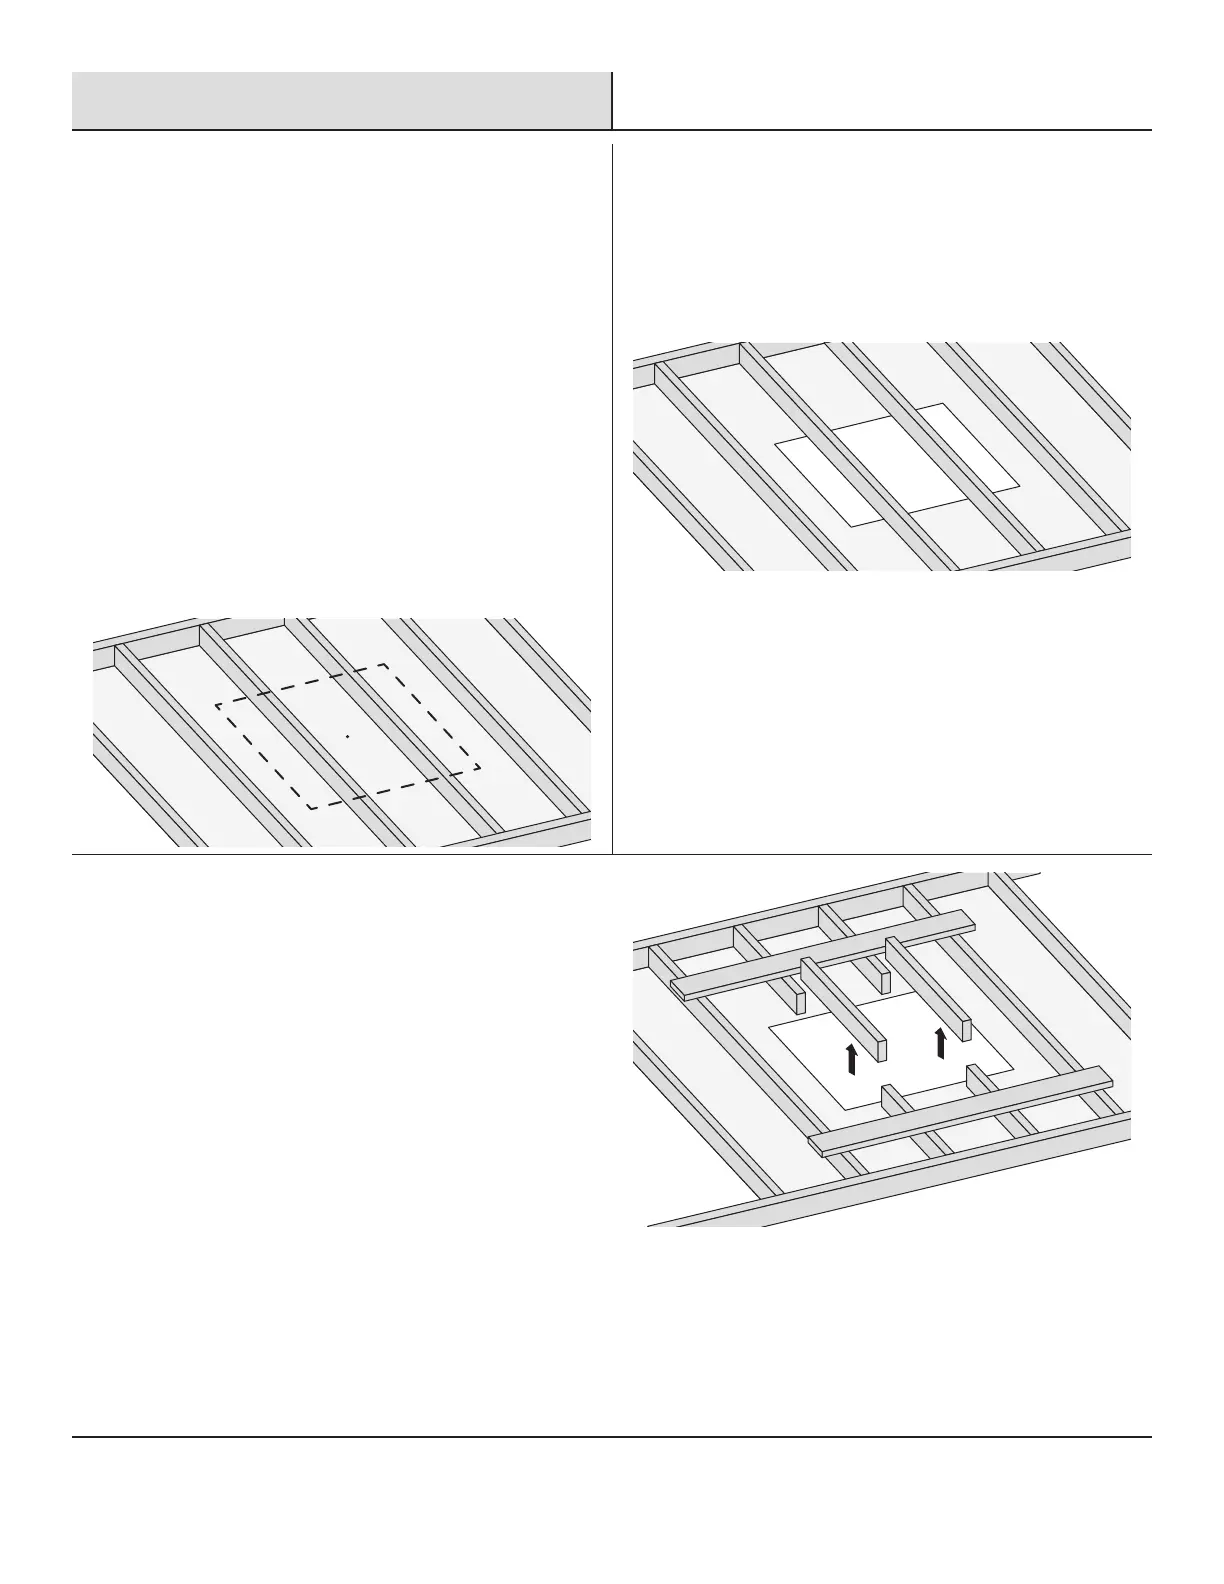
Installation - Joist-out
1
Preparing the shutter opening
□ Find a spot in the center of the hallway, drill a hole and
feed a wire through to mark it.
□ Mark space around the wire equal to the area of the rough
shutter opening in the table on page 5 in the joist-out
option.
□ Remove all insulation above the installation site.
□ Drill two 1/4-in. holes (from attic oor through the ceiling)
at the two corners that are aligned with one of the ceiling
joists.
□ On the ceiling side, draw a straight line between the two
drilled holes. Use this line as a guide to mark the other
three sides of the shutter opening, using rough opening
dimensions in the table on page 5.
□ From the ceiling side, drill two more 1/4-in. holes at the
remaining corners.
2
Cutting the shutter opening
□ Cut through the ceiling along the lines using a circular saw.
Measure the depth of the drywall and adjust the saw so
you only cut the drywall and avoid the joists.
□ Carefully remove the drywall from the opening.
3
Cutting the ceiling joist
□ Stabilize the joists using 2 X 6 lumber to bridge the joist
about 6 in. away from either side of the opening.
□ Attach stabilizers to the joists with #12D nails or 2-1/2-in.
deck screws.
□ Mark two lines on the joists to be cut about 1-1/2 in. away
from either side of the opening.
□ Cut along the lines using a saber saw. Make sure cuts are
perpendicular and accurate.
 Loading...