After the adjustment is finished, do not operate the instrument for 60 seconds, it will automatically
exit the procedure
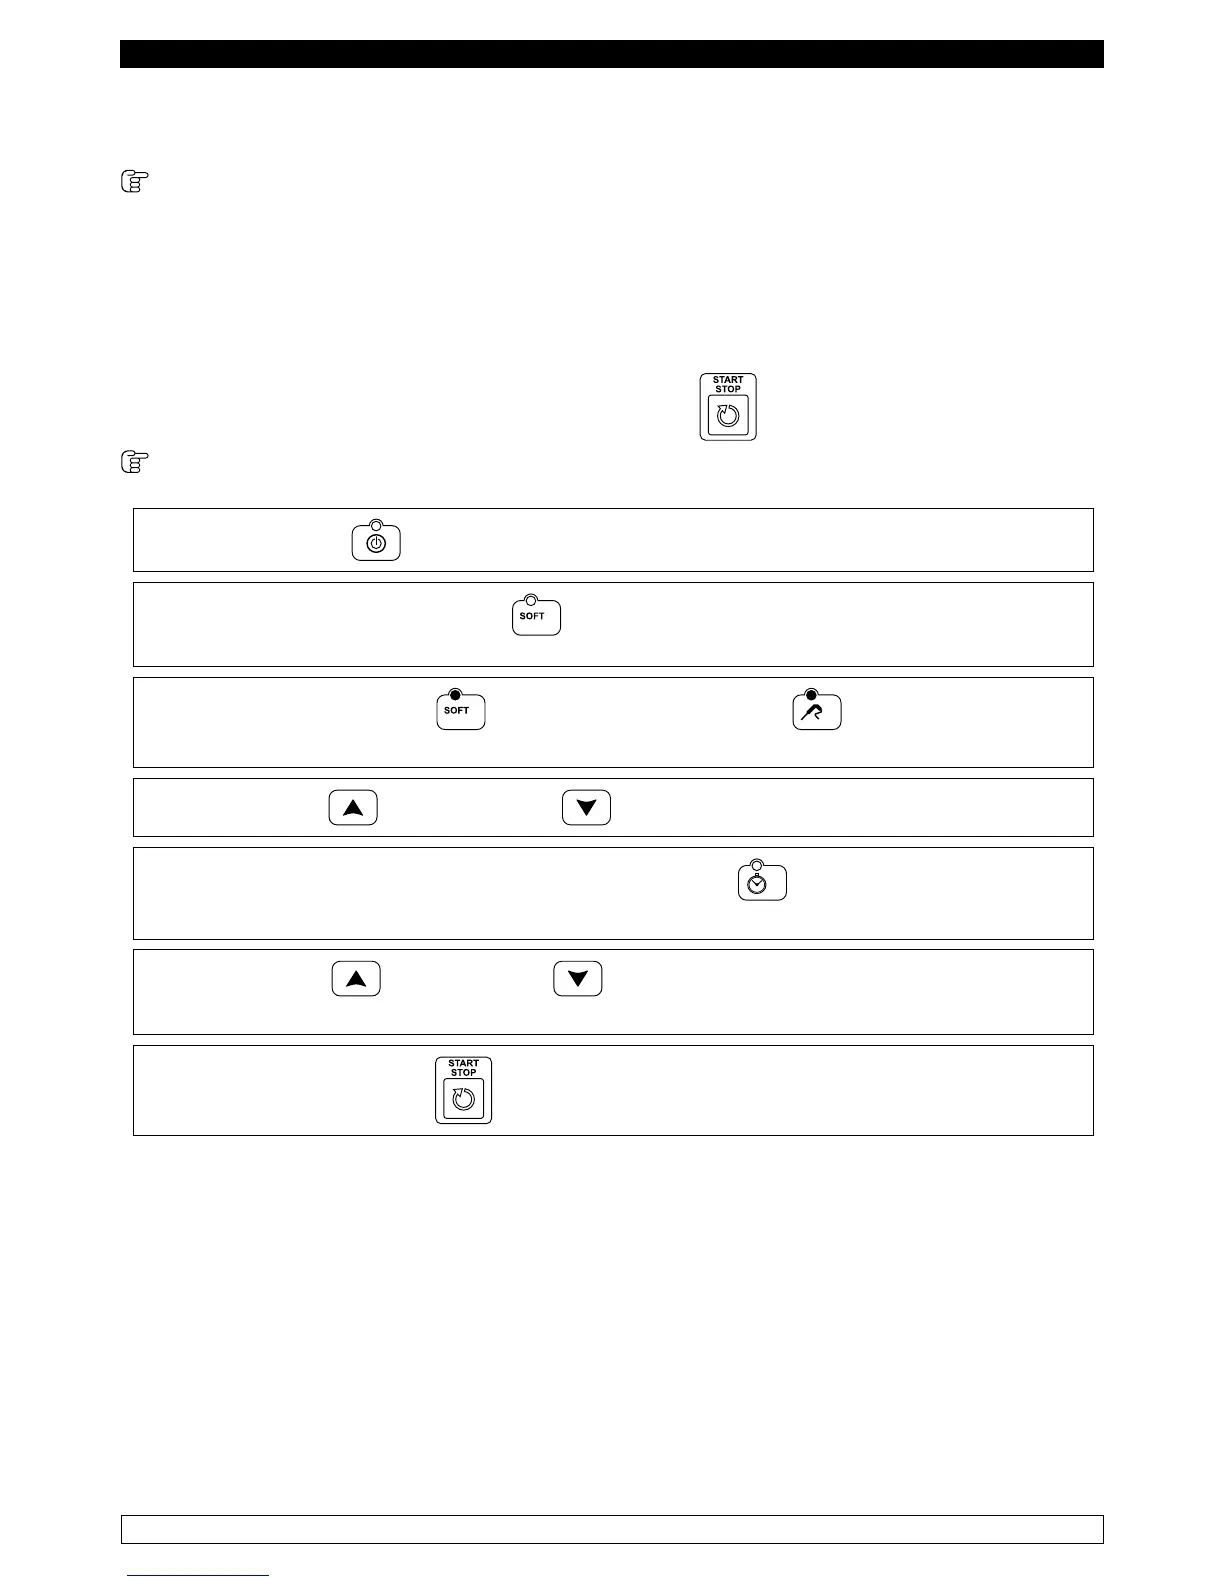
9.2.3 Selecting cycles (fig.3)
With card in STANDBY: you can select a blast chilling/freezing cycle. The cycles can be controlled
by the temperature of the needle probe or by a time. Where they are controlled by the temperature
of the needle probe, the end of the blast chilling phase occurs when the needle probe reaches the
setpoint at the end of blast chilling/freezing, while if a duration is defined for the blast chilling/freezing
phase, the end occurs when the preset time expires.
For both types of cycle, once the blast chilling/freezing phase ends, the storage phase starts, the end
of which is defined by pressing the START/STOP button,
, which puts the card in STANDBY
POSITIVE BLAST CHILLING CYCLE
► Press the ON/OFF button
► Press the BLAST CHILLING button to select a positive blast chilling cycle. By default, the
selected cycle is controlled by the temperature of the needle probe.
► The BLAST CHILLING LED and the
TEMPERATURE LED are on. The display DIS1
shows the cell setpoint, while the display DIS2 shows three dashes.
► The INCREASE and DECREASE buttons can be used to change the cell setpoint.
► To switch the cycle to a time cycle, press the TIME button .
The display DIS2 shows the time.
► The INCREASE and DECRASE buttons can be used to change the time .
The changes made are only temporary and are not saved.
► Pressing the START/STOP button starts the execution of the cycle.
NOTE: The minimum acceptable value for the cell setpoint is -2°C and the maximum is 99°C.
The minimum value that can be set for the time is 0 minutes, the maximum is 400 minutes.