EVGA X299 Micro (131-SX-E295)
- 85 -
On
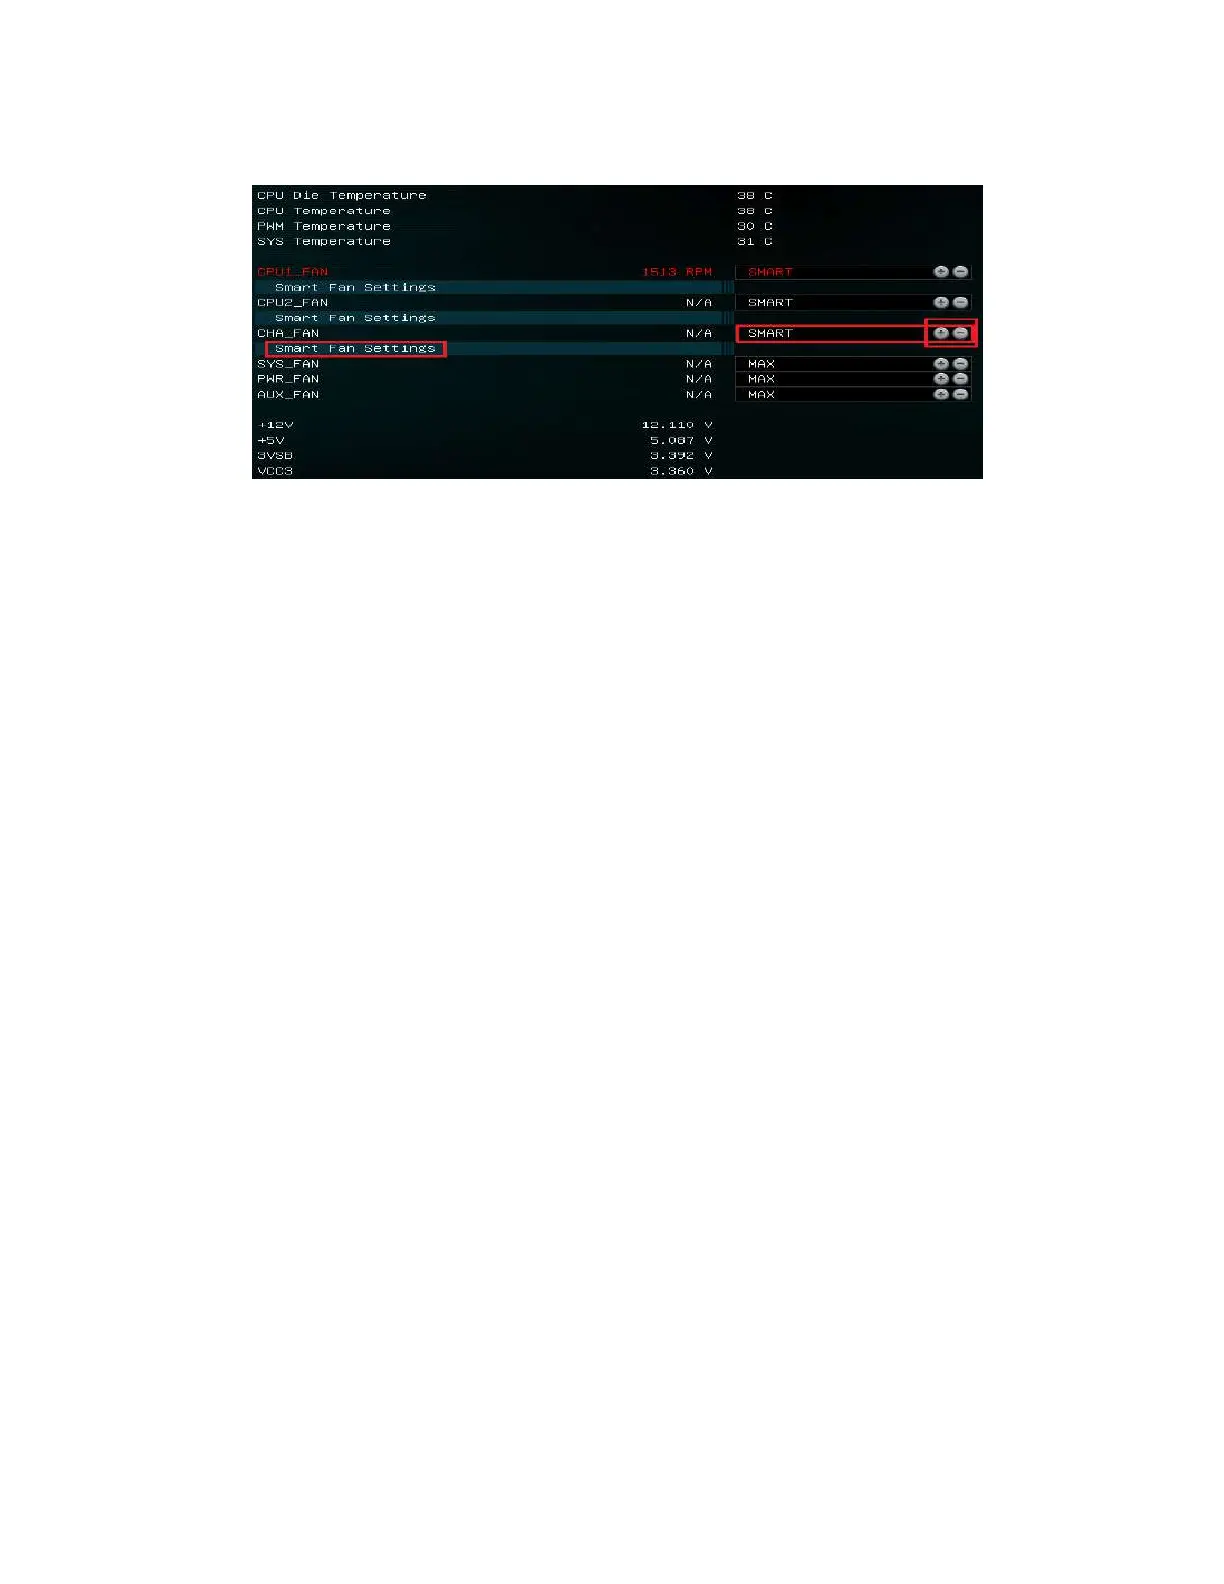
ce into the H/W Monitor section, you can see the temperature monitors across the
top. Below the monitors are the two (2) PWM fans: CPU1_FAN, CPU2_FAN, and
CHA_FAN. The PWM fans are set to “Smart,” which means the PWM controller is
using a Smart curve for fan controls. Each PWM fan can be set to a separate fan curve.
To set a Smart curve, please see the guide starting at the top of the next page.
The +/- buttons next to Smart allow you to set your fans at a static speed percentage,
instead of a curve. If you set the speed too low, however, the fan may stall; the stall
speed will vary from fan to fan.
Below the fans, you will see the four (4) DC/PWM fans: SYS1_FAN, SYS2_FAN,
PWR_FAN, and AUX_FAN. These fans can only be set to a static speed percentage.
Again, if you set the speed too low, however, the fan may stall; the stall speed will vary
from fan to fan.
The DC/PWM fan headers can support either DC Mode or PWM Mode, which will be
auto-detected by the onboard fan controller. DC Mode will power the header using the
static percentage set and the fan’s maximum speed. PWM Mode will power the header
and communicate via PWM with a supported PWM fan. PWM mode is necessary if you
are running a PWM fan powered by a different connector, such as a molex, SATA, or 3-
pin header not on the motherboard. If you don’t attach the fan prior to power on, the
fan may run in DC mode at 100%, or behave erratically, regardless of the static
percentage you set above. If you have a PWM fan powered directly by the 4-pin header,
then selecting PWM will control the fan via PWM signal NOT via reducing voltage,
while it will run at a static speed based on the percentage selected, this also should
reduce the low RPM stall point of the fan as it is receiving full voltage.
To set a Smart curve, select the “Smart Fan Settings” and enter the menu.