12
www.evolutionrage.com
13
www.evolutionrage.com
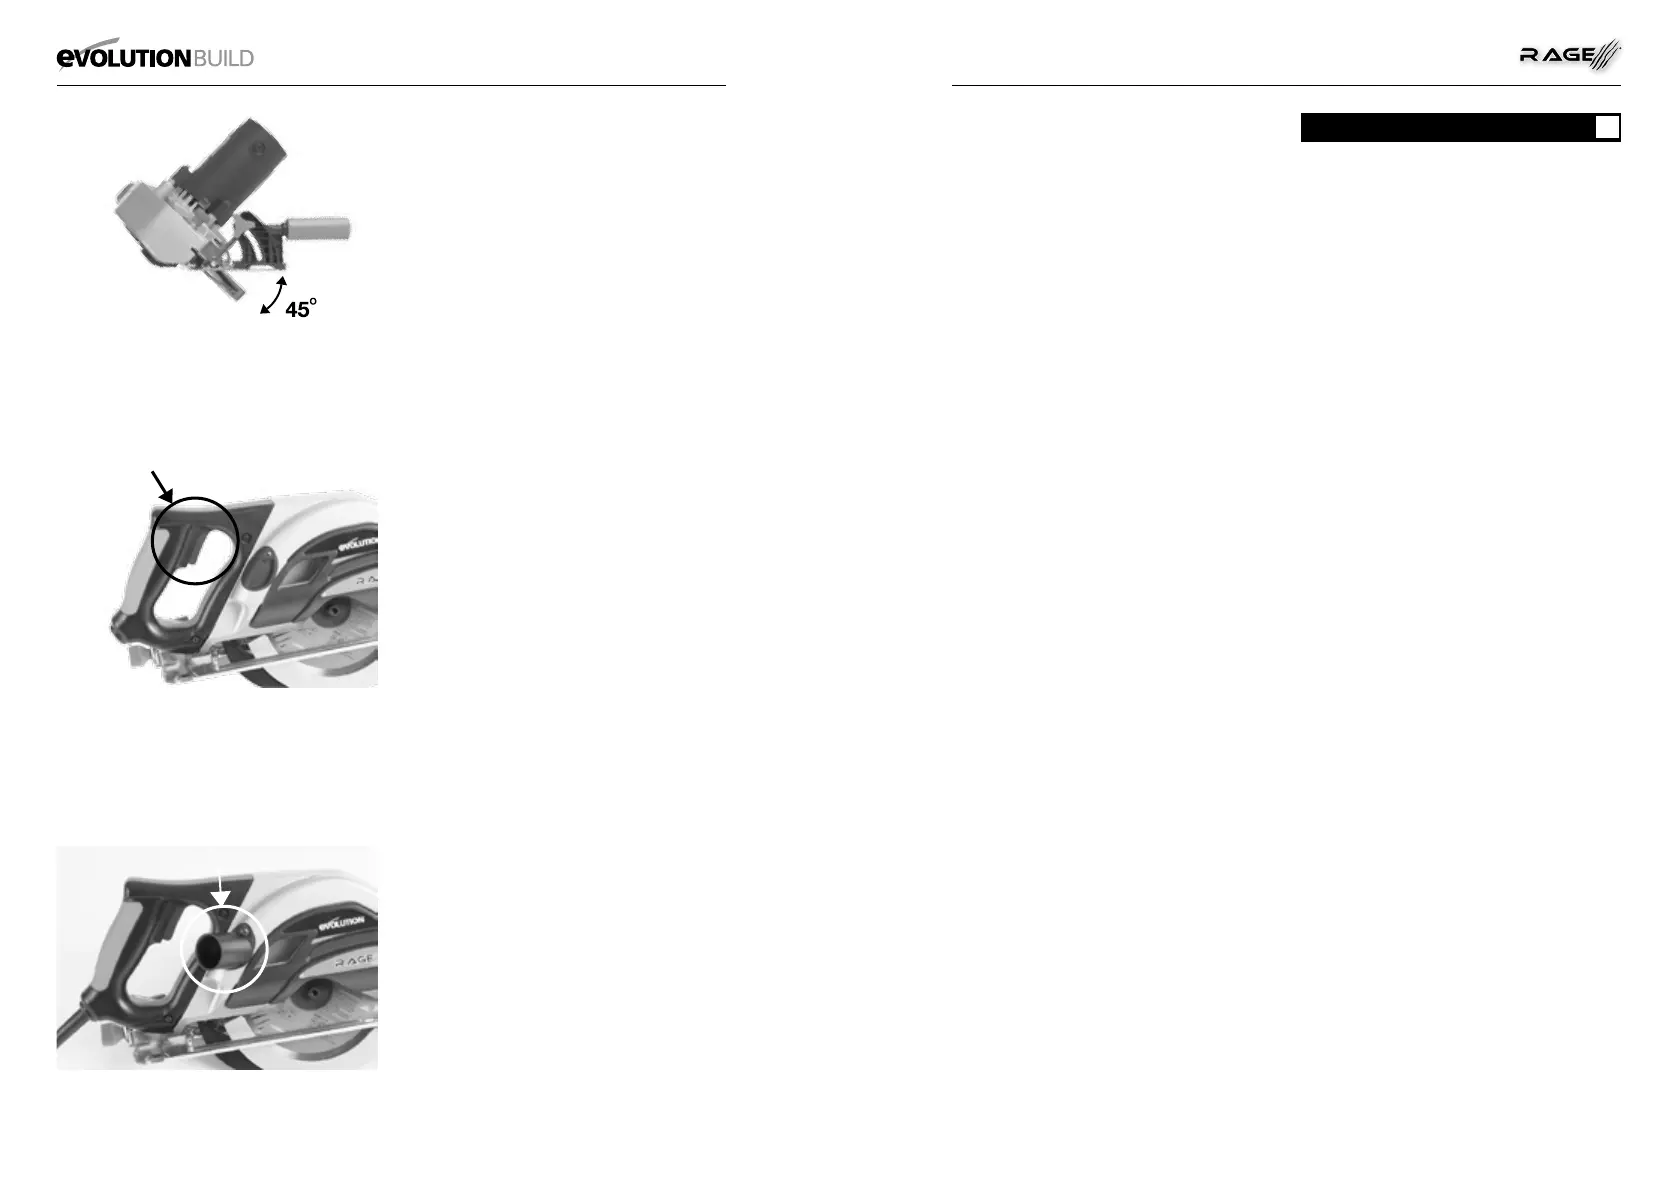
ON/OFF Trigger Switch
This machine is equipped with a safety start trigger
switch.
To start the machine:
• Push in the safety lock button on the side of the
handle with your thumb.
•Depress the main trigger switch to start the motor.
(Fig. 8)
Chip Collector
This machine is tted with a chip collector to
capture metal chips. The chip collector cover plate
is provided with a transparent ‘window’ so that the
operator can see the contents and empty when
necessary.
To remove and empty the chip collector:
• Loosen the two chip collector thumb screws.
• Ease the chip collector from the machine.
• Empty the contents of the chip collector by
tipping the collector upside down over a suitable
waste container, allowing the contents to fall out.
Note: To maintain operational efciency we
recommend that the collector is emptied when
approximately 60% full. Dispose of the contents of
the chip collector in an environmentally responsible
manner.
• Replace the chip collector and securely tighten
the (2) thumb screws.
Discharge Port
When cutting wood the Discharge Port Exhaust
should be tted to the chip collector cover
Discharge Port.
To t the Discharge Port Exhaust
• Remove the Discharge Port blanking cover by
unscrewing the cross headed screw.
• Pull the blanking cover from the Discharge Port
and safely store for future use.
• Fit the Discharge Port Exhaust in place of the
blanking cover. (Fig. 9) Wood chips will be ejected
from the Discharge Port Exhaust during cutting
operations.
When cutting has been completed, remove the
Exhaust Port and replace the blanking cover and
tighten the xing screw securely.
Cutting Advice
The operator should wear all relevant PPE (Personal
Protection Equipment) necessary for the job at
hand. This could include safety glasses, dust
masks, safety shoes etc.
The operator should always be aware of the position
and routing of the power cable.
• Do not force the machine.
• Allow the speed of the saw blade do the work.
Cutting performance will not be improved by
applying excessive pressure to the machine, and
blade life will be reduced.
• When using the parallel edge guide, ensure that
it is parallel with the blade. The blade and/or
motor could become damaged if the machine
is used with an incorrectly adjusted parallel edge
guide.
• To set the guide, loosen the two retaining screws,
and adjust the guide to the required position.
Tighten the locking screws.
• Place front edge of sole plate squarely on the
workpiece before starting the motor.
• When starting a cut, sight the cutting line with
the line of cut guide, taking care to introduce the
blade to the material slowly, so as not to damage
its teeth.
• Use both hands to move the saw forwards the
work piece.
• Apply smooth, constant pressure to move the
saw forwards through the workpiece.
When a cut has been completed release the ON/
OFF trigger switch and allow the blade to come to
a complete halt. Do not apply lateral pressure to
the blade disc in an attempt to slow it down more
quickly.
WARNING: If the motor should stop or stall whilst
a cut is being attempted release the trigger switch
immediately and disconnect the machine from
the power supply. Remove the machine from the
workpiece before investigating the cause and
attempting to restart the motor.
Note: This saw is tted with an overload protection
device. This is designed to prevent overloading and
consequent damage to the motor. If this feature
‘trips’, the motor stops and will not operate.
Allow the machine to cool down and then press the
‘reset switch’ at the base of the main handle.
MAINTENANCE
Note: Any maintenance must be carried out with
the machine switched off and disconnected from
the power supply.
Check that all safety features and guards are
operating correctly on a regular basis. Only use
this machine if all guards/safety features are fully
operational.
All motor bearings in this machine are lubricated for
life. No further lubrication is required.
Use a clean, slightly damp cloth to clean the plastic
parts of the machine. Do not use solvents or similar
products which could damage the plastic parts.
WARNING: Do not attempt to clean by inserting
pointed objects through openings in the machines
casings etc. The machines air vents should be
cleaned using compressed dry air.
Excessive sparking may indicate the presence of
dirt in the motor or worn out carbon brushes.
Brush Checking and Replacement
To replace the motor brushes:
• Disconnect the machine from the power supply.
• Place the machine on a level, secure surface.
• Remove the (2) motor brush retainer cap screws.
• Withdraw the brushes.
Note: If the Carbon rod is less than 6mm long or if
there are signs of burning or damage, replace the
brushes.
• Fit the new brushes.
• Ret the motor brush retainer caps.
• Run the saw without load for several minutes
after brush replacement to aid the ‘bedding in’
process.
MAINTENANCE
GB
FIG 7
FIG 8
FIG 9
 Loading...