16
www.evolutionpowertools.com
10. Replace the chip collector and securely tighten the two
thumb screws.
11. Check that the arbor lock is fully released by manually
rotating the blade.
12. Check the operation of the safety guard.
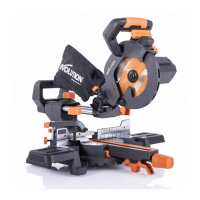
Parallel Edge Guide
A parallel guide (for help when rip cutting) can be fitted to the
sole plate of the machine The guides arms should be inserted
into the rectangular slots in the turned up edges of the sole
plate, and slid under the locking thumb screws. (Fig. 5)
Note: The edge guide can be fitted to either side of the sole
plate and should only be fitted and adjusted with the machine
disconnected from the power supply.
Adjust the edge guide so that it is at the required distance from
the blade and tighten the two thumb screws. Check that the
edge guide is parallel to the saw blade.
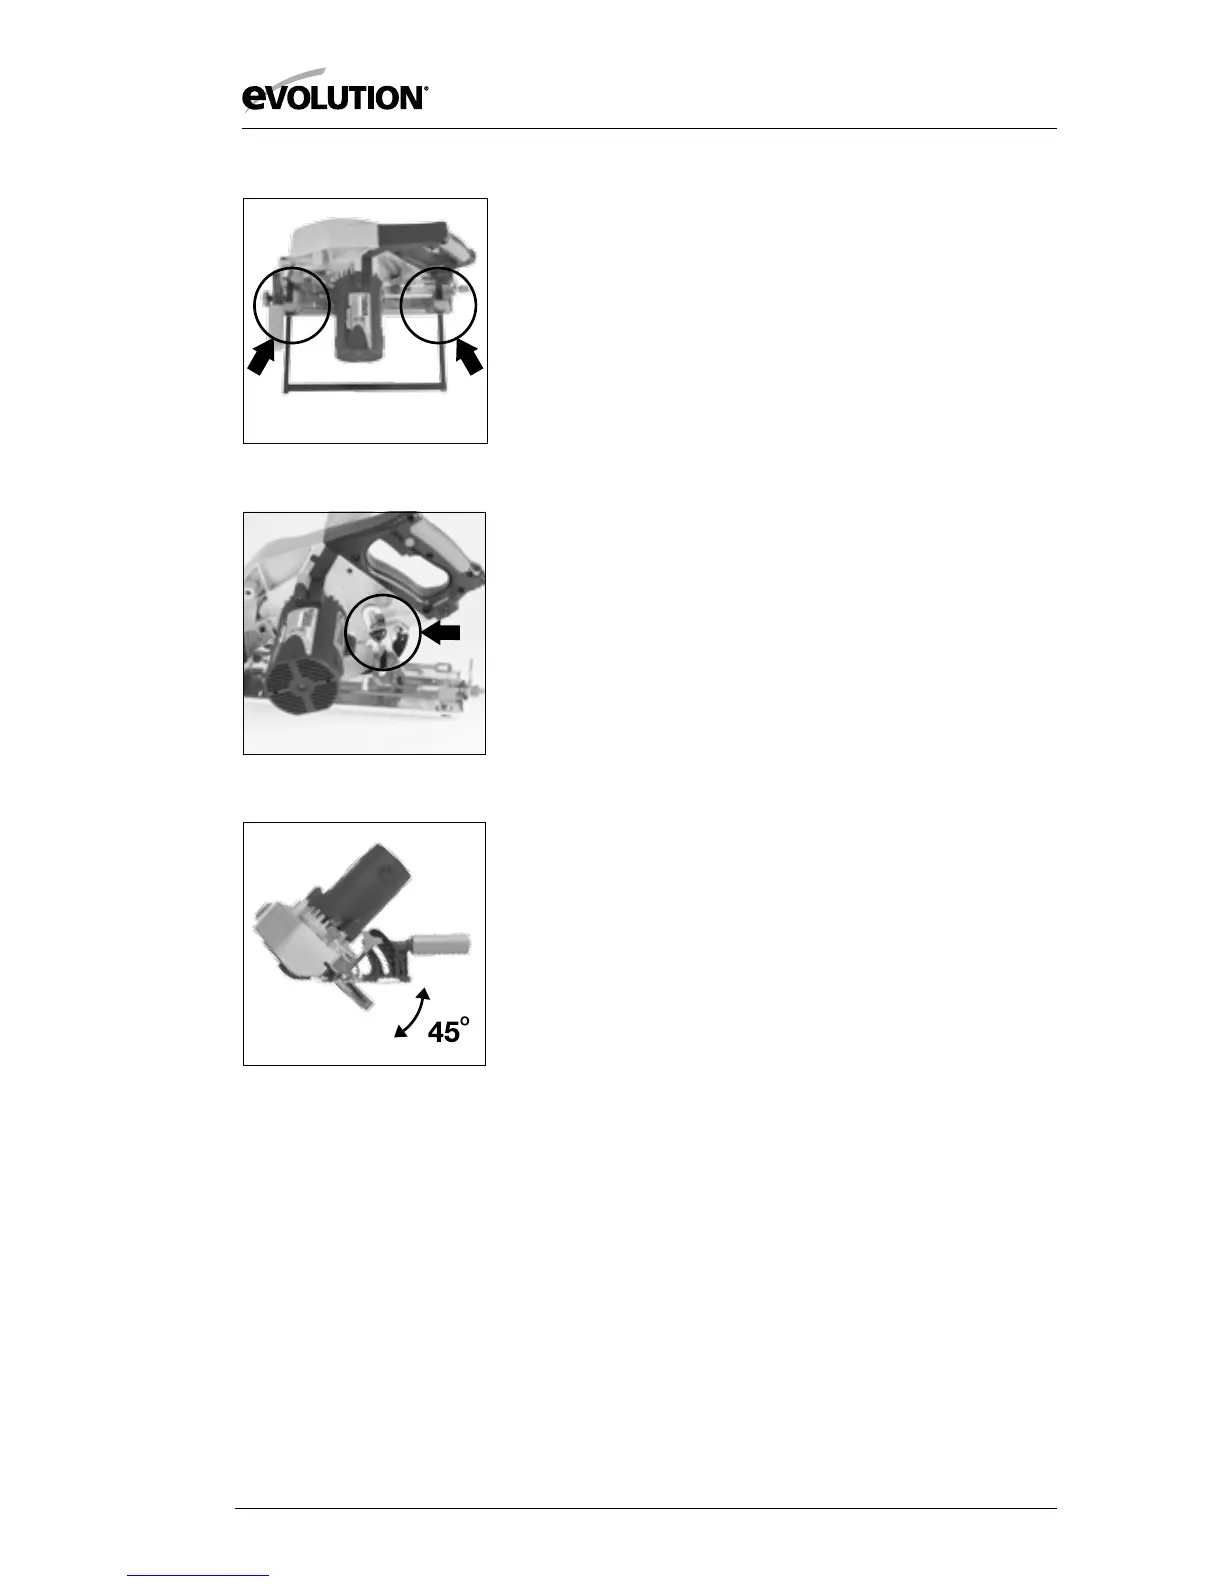
Adjustment of the Cutting Depth
Release the Lever Lock to adjust to the required cutting depth.
In most cases depth should be set at maximum unless there are
obstructions below the work surface. Tighten the Lever Lock
securely to lock in the required position. (Fig.6)
Adjustment of the Cutting Angle
1. Loosen the Bevel Locking Screw found at the front of the saw.
2. Loosen the Rear Bevel Locking Screw found at the rear of the
machines sole plate.
3. Tilt the blade to the required angle. (Fig. 7)
4. Tighten both Bevel Locking Screws securely
Note: An angle scale (0
O
-45
O
) is incorporated into the Bevel
Locking quadrant to aid setting.
Fig. 5
Fig. 6
Fig. 7