12
STEP 2
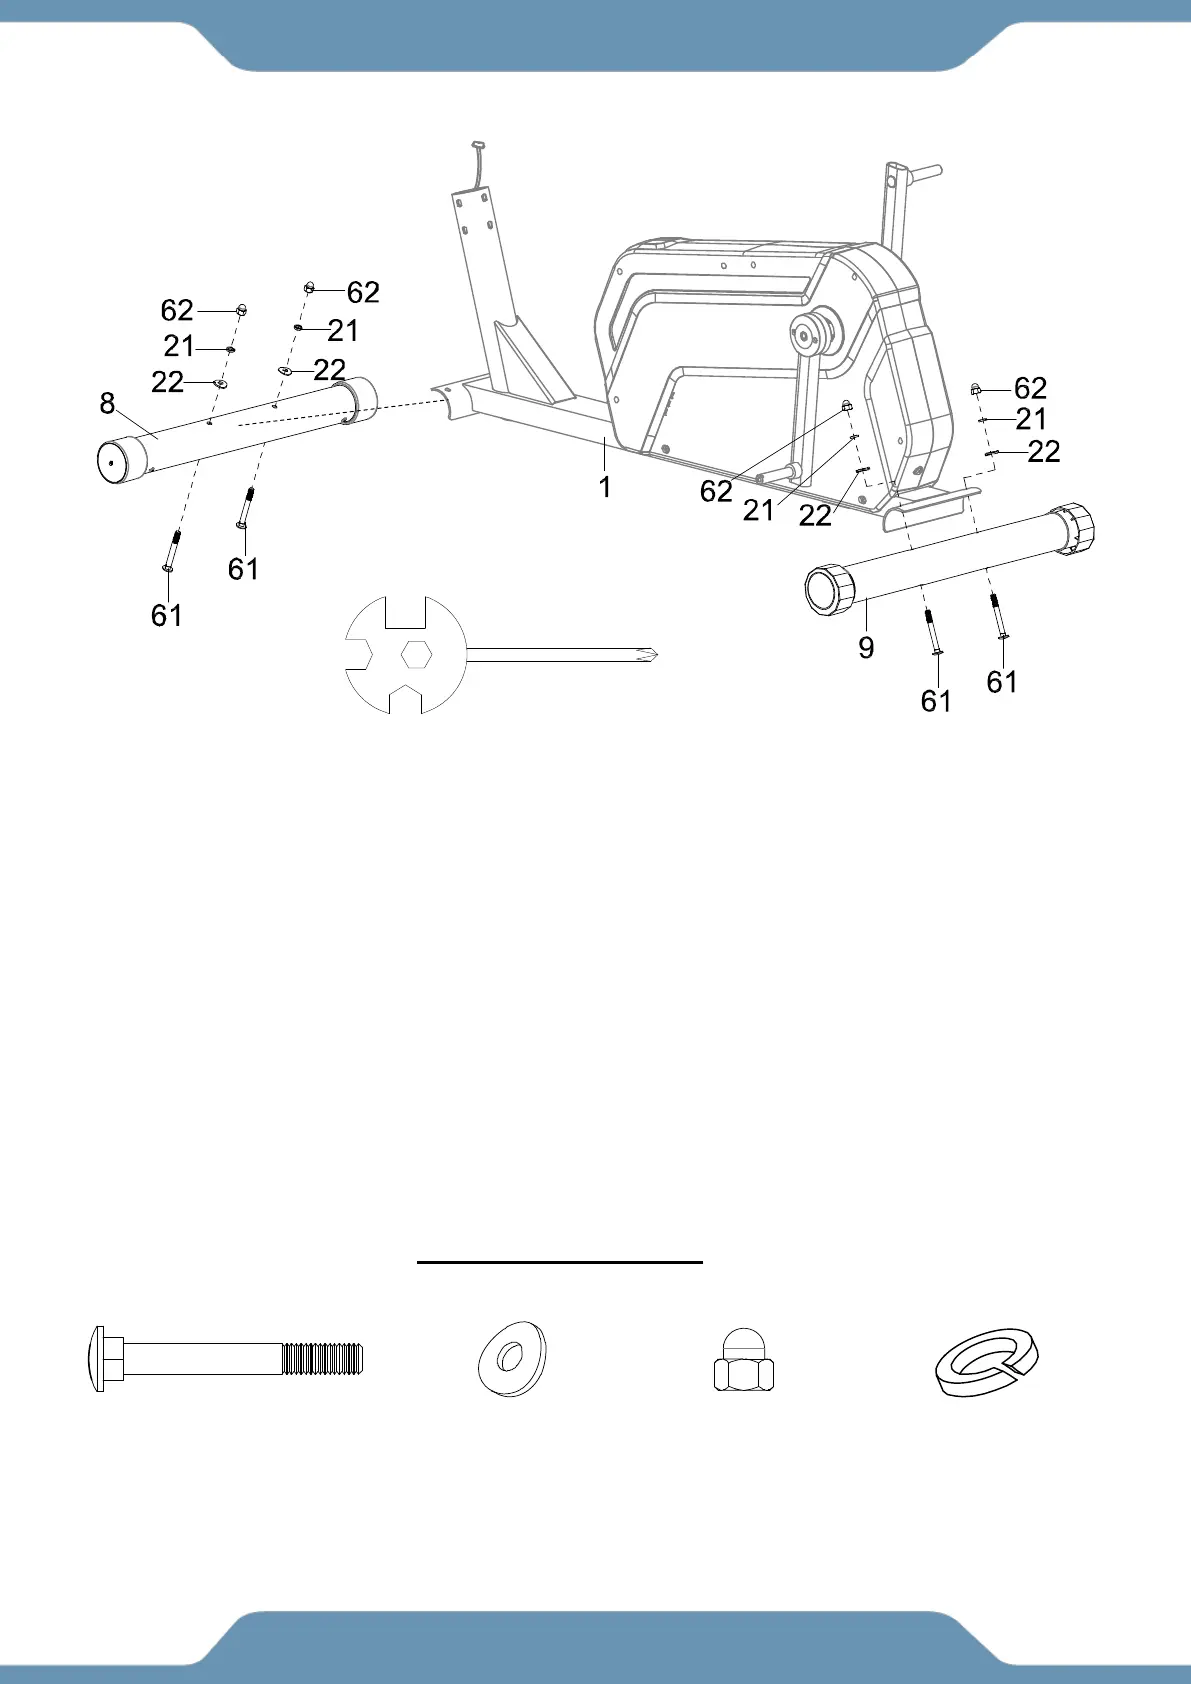
2a. Installing the Front Stabilizer –Lift up the front of the Main Frame (1), and then align the
holes of the Front Stabilizer (8) with the holes on the front curve of the Main Frame (1). Insert two
Carriage Bolts (61) and attach two Big Curved Washers (22), two Spring Washers (21), and two
Cap Nuts (62) to the threaded side of the two Carriage Bolts (61). Use the Multi Hex Tool with
Phillips Screwdriver to tighten the Cap Nuts (62) until firm and secure.
Note: The wheels on the Front Stabilizer (8) should not be touching the floor when installed, the
wheels should only touch the ground when the unit is tilted forward for transporting. See the UP
sticker on the stabilizer.
2b. Repeat the same process for installing the Rear Stabilizer (9).
4 PCS
Washer
4 PCS
Multi Hex Tool with Phillips
Screwdriver