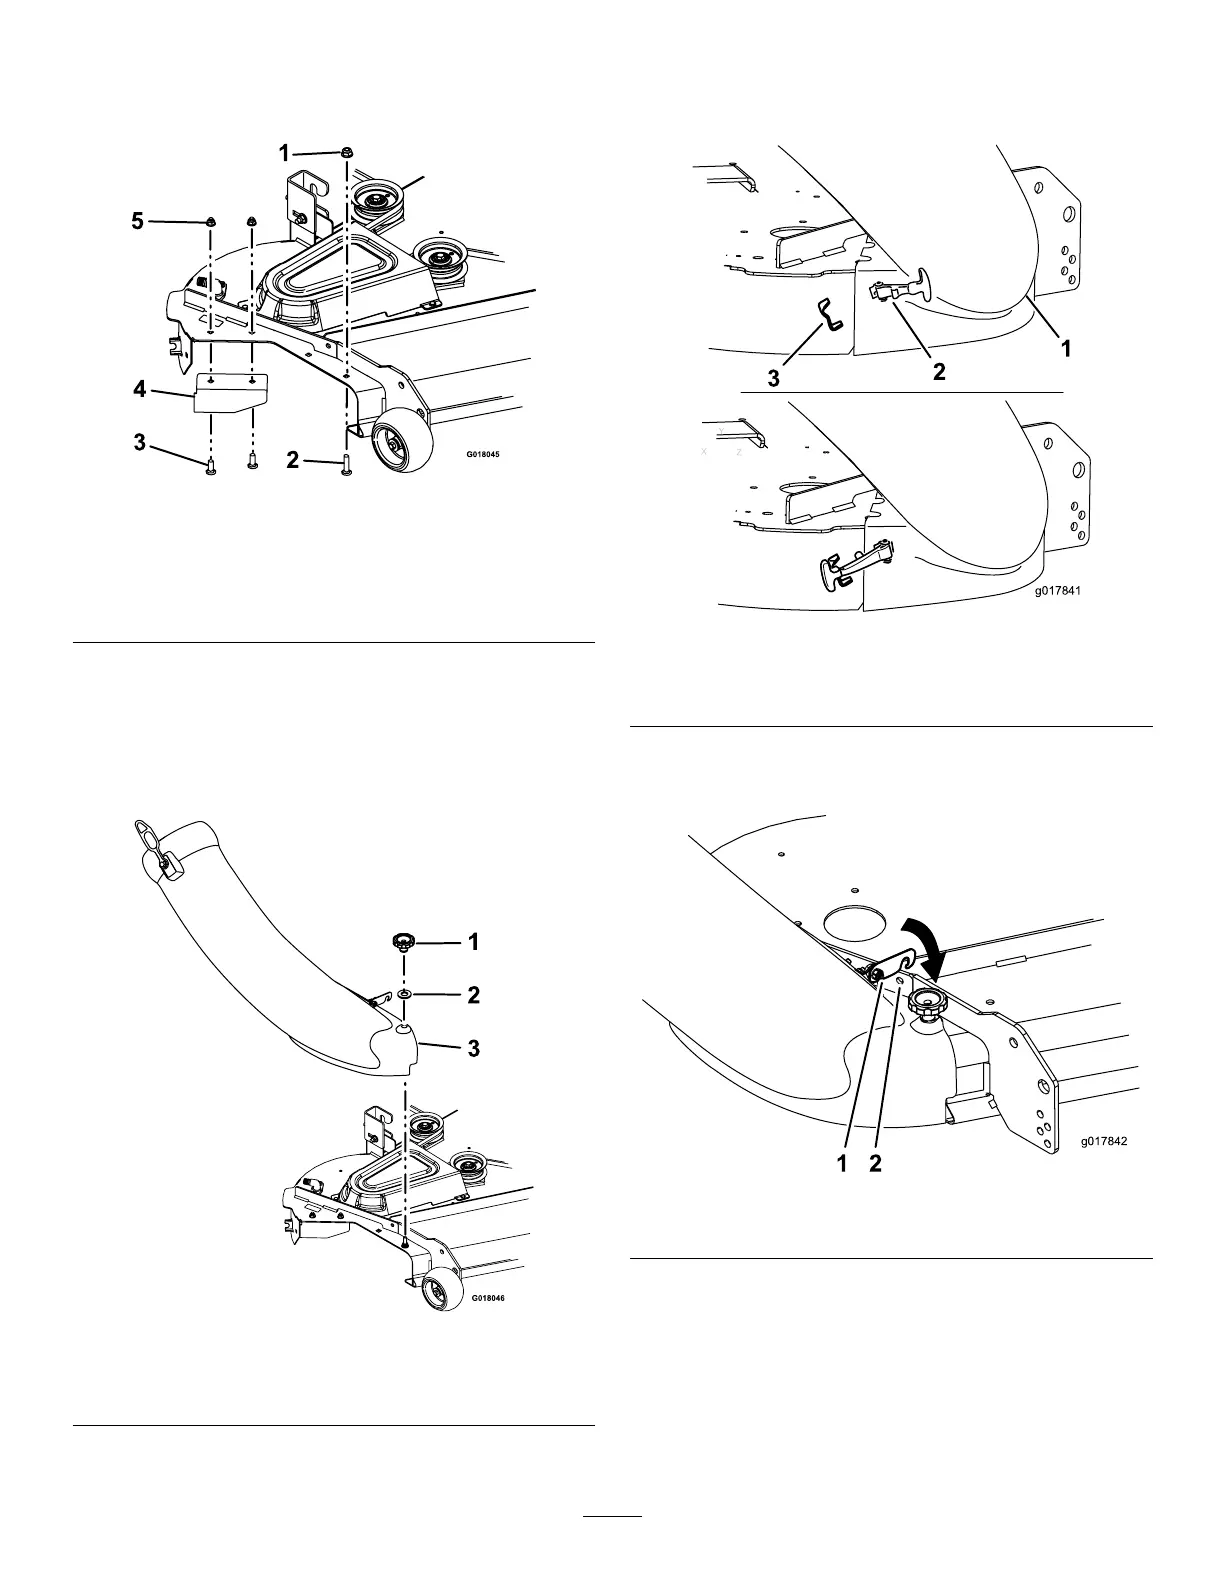
B.Installtheexistingbafewiththeexistingbolts
andnutsafterremovingtheplateassembly(see
Figure15).
Figure15
1.Newangenut(5/16inch)4.Existingbafe
2.Newcarriagebolt(5/16x
13/8inches)
5.Existingnuts
3.Existingbolts
C.Installthecarriageboltandangenutintothe
frontholeasshowninFigure15.
D.Installthelowertubeassemblyontothecarriage
bolt.Securetheassemblytothemowerdeckwith
theknobandatwasherasshownin
Figure16.
Figure16
1.Knob3.Lowertubeassembly
2.5/16inchwasher
E.Securethelowertubeassemblytothedeckby
fasteningtheexiblelatchtothedeckclasp(see
Figure17).
Figure17
1.Lowertubeassembly3.Deckclasp
2.Flexiblelatch
F.Rotatethelatchuntilithooksintotheholeinthe
mowerdeckstiffener(seeFigure18).
Figure18
1.Latch
2.Mowerdeckstiffener
2.Slipthecurvedendoftheuppertubeintothehopper
junctiontubeopening.Slidethearedendofthe
uppertubeoverthelowertubeassembly.Securethe
tubesbyfasteningrubberretainingstrapontothe
uppertubepeg(reference
Figure12).
7