Operation
Note:Onthe42and52inchdecks,thedischarge
bafedoesnothavetoberemovedfromthedeck;
youmaynoticebetterdischargewithitinstalled.
Ifremoved,replacetheoriginalhardwareinthe
deckholes.
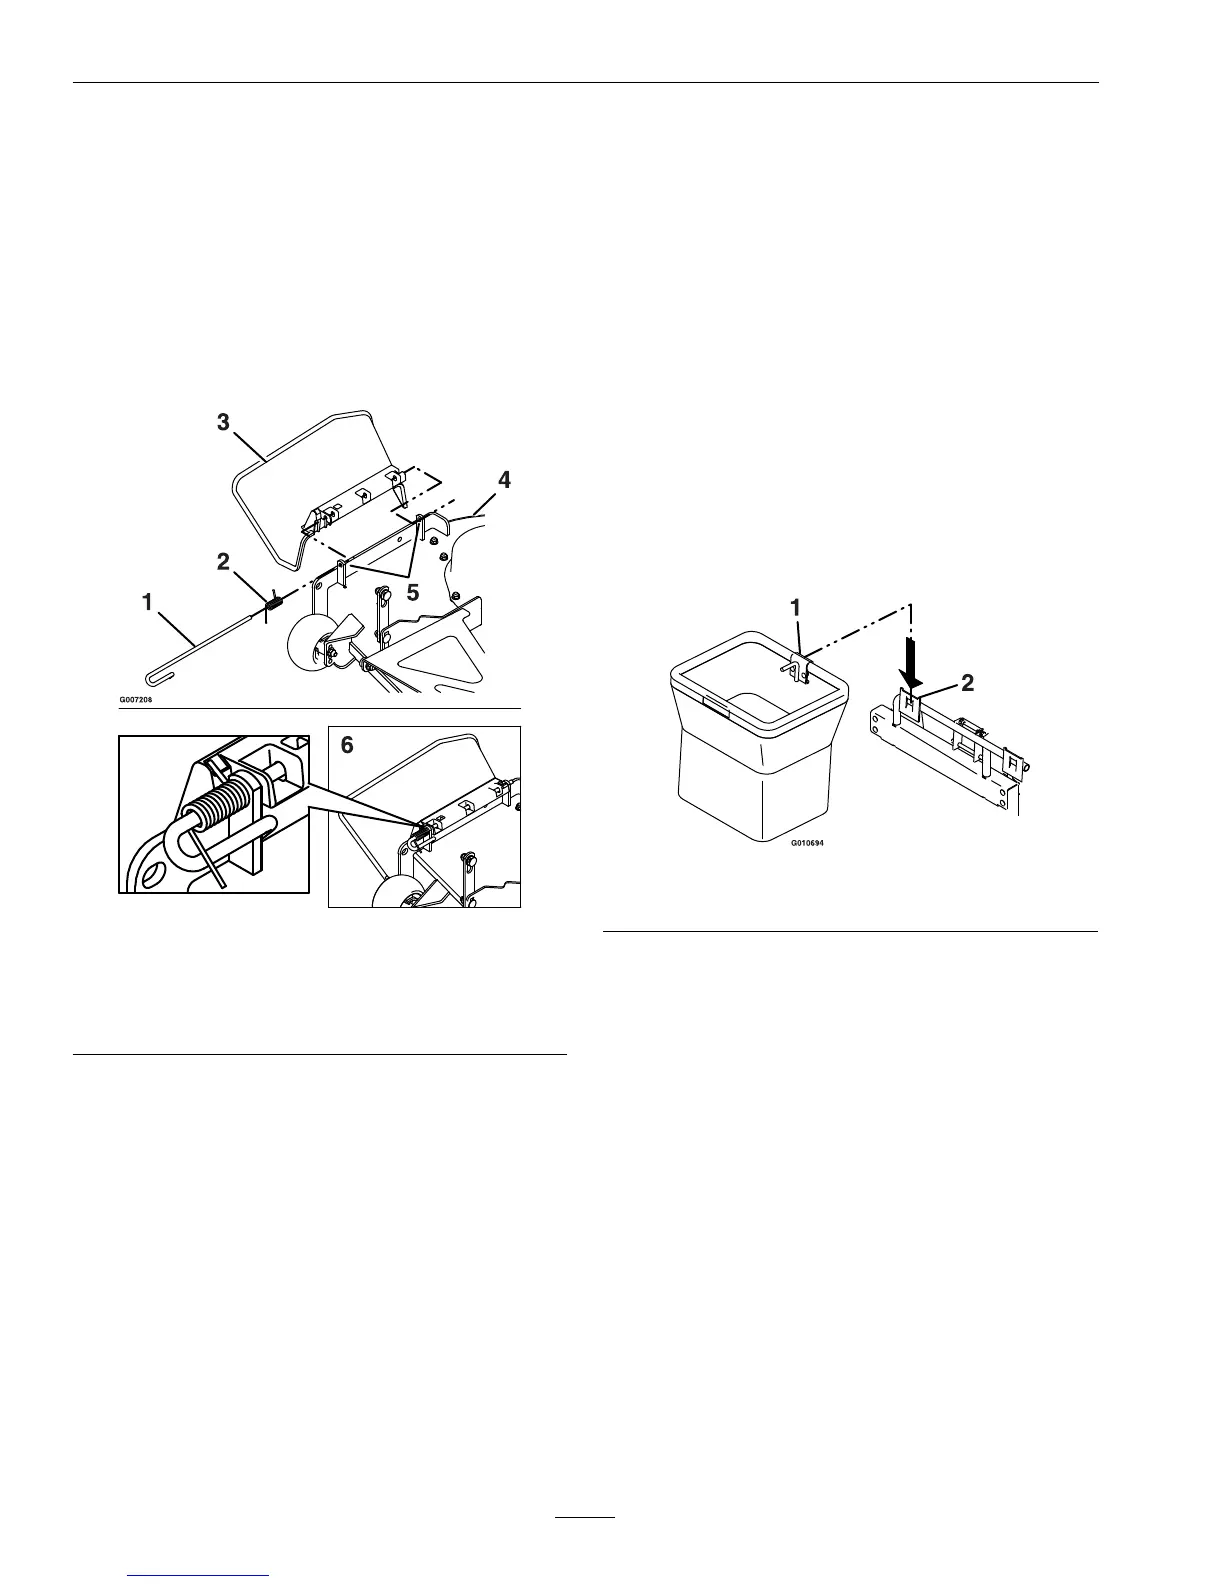
ReplacingtheDischarge
Deector
1.LocateitemsshowninFigure7.
Figure7
1.Rod4.Mowerdeck
2.Spring5.Dischargedeector
bracket
3.Dischargedeector
6.Assembledview
2.Placethedischargedeectoronthedeck.
3.Orientthespringsothattheshortlegpoints
towardsthedischargedeectorandthelonger
legpointstowardsthedeckasshowninFigure7.
Placespringonrodandsliderod,straightend,
throughthefrontdischargedeectorbracket,
dischargedeector,andreardeectorbracket.
4.Makesurethatthespringandrodareinstalledso
thattherodisretainedfromslidingoutbythe
frontbracketandthespringholdsthedischarge
deectorinthedownposition.Referto(Figure7)
forproperorientation.
Important:Thedischargedeectormustbe
springloadedinthedownposition.Liftthe
deectoruptotestthatitsnapstothefull
downposition.
InstallingtheBagger
1.Movethemotioncontrolleversoutwardto
neutralposition,disengagethepowertakeoff
(PTO),engageparkingbrake,stoptheengine,
removethekey,andwaitforallmovingpartsto
stopbeforeleavingtheoperatingposition.
2.Slidetherodoutoftheshortstand-off,spring,
anddischargedeector.Removethedischarge
deector(seeFigure7).
3.Installthehoodassemblyontothehitch.
4.Installthebagsbyslidingthebagframehook
ontotheretainingbracket(seeFigure8).
Figure8
1.Bagframehook
2.Retainingbracket
5.Lowerthehoodontothebags.
6.Insertthemountbrackettabonthelowertube
assemblyintothebootmountbracketasshown
inFigure6.
7.Usethelatchonthelowertubeassemblytolock
thebrackettothedeck.Adjustthetensionon
thelatchtoholdthebracketuptothedeck,yet
allowforreleasebyhand.
8.Sliptheupperexibletubeintojunctiontubeof
thehoodopening.
9.Installthefrontweight.Thelockrodhasakey
ononeend.Slidethelockrodthroughtheweight
supportassembly,notchintheweightandthe
ovalholeintheframebracket.
10.Rotatethelockrodtosecureitintoplace.
12