2. Align the bracket on the ceiling rail in such a way that the bracket metal angled cuts are parallel to
the sides of the ceiling rail.
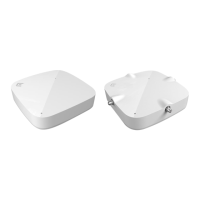
Figure 2: AH-ACC-BKT-AX-TB bracket
Callout Description
1 Metal angled cuts
2 Wall mount holes
3 White tab
3. Rotate the bracket clockwise until the metal angled cuts on the back of the bracket hook over the
edge of the ceiling rail and the white tabs click in place.
Note
There are two white tabs in the back of the bracket that holds on to the ceiling rail in place.
Use your finger to push and unhook one side of the white tab if you want to remove the
accessory from the ceiling rail.
4. Attach the Ethernet port cap to the access point Ethernet port.
5. Align the red dot on the back of the access point against the red dot on the bracket.
Note
The bracket has a center circular tip that fits into the circular dip on the back of the access
point.
Install the Access Point on a Standard Ceiling Install the Access Point
14 ExtremeWireless™ Indoor Access Point AP4000

 Loading...
