Page | 7
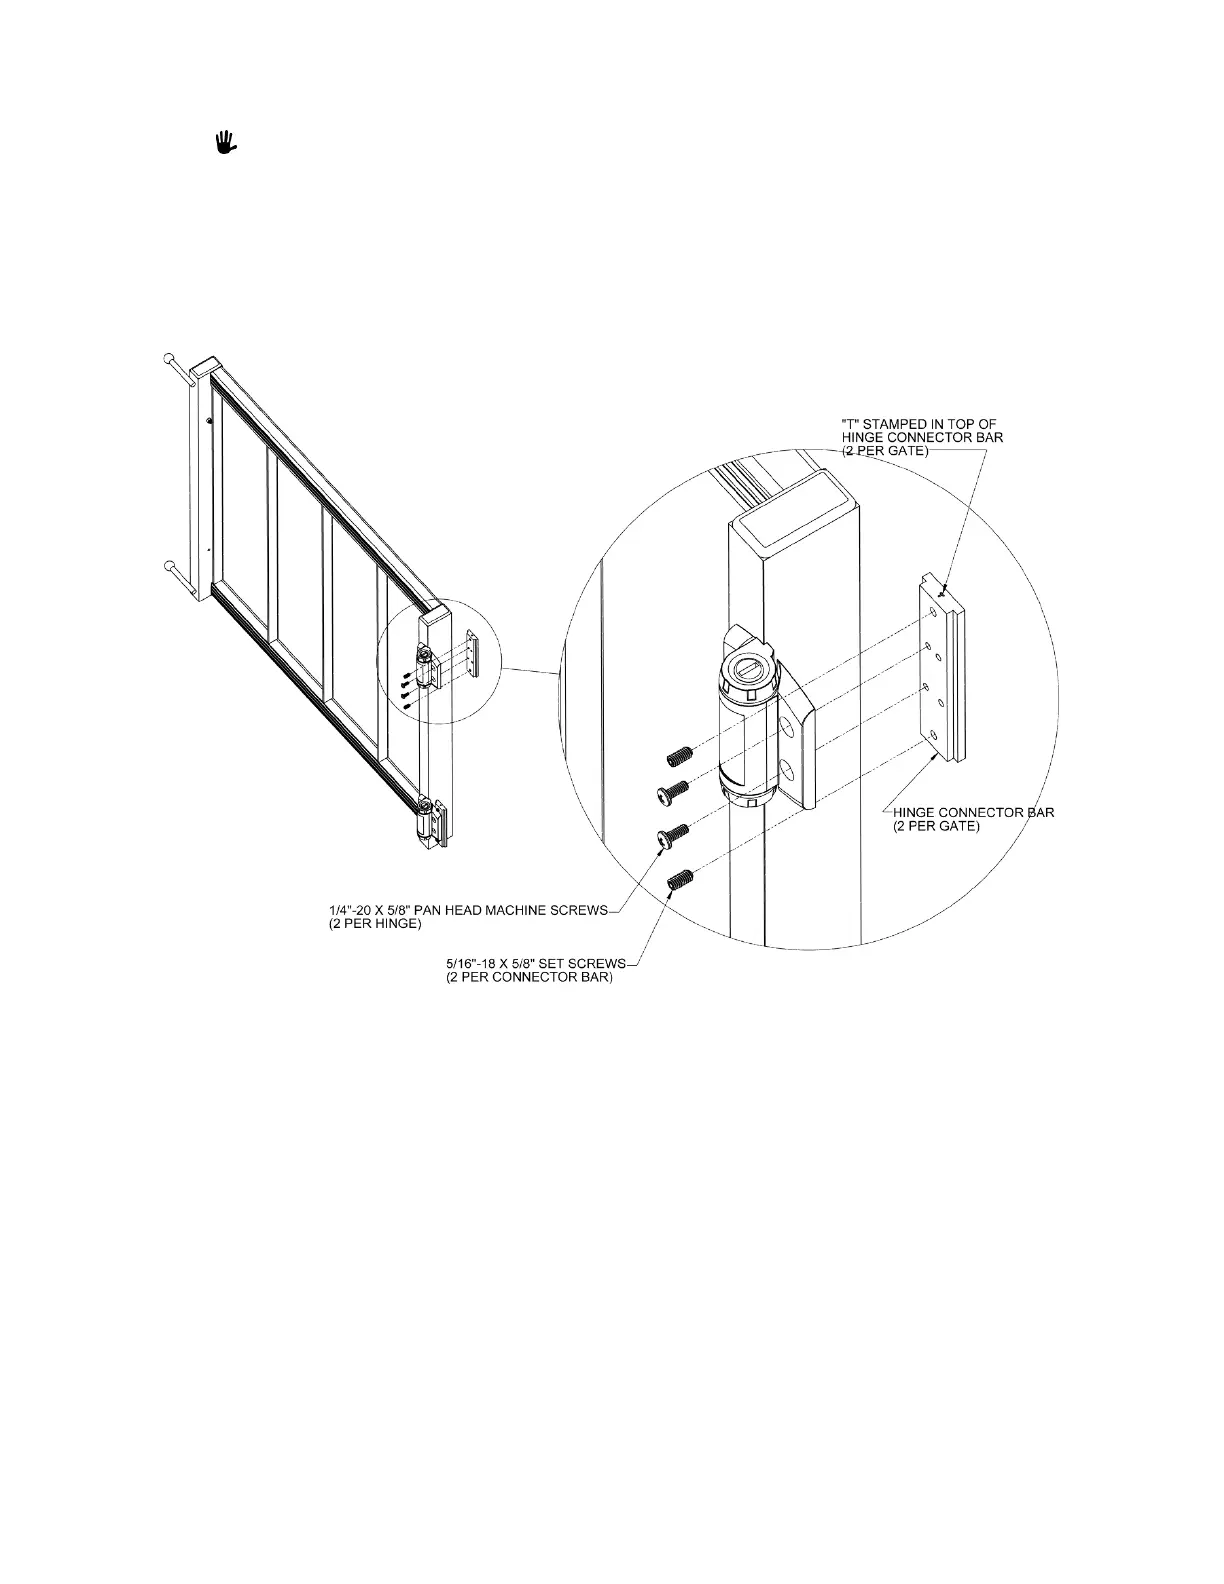
7.2 Attach the replacement hinge connector bars to the replacement hinges using two
1/4”-20 x 5/8” pan head machine screws in the two tapped holes closest to the Top Landing
Gate when the hinge connector bars and hinges are oriented as shown (FIG. 4).
There are four tapped holes for hinge mounting in the hinge connector bar but only the two
closest to the Top Landing Gate are used (depending on which side of the Top Landing
Gate the hinges are mounted). The hinge connector bars MUST be installed with the “T”
stamped end of the hinge connector bar on top.
7.3 Insert the 5/16”-18 x 5/8” set screws (included in hinge replacement kit) into the upper and
lower tapped holes in each hinge connector bar but do not thread all the way through (FIG. 4).
FIG. 4
 Loading...