EasyManuals Logo

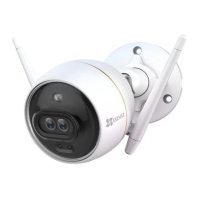
Ezviz C3X User Manual

Ezviz C3X
13 pages
To Next Page IconTo Next Page
To Previous Page IconTo Previous Page
Page #12 background imageLoading...
Page #12 background image
10
2 Install the Camera
The camera can be mounted on the wall or ceiling. Here we take
wall mounting as an example.
Recommended installation height: 3 m (10 ft).
Make sure the wall/ceiling is strong enough to withstand three times
the weight of the camera.
Avoid positioning the camera in an area that gets a lot of light shining
directly into the camera lens.
- Place the drill template onto the surface you have chosen to mount the
camera.
- (For cement wall/ceiling only) Drill screw holes according to the template,
and insert three anchors.
- Use three metal screws to x the camera according to the template.
Drill Template
Anchors Metal Screws
Please tear up the drill template after installing the base if needed.
Questions and Answers:

Question and Answer IconNeed help?

Do you have a question about the Ezviz C3X and is the answer not in the manual?

Ezviz C3X Specifications

General IconGeneral
TypeIP security camera
Day/night modeYes
Placement supportedIndoor & outdoor
Connectivity technology-
Form factorDome
Mounting typeCeiling/wall
Product colorWhite
International Protection (IP) codeIP67
Minimum illumination- lx
Number of lenses2
Total megapixels- MP
Maximum resolution1920 x 1080 pixels
Supported video modes1080p
Video formats supportedH.265
Supported graphics resolutions1920 x 1080 (HD 1080)
Number of cameras1

Related product manuals