XKP W 3 532110 - Rev.A
Ch4
Ch2 Ch3Ch1
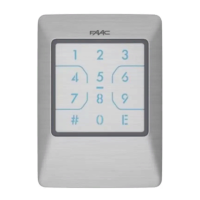
LED
verde/rosso
green/red
vert/rouge
rot/grün
rojo/verde
rood/groen
2. INSTALLATION
!
The surface on which it is to be installed must
be flat and smooth. The IP sealing gaskets
must be present and intact, in the base
(1) and in the body (3).
1. Insert the batteries. Insert the batteries the
correct way round and follow the instructions
in 1.
- The XKP W lights up for 1 s and then goes into
standby: The signalling LEDs and backlighting
are off.
2. Assemble the body and base temporarily.
3. The XKP W has to be stored on the radio receiver:
- On a new system, the XKP W has to teach the radio
code to the receiver SLH (§ 3.8).
- If the XKP W is added to an existing system, the
XKP W must learn the radio code from a SLH trans-
mitter that has already been programmed (§ 3.9).
4. If you wish to change the Easy/Advanced operat-
ing mode, carry out the procedure indicated in §
3.12 before storing the user codes.
5. The user codes must be stored on the required
radio channels (§ 3.1).
6. Carry out any optional programming such as
button E (§ 3.6) and the Slave XKP W (§ 3.10).
- We recommend that you change the PWD (§ 3.4).
7. Check that all the user codes work correctly on
all the enabled radio channels. Check that the E
button is working properly, if enabled.
8. Install the base. Follow the instructions in2.
9. Secure the body to the base (3). Use fasten-
ers suitable for the material to which it is to be
attached and keep to the screw dimensions
indicated in the figure for wood / brick / masonry
(A) or metal (B).
10. Fully tighten the screws in order to compress the
IP sealing gaskets.
11. Secure the cover (4).
Note Always press one button at a time (if 2
buttons are pressed at the same time, neither is
recognised). The timeout between the pressing
of buttons is 5 s. Each time a button is pressed,
the XKP W issues a short acoustic signal and the
backlighting turns off momentarily.
Key to Symbols
LED off
LED on
Flashing
Fast flashing
Time
Beep
Signal on XKP W
OK 1 0.5 s (green)
ERROR 5 5
(red)
TIMEOUT
waiting for operation
60 s (red)
STANDBY
(green and red)
 Loading...