Do you have a question about the Fagor FI-200W L and is the answer not in the manual?
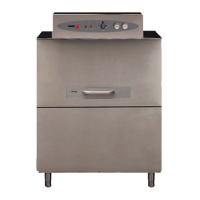
This document outlines the service manual for Fagor Rack Conveyor Dishwashers, models FI-200W L and FI-200W R, published in April 2009.
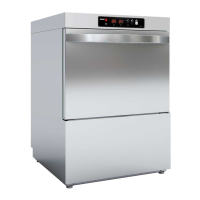
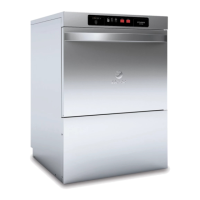
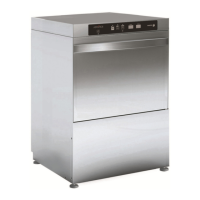
The Fagor Rack Conveyor Dishwasher is designed for high-capacity commercial dishwashing operations. It utilizes a conveyor system to move racks of dishes through various washing and rinsing stages, ensuring efficient and thorough cleaning. The machine is equipped with automatic detergent and chemical sanitizer feeders, allowing for precise dispensing based on the washing cycle. It also features a table limit switch for safety, which stops the machine if a jam or obstruction occurs at the exit table.
Capacities:
Water Consumption / Requirements:
Wash Pump Motor:
Temperatures:
Heating Elements:
Venting Requirements:
Dimensions / Shipping:
Total Power Consumption (208/60/3):
Boiler Power Consumption (208/60/3):
Pump Power Consumption (208/60/3):
Installation: The dishwasher requires proper installation, including leveling, water supply connections, drainage, and electrical connections. Water installation involves connecting to a hot water line that must provide between 20-40 psi pressure. The hot water heater should deliver water at ≥140°F (≥ 60°C) temperature. A water conditioner must be installed if water hardness exceeds 2 grains or 10°F and PH is beyond the range of 7.0 – 8.5. Electrical connection requires a circuit breaker in accordance with consumption guidelines and data plate. The machine must be properly grounded.
Operation: The dishwasher is operated via a selector dial (1) and a pilot light (2). The pilot light indicates the machine's status, including the filling and heating of the rinse and wash water. The appliance displays temperatures for both rinse and wash. The motor has 2 advance speeds (CMV1 and CMV2 relay) that can be activated independently or simultaneously. The selector dial allows for different washing intensities:
Preparing the Crockery: Before loading, remove large pieces of food from dishes. Wash glassware first. Put plates in the baskets, ensuring each is in its separate rack. Put glasses in an upside-down position. Put cutlery in the cutlery baskets handles down. Spoons, knives, and forks can be mixed. Put special cutlery baskets in the base baskets.
General Maintenance: Regular wiping of the outside surface with a soft, damp sponge or cloth and mild detergent is essential for maintaining the good looks of the dishwasher. Check the rinse aid and detergent dispenser from time to time and refill when necessary. Check and clean the injectors frequently, as shown in figures 14, 15, and 16.
Washing and Rinsing Injectors: Clean the washing and rinsing injectors regularly. Clean the tub appropriately with a water jet, removing all residues that are stuck to it. Clean the racks daily.
Re-assembly: When re-assembling the device, ensure the short side of curtains faces towards the dishes entrance. The nozzles should be aimed towards the dishes. Keep the door open to avoid bad smells forming.
Prolonged Disuse: If the machine is not used for a long time, it is advisable to start the machine with clean water while it is empty to avoid unpleasant smells forming and dirt accumulating.
Troubleshooting: The manual provides a comprehensive troubleshooting guide, listing common symptoms, possible causes, and recommended actions. For example:
Clutch Adjustment: If it is necessary to adjust the clutch, follow these steps:
Dispensers: Detergent and rinse aid dispensers are not supplied with the machine. These are necessary for a correct final wash and rinse. The connections between the detergent doser, the rinse doser, and the safety end switch with the binding clamp should be done as shown in figure 7.
Table Limit Switch (Safety End Switch): This safety switch is to avoid rack jam at exit table if it is required. See figure 7 for electric connection.
| Brand | Fagor |
|---|---|
| Model | FI-200W L |
| Category | Dishwasher |
| Language | English |