Flame Sensor
Ports
Slots
SECTION 4 - CLEANING and MAINTENANCE
All surfaces are easier to clean if spillage is removed
before it becomes burnt on and if unit is cleaned daily.
Stainless Steel Surfaces
These surfaces should be cleaned with hot water and
detergent then dried and polished with a soft cloth.
Cleanin g agent s contai ning bleac h , abras i v es or
caustic chemicals will damage or stain the stainless
steel surfaces and must not be used.
Vitreous Enamel Surfaces
Approved cleaning agents which have the mark of the
Vitreous Enamel Development Centre are
recommended.
It is advisable to clean daily after use. Wipe clean the
vitreous enamel surfaces while they are still warm
using a soft cloth and hot soapy water. Badly stained,
removable parts should be soaked in hot water with
an approved detergent. If the parts are not removable
from the unit the application of warm water with
approved detergent using nylon or scotch cleaning
pads will give good results.
Solid Top
The hob fillings can be lifted off the range for cleaning
with warm soapy water, only using abrasives such as
nylon cleaning pads for extreme overspill. Remove
all accumulated debris which may be gathered in the
burner tray and the ledge which supports the fillings.
Warning
Since the fillings are very heavy, care should be taken
when handling them.
Open Top
Remove pan supports and burner head from unit.
Wash all parts with hot soapy water. After washing,
dry all parts well and ensure all water is removed from
inside the burner head. Wipe out hob area and drip
trays before replacing all parts in reverse order.
Ensure that all burner parts are located correctly.
Oven
To Clean The Oven
Clean while oven is warm but not hot. The enamelled
base plate lifts out. The runners can be removed,
(grip at the bottom, lift upwards until the lower ends
come out of the brackets, pull outward towards centre
of oven, then lower). Two oven drip trays are provided
and these are simply removed without disturbing
burner, by sliding them out from the front.
CLEANING INSTRUCTIONS for
OPEN TOP BURNERS
The following instructions should be followed when :
a) A spillage has occurred on the burner.
b) The burner fails to light or stay alight.
c) At the end of each day or cooking period.
Caution
Parts may be hot therefore protection to avoid burns
should be used.
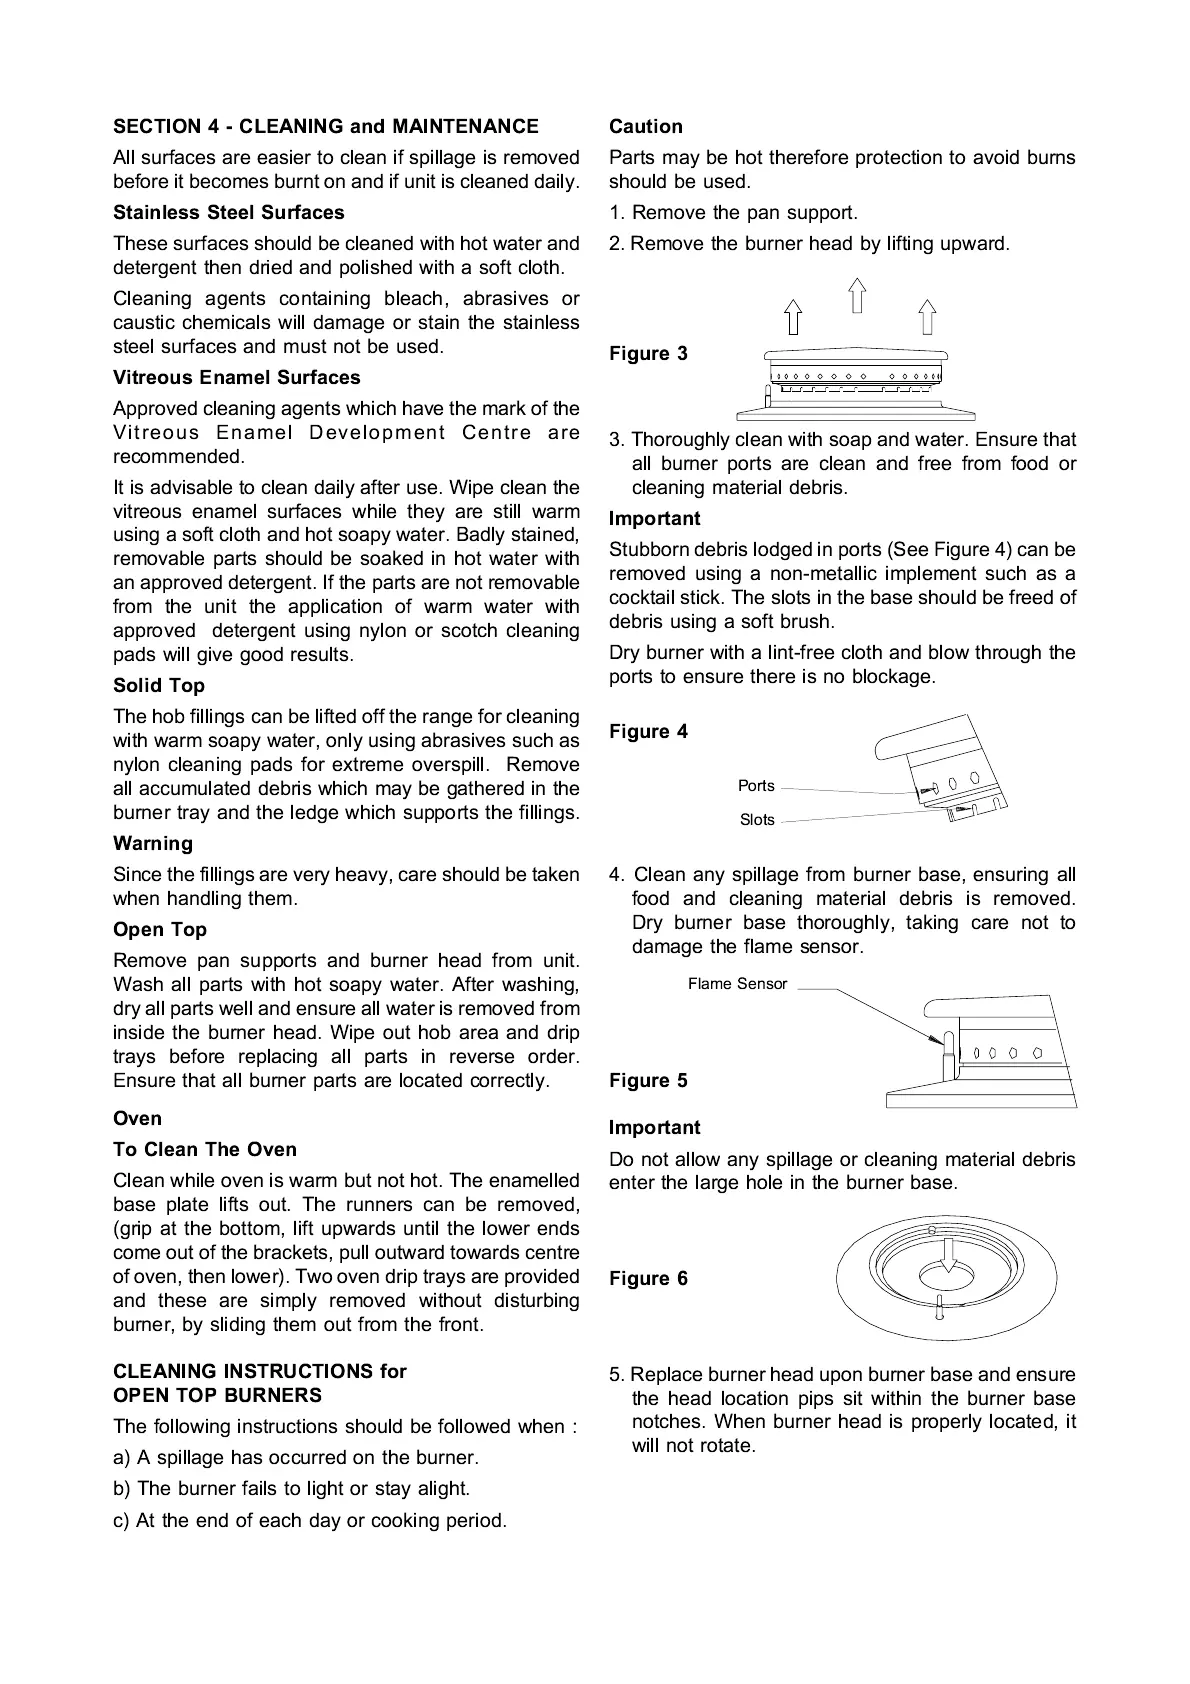
1. Remove the pan support.
2. Remove the burner head by lifting upward.
Figure 3
3. Thoroughly clean with soap and water. Ensure that
all burner ports are clean and free from food or
cleaning material debris.
Important
Stubborn debris lodged in ports (See Figure 4) can be
removed using a non-metallic implement such as a
cocktail stick. The slots in the base should be freed of
debris using a soft brush.
Dry burner with a lint-free cloth and blow through the
ports to ensure there is no blockage.
Figure 4
4. Clean any spillage from burner base, ensuring all
food and cleaning material debris is removed.
Dry burner base thoroughly, taking care not to
damage the flame sensor.
Figure 5
Important
Do not allow any spillage or cleaning material debris
enter the large hole in the burner base.
Figure 6
5. Replace burner head upon burner base and ensure
the head location pips sit within the burner base
notches. When burner head is properly located, it
will not rotate.
 Loading...