54
T-Series Service Manual
STEP 5
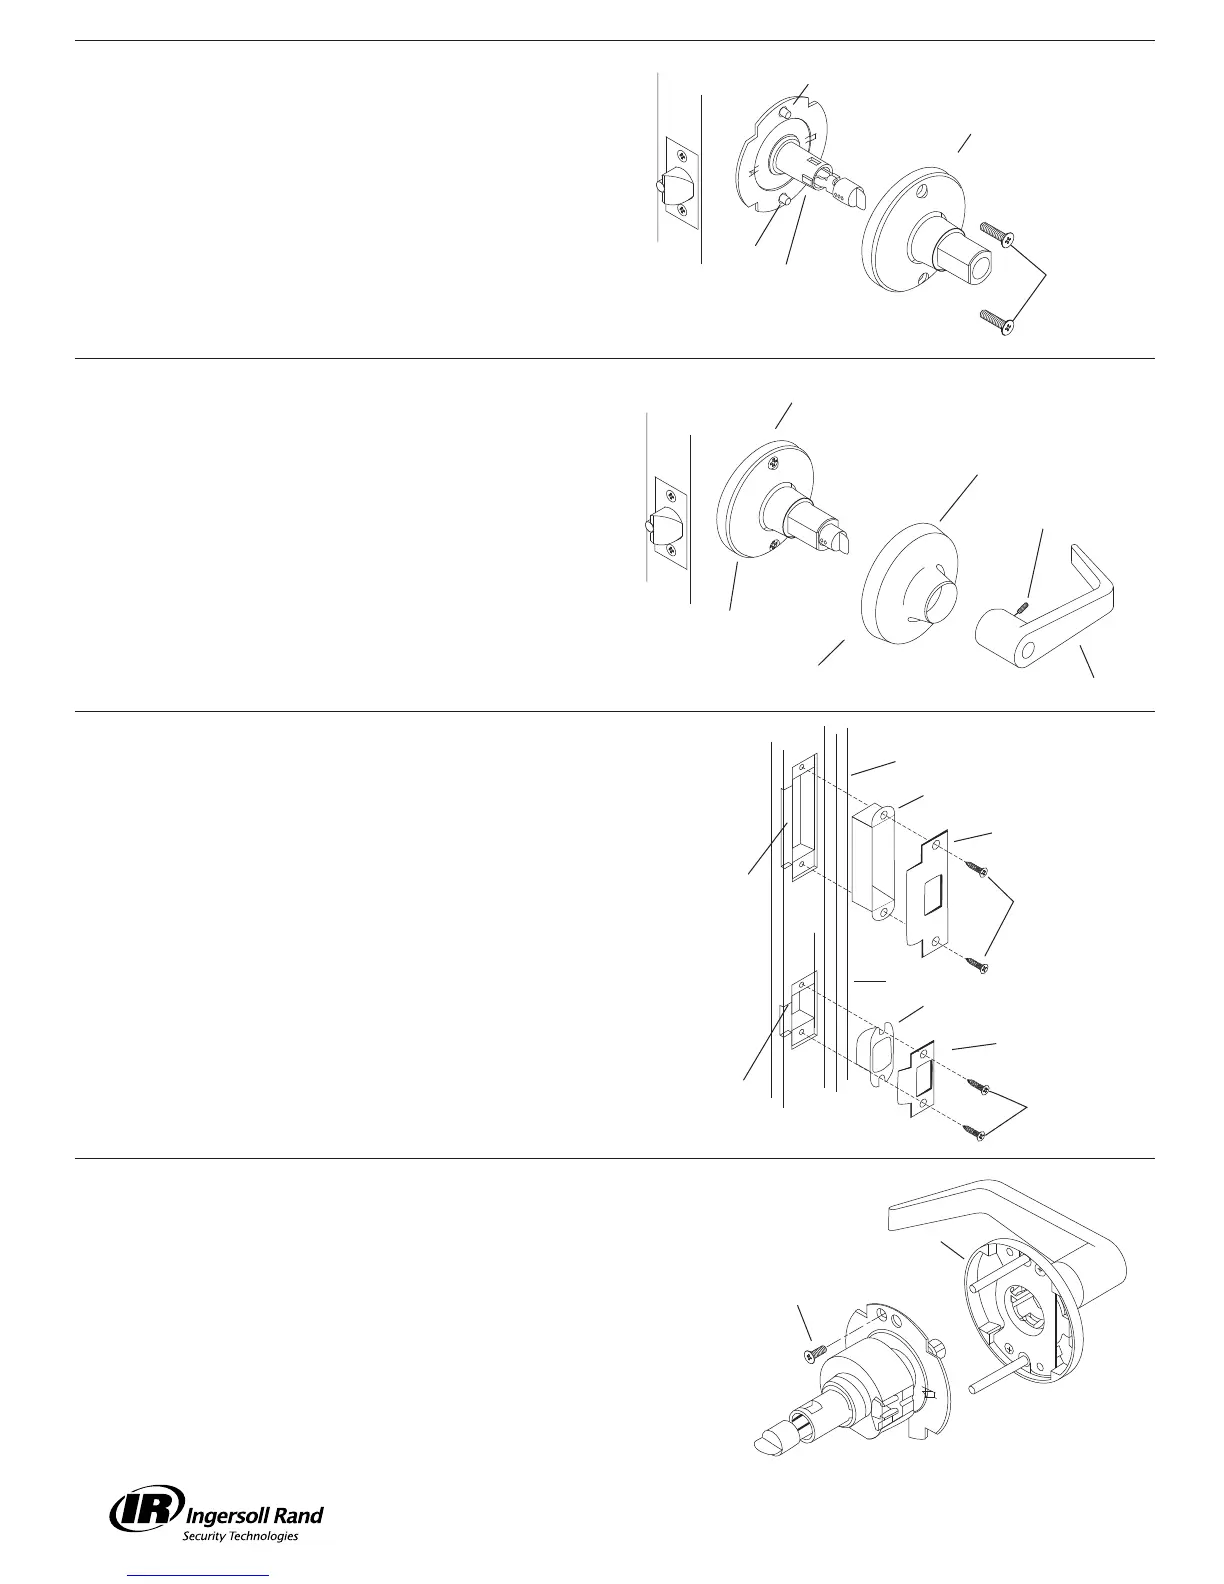
INSTALL INNER TRIM ASSEMBLY
Slide inner trim assembly over chassis spindle. Thru-posts will
engage inner trim asembly on 17N" (45mm) thick doors.
Secure to door with two #10-32 x 1" machine screws provided.
STEP 6
INSTALL INNER LEVER
A. Position rose over inner trim assembly making sure rose
detent engages groove in spindle assembly.
B. Install lever handle and tighten set screw with hex key
provided.
Stop! Test operation to be sure latch bolt moves freely. Do not force.
If lockset does not operate properly, remove lockset from door and
check door preparation and door thickness adjustment. See Step 4
to re-install chassis.
STEP 7
LOCATE AND INSTALL STRIKE
A. For wood jambs center strike latch opening over 1" (25mm)
hole in jamb. Trace outline around the strike on door jamb.
B. Mortise door jamb to accommodate strike box and strike.
C. Insert strike box if required and fasten strike to jamb with
combination screws provided.
Caution: Deadlocking plunger of latch bolt must not enter
opening in strike plate.
Note: When strike box is not used, recess in jamb must be
a minimum of 7RF" (14mm) deep to allow latch bolt to extend
to its full projection.
STEP 8
A. Remove the outside trim retaining screw (A).
B. Slide the outside trim (B) from the chassis assembly.
C. See Step 9 for chassis adjustment procedure,
or Step 10 for spacer installation.
D. Slide the outside trim (B) onto the chassis.
E. Replace the outside trim retaining screw (A).
INSTRUCTIONS FOR REMOVING OUTSIDE TRIM
Thru Post
Inner Trim Asssembly
Mounting Screws
#10-32 x 1"
Thru Post
Chassis Spindle
Groove
Rose Detent
67N-20 x 67N"
Set Screw
Inner Trim Assembly
Rose
Inner Lever
Jamb
ANSI Dust Box
ANSI Strike
#12 Combination Screw
Mortise for
dust box
and strike
Jamb
Dust Box
T-Strike
#8 Combination
Screw
Mortise for
dust box
and strike
A
B
 Loading...