How to fix too dry air with Fantech Fan?
- KKaren MurraySep 6, 2025
If your Fantech Fan air is too dry, increase the desired level of humidity. Also, change the ventilation mode from continuous mode to standby.
How to fix too dry air with Fantech Fan?
If your Fantech Fan air is too dry, increase the desired level of humidity. Also, change the ventilation mode from continuous mode to standby.
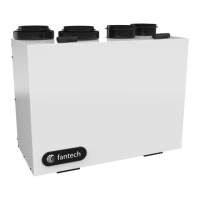
Why is the air from my Fantech VHR 704 Fan too dry?
The air from your Fantech Fan may be too dry if the dehumidistat control is set too low or the HRV is out of balance. You can increase the desired level of humidity and change the ventilation mode from continuous to standby. It is also recommended to have a contractor balance the HRV airflows.
What to do if the air is too humid with my Fantech VHR 704?
To address air that's too humid, try reducing the humidity level setting and use continuous exchange mode on your Fantech Fan. Also, ensure your dryer vent exhausts outside, store wood for heating outdoors, and open curtains or blinds to improve air circulation. If you have a well-sealed basement door, open it or install a grill. If the issue persists, a contractor should check the defrost damper, as a failed damper system might be stuck in recirculation mode, or balance HRV airflows.
How to improve poor air flows in my Fantech VHR 704 Fan?
To improve poor air flows with your Fantech Fan, begin by cleaning the exterior hoods or vents and removing and cleaning the filter and core. Ensure indoor grilles are open and not blocked. Have an electrician check the power supply voltage. Check the duct installation and increase the HRV speed. If the issue persists, have a contractor balance HRV airflows or reconnect ducting.
How to stop persistent condensation on window with my Fantech VHR 704?
To fix persistent condensation on your window when using a Fantech Fan, reduce the humidity level and use continuous exchange mode. Open curtains or blinds to improve air circulation. If the problem continues, have a contractor balance the HRV.
Why does supply air feel cold from my Fantech VHR 704?
If the supply air from your Fantech Fan feels cold, reposition the supply grilles high on the walls or under the baseboards, and install ceiling-mounted diffusers to avoid direct airflow on occupants. Reduce the HRV supply speed. If supply air is ducted into the furnace return, run the furnace fan continuously. Also, ensure furniture or closed doors aren't restricting air movement.
Why is my Fantech Fan air too humid?
Several factors can cause your Fantech Fan to produce air that is too humid. First, reduce the desired level of humidity if the dehumidistat control is set too high and combine this with the use of continuous exchange mode. If there has been a sudden change in temperature, wait until the outside temperature stabilizes. Ensure that you store a majority of your wood outside. Check that the dryer vent is exhausting outside and that there is good air circulation near windows (open curtains or blinds). If you have a well-sealed basement door, open it or install a grill on the door. Finally, a failed damper system may be stuck in recirculation mode, so have a contractor verify the damper system.
What to do if Fantech VHR 704 has persistent condensation on window?
If you notice persistent condensation on your window when using the Fantech Fan, it could be due to a few reasons. Try reducing the desired level of humidity, combining this step with the use of continuous exchange mode. Also, ensure good air circulation near windows by opening curtains or blinds. If the issue continues, have a contractor balance the HRV.
How to stop condensation on window with Fantech VHR 704?
If you notice persistent condensation on the window when using your Fantech Fan, try reducing the desired humidity level and use continuous exchange mode. If the problem continues, have a contractor balance the HRV. Additionally, ensure good air circulation near the windows by opening curtains or blinds.
What to do if Fantech VHR 704 has poor air flows?
If you're experiencing poor air flows with your Fantech Fan, start by checking and cleaning the exterior hoods or vents if they're plugged with debris. Also, remove and clean the filter, inspect and clean the core, and make sure that indoor grilles are open and unblocked. If these steps don't resolve the issue, have an electrician check the power supply voltage, check the duct installation, increase the speed of the HRV, or have a contractor balance the HRV airflows or reconnect any ducting that has fallen down or been disconnected from the HRV.
Explains the working principle of HRVs, focusing on heat transfer and air exchange.
Explains how to interpret the alphanumeric codes used in Fantech HRV model numbers.
Describes the differences between 4-port and 5-port HRV models.
Discusses humidity control and condensation issues during the winter months.
Discusses temperature and humidity adjustments suitable for spring conditions.
Discusses humidity control and ventilation strategies for the summer months.
Discusses humidity control and condensation in fall due to temperature changes.
Describes continuous airflow operation for consistent air exchange.
Describes standby and intermittent operation modes, often activated by remote controls.
Describes defrost and recirculation for 5-port models using a damper system.
Describes the defrost mechanism for 4-port models using fan shutdown.
Descriptions of various remote control units for humidity and timer functions.
Details of the EDF5 control panel functions including digital display and cycle control.
Detailed cleaning and replacement procedures for filters and the heat recovery core.
Notes on fan, unit interior, drain lines, and outside hoods requiring periodic checks.
Solutions for common air dryness and humidity issues experienced with HRVs.
Solutions for window condensation and poor airflow problems.
Solutions for HRV/duct frosting and ice build-up in insulated ducts.
Explains the meaning of LED indicator lights on the control board.
Lists required maintenance tasks and provides space for recording maintenance dates.
Summarizes the best limited warranty terms for the HRV's core and components.
Crucial safety and preparatory information before installing the HRV unit.
Lists the specific SHR and VHR models covered in this installation manual.
Demonstrates airflow calculation based on house volume and air changes per hour.
Provides an alternative method for calculating airflow requirements room by room.
Physical measurements and airflow illustration for various SHR HRV models.
Performance curves, apparent sensible effectiveness, and power usage for SHR models.
Physical measurements and airflow illustration for various VHR HRV models.
Performance curves, apparent sensible effectiveness, and power usage for VHR models.
Guidance on choosing the optimal installation space for the HRV unit.
Steps for physically mounting the HRV unit securely and ensuring it is level.
Instructions for setting up the condensate drain system, including a P-trap.
Criteria for placing intake and exhaust exterior hoods for optimal performance.
Procedures for connecting flexible ducts to weatherhoods and installing hoods.
Best practices for duct layout and connecting interior ducts to the HRV unit.
Guidance on positioning interior air supply and exhaust grilles for effective air distribution.
Specifics for ducting units equipped with a fifth port for defrost or recirculation modes.
Illustrates a complete dedicated installation setup for new construction.
Shows connecting the HRV supply air to the furnace cold air return.
Diagram for a simplified installation using dual return connections to the furnace.
Diagram for a simplified installation using supply and return connections to the furnace.
Explains the self-diagnostic process and speed selection on unit start-up.
Explains the importance and purpose of balancing airflow for optimal HRV performance.
How to adjust the integrated damper for precise airflow control and balancing.
Details the method for measuring airflow velocity using a station or grid.
Details on various EDF control units and their functions for operation and monitoring.
Details on MDEH and RTS timer controls and their capabilities for humidity and timed operation.
Diagram showing internal wiring and connections to accessory controls within the HRV.
Mentions specific controls and polarity considerations for proper wiring.
Detailed diagram of internal wiring and component connections within the HRV unit.
Guidance on linking the HRV to furnace systems for integrated operation.
Wiring diagrams for standard and alternative furnace control connections.
Lists required maintenance tasks and provides space for recording maintenance dates.
Outlines the warranty coverage, limitations, and conditions for the HRV system.