- 18 -
Mi 2513/2
Timings
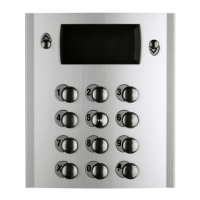
In this section it is possible to program the timings of all the
actuations of the system. By pressing you enter the pro-
gramming procedure, whilst pressing key you return to the
previous menu. Parameters that can be programmed are:
- Activation time for S+S-: activation time for the “open door”
circuit (terminals S+ ed S-).
- Activation time for auxiliary relè: activation time for the
auxiliary relay (terminals C, NC ed NO).
With arrows or select the parameter to be programmed
and conrm with the key. key backwards you to the pre-
vious menu.
Activation time for S+S-
By pressing you enter the programming mode, while
key backwards you to the previous menu. Entering the menu,
the rst line of LCD shows “Enter time”, while on the bottom
of the second line the activation time currently stored is report-
ed (1 sec. from factory). With erase the old value and then,
enter the new one (max. 9 sec.) and then conrm by pressing
, display will show briey “saved” after that the system re-
turns to the previous menu.
Attivation time for the auxiliary relay
By pressing you enter the programming mode, while
key backwards you to the previous menu. Entering the menu,
the rst line of LCD shows “Enter time”, while on the bottom
of the second line the activation time currently stored is report-
ed (1 sec. from factory). With key erase the old value and
then, enter the new one (max. 98 sec.; entering the value 99
the auxiliary relay will act as bi-stable device) and then conrm
by pressing , display will briey show “saved” after which
the system returns to the previous menu.
Administrator Password
From the factory the administrator password is 0039, but it can
be changed with a new one chosen by the installer or the instal-
lation manager. Pressing you enter the programming mode
and at the end of the second line of the LCD the current admin-
istrator password is reported (0039 from factory), erase the old
one using the key and then enter the new password, press
to conrm, display will briey show “saved” after which the
system returns to the previous menu.
Attention: write down and keep the administrator pass-
word in a safety place, without the administrator password it is
impossibile to program the device.
Miscellaneous
In this section of the menu it is possible to program the general
parameters of the system which are:
- key to send a call
- Conversation time
- External camera (TLC)
- Welcome message
- LCD contrast
- FW version
With or arrows select the parameter to be set and conrm
with . key backwards you to the previous menu.
key to send a call
It is possible to chose the operating mode for sending a call
which can be:
- manual: after dialing the user address, its alias or after se-
lecting the user name from the directory, it is necessary to
press to send the call;
- automatic: call is automatically sent 3 sec. from when you
have dialed the user address, its alias or you have selected
the user name from the directory, therefore it is not neces-
sary to press to send a call.
By pressing the key you enter the programming mode "
key to send a call” and the rst line of LCD shows:
- key to send call? With arrows or select <YES> or
<NO> and then press ; the system stores your selection
and returns to the previous menu.
Conversation time
This function extends the conversation time from 90 sec. (fac-
tory value) to 4 min. Pressing you enter the programming
mode “Conversation time 4 min.”, while key backwards
you to the previous menu. Entering the programming mode, the
rst line of LCD shows:
- Conv. time 4 min? With arrows or select <YES> or
<NO> and then press to conrm. Choosing <YES> con-
versation time will be extended up to 4 min; it is always pos-
sible to close the conversation at any time by pressing on
the door station or hanging-up the handset on the videoint-
ercom. Choosing <NO> the conversation time remains set to
90 sec., but it is always possible to double the conversation
time pressing, on the door station keypad, the key when
a tone will warn you that the conversation time is going to
expire.
External camera
Enabling this function the door station will manage an exter-
nal additional camera besides the one present on the device.
When a video door phone sends the "monitoring" commands,
the door station switches from the two cameras and on the vid-
eo door phone you get alternatively the two related images. By
pressing you enter the programming mode “External cam-
era” and the rst line of LCD shows:
- External TLC? With arrows or select <YES> or <NO>
and then press to conrm; the system stores your selec-
tion and returns to the previous menu.
Welcome message
During standard operations, on the LCD of the door station a
welcome message, reporting short info on how to call a user,
is displayed. It is composed of two pages (2 lines for 20 char-
acters each) that can be customized and which would alternate
each 6 seconds. Pressing you enter the programming mode
“Message programming”, whilst key backwards you to the
previous menu. The programming section is composed of two
parts:
- Message 1
- Message 2
With arrows or select which of the two massages you
wish to modify, then press to conrm. LCD shows a blanked
display on which it is possible to write a message using the key-
pad of the door station as described in the paragraph “How to
use the keypad". After entering the new message, press to
store. Proceed in the same way, if required, to enter the second
message.
Attention: it is sufcient to program only one of the two
messages so that the system considers it as a welcome mes-
sage, in this case the LCD will remain x on it.
LCD Contrast
It is possible to adjust the LCD contrast; pressing you enter
the “LCD contrast” menu and the rst line of LCD shows:
- LCD contrast: with or arrows, increase or decrease
the contrast value, as indicated on the display, and press
to conrm, system stores the entered value and returns to
the previous menu.
Firmware version
Pressing LCD will show the rmware version currently pro-
grammed in the device. Pressing the the system returns to
the previous menu.
 Loading...