EasyManua.ls Logo

Farfisa Profilo TD10PLG - User Manual

Farfisa Profilo TD10PLG
23 pages
Print Icon
To Next Page IconTo Next Page
Loading...
- 1 -
Mi 2488
Italiano English
Mi 2488
IT
Modulo pulsantiera digitale serie Profi-
lo per sistema
TD10PLG
Pulsantiera in alluminio serie Profilo con 14 tasti in acciaio e
display LCD. La pulsantiera permette di effettuare chiamate
e conversazioni citofoniche su sistemi di comunicazione con
tecnologia GSM. La chiamata agli interni può avvenire tramite
ricerca del nominativo in rubrica o composizione sulla tastiera
del numero abbinato all'utente.
Dati tecnici
Alimentazione: 12Vca/cc ± 1
Assorbimento a riposo: 0,15A
Assorbimento massimo: 0,25A
Tempo azionamento serratura: 1÷60 secondi
Display LCD: grafico 128x64
Numero di chiamate: 127
Memoria: 250 nominativi
Numero relè: 2
Contatti relè: 12÷24Vca/cc - 1A
Dimensioni: 1 modulo
Temperatura di funzionamento: 0°÷+40°C
Massima umidità ammissibile: 90% RH
123
456
789
0
EN
Digital push-button module series Profilo
for
system
Profilo series aluminum push-button panel with 14 steel
buttons and LCD display. The push-button panel allows
making an intercom call using GSM technology. Call can be
done by searching the user name in the electronic directory
or dialing directly the user number on the keypad.
Technical features
Power supply: 12Vac/dc ± 1
Operating current: 0.15A
Maximum absorption: 0.25A
Door-opening time: from 1 to 60 sec.
LCD display: graphic 128x64
Number of calls: 127
Electronic index: 250 names
Number of relays: 2
Contact ratings: 12÷24Vac/dc - 1A
Dimensions: 1 module
Operating temperature: 0°÷+40°C
Maximum humidity acceptable: 90% RH
Question and Answer IconNeed help?

Do you have a question about the Farfisa Profilo TD10PLG and is the answer not in the manual?

Summary

TD10 PLG Product Overview

Technical Specifications

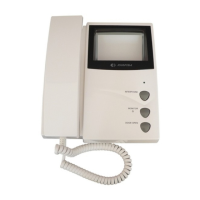
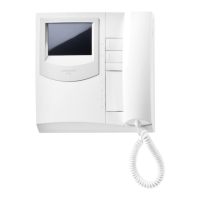
Lists power supply, current, absorption, door-opening time, display, calls, memory, relays, dimensions, temperature, and humidity.

2 Installation Procedures

Mounting the Push-Button Panel

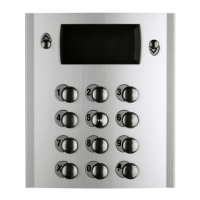
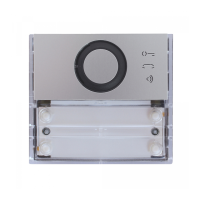
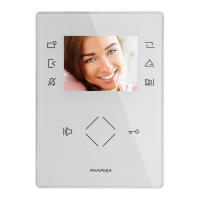
Detailed steps for installing the push-button panel, including fixing frames, modules, antenna, microphone, and back box.

2.1 System Connections and Terminals

GSM Audio Module Connection

Flat cable for connecting the GSM audio module.

PC Programming Port

Stereo jack for programming the unit via a personal computer.

System Connection Terminals

Explains terminal functions for power, inputs, and relays.

2.2 Connection Diagrams

Diagram A: Independent Relay Activation

Shows installation for 2 independent relays activated from the keypad.

Diagram B: Door Release and Gate Control

Diagram for controlling door release and gate from keypad or telephones.

3 Programming the System

Accessing Programming Mode

Procedure to enter the programming mode using the administrator password.

Programming Mode Navigation

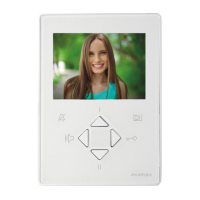
Describes button functions for navigating and confirming within programming menus.

Password Management

Explains how to change user and administrator passwords and reset defaults.

Contact Directory Management

Storing and Managing Contacts

Covers storing, entering, modifying, and deleting user contacts and addresses.

Entering New User Details

Step-by-step guide for adding a new user's name and address.

Contact Entry Button Functions

Explains the function of buttons during the contact entry process.

User Contact Operations

Editing, Deleting, and Sorting Contacts

Covers modifying user details, alias, deleting users, setting sort order, and deleting all contacts.

Loading Contacts from PC

Instructions for loading contact names directly from a personal computer.

System Configuration Settings

Language Selection

Procedure to select the preferred system display language.

P1 and P2 Button Addressing

How to assign addresses to P1 and P2 buttons for relay activation or direct calls.

Timing Adjustments

Modifying display durations for calls and relay activation times.

Advanced Panel Settings

Relay 2 Duration

Setting the activation time for Relay 2.

Display Mask and LCD Settings

Customizing the idle display text and adjusting LCD backlight and contrast.

Miscellaneous Functions

Options for enabling 'X' key, extending passwords, and managing keypad tones.

System Reset and Recovery

Factory Default Restore

Restores keypad settings to factory defaults, excluding directory and passwords.

Software Version Information

Displays the current software version of the keyboard.

Administrator Password Reset

Procedure to reset the administrator password to default (0039).

4 System Operation

Making Intercom Calls

Steps to dial a number or select a username to initiate an intercom call.

Activating Relays

Procedure to activate the system's relays using predefined passwords.

Warranty Information

Purchase and Dealer Details

Fields for purchase date, serial number, and dealer stamp/signature.

Farfisa Profilo TD10PLG Specifications

General IconGeneral
BrandFarfisa
ModelProfilo TD10PLG
CategoryIntercom System
LanguageEnglish

Related product manuals