Operation - RT17, RT19 Tedder
25
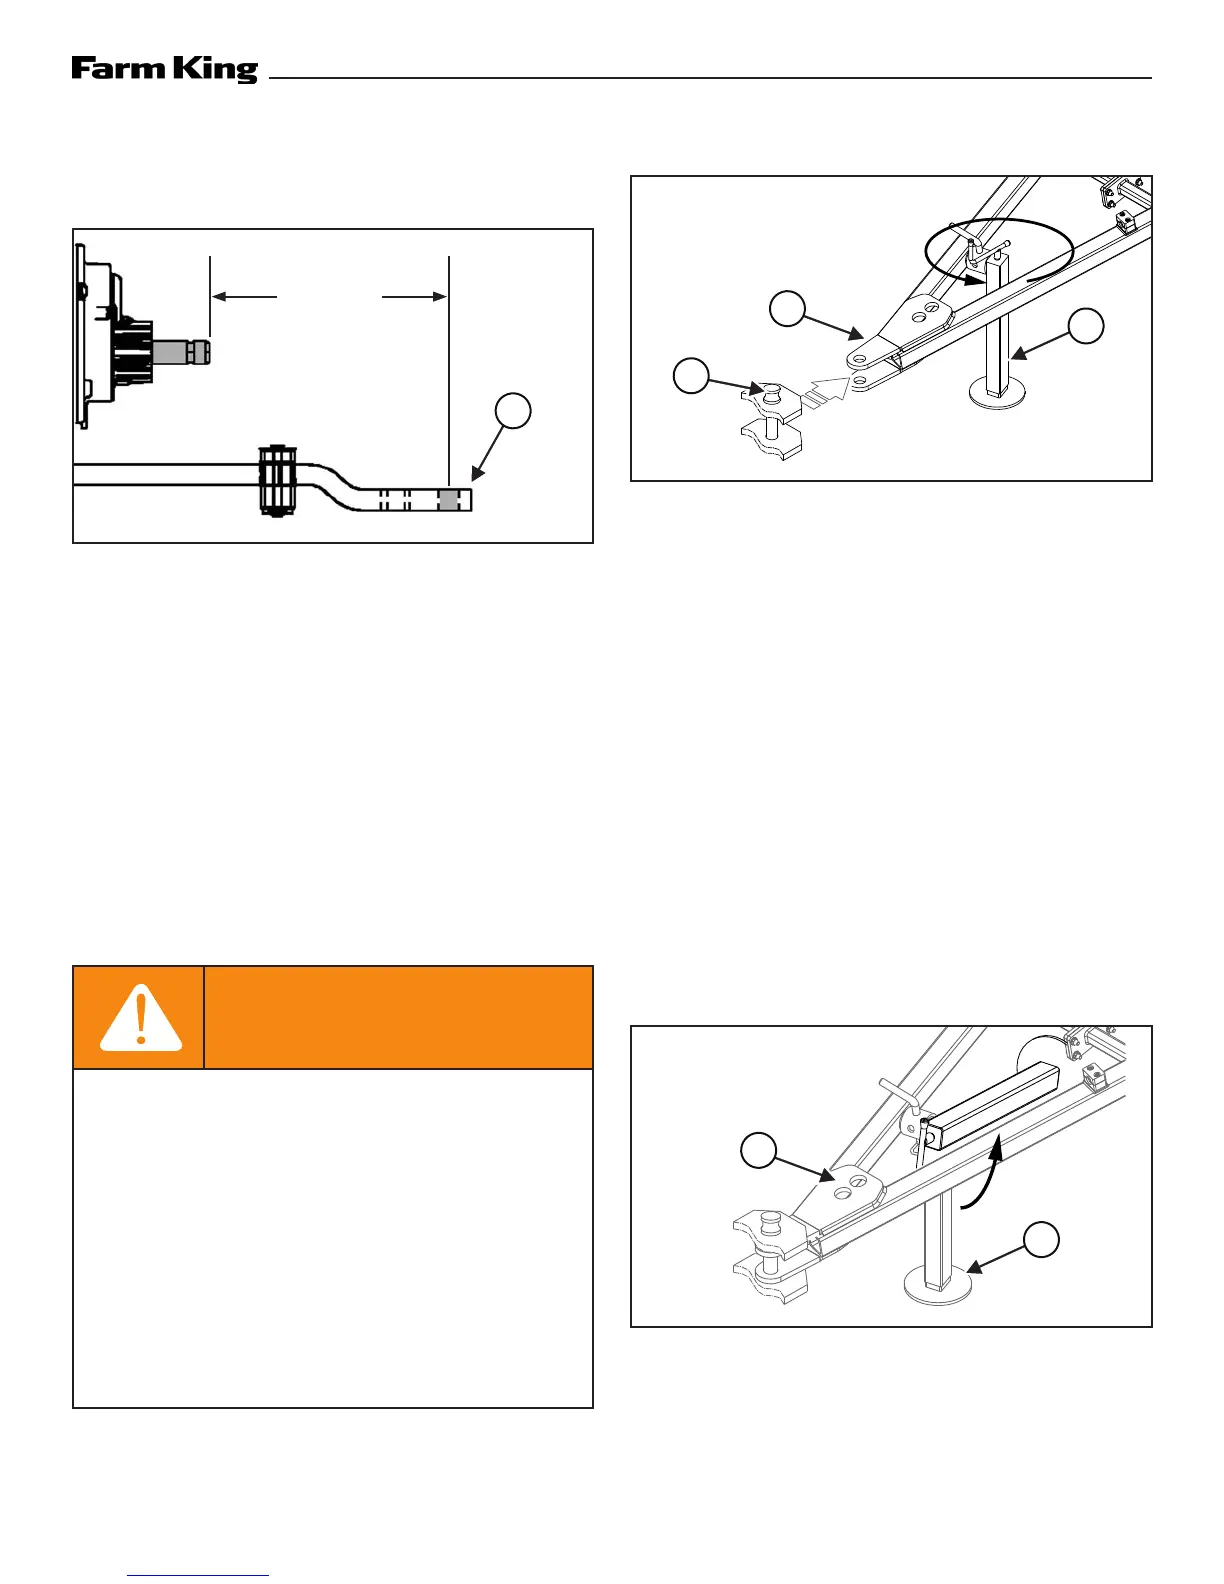
Pull Type Hitch
Figure 3
Adjust the tractor’s drawbar in / out, until the center
of the hitch pin hole (Item 1) is 16 inches (410 mm)
from the end of the tractor’s PTO shaft. See your
tractor’s owner’s manual for correct adjustment
procedures [Figure 3].
Always inspect the tractor’s hitch and equipment
hitch before connecting. See the tractor’s owner’s
manual.
Enter the operator’s position (See “Entering The
Operator’s Position” in Operation section).
Move the tractor into position in front of the
equipment.
WARNING
AVOID INJURY OR DEATH
Before moving the tractor, look in all directions
and make sure no bystanders, especially small
children are in the work area.
Do not allow anyone between the tractor
and the equipment when backing up to the
equipment for connecting.
Keep fingers and hands out of pinch points
when connecting and disconnecting
equipment.
Figure 4
Move the tractor backwards, aligning the drawbar
with the equipment hitch (Item 1). Lower or raise
the support jack (Item 2) to properly align the
drawbar and hitch [Figure 4].
Move the tractor backwards, aligning pin holes
with the equipment hitch pin holes.
Leave the operator’s position (See “Leaving The
Operator’s Position” in Operation section).
Install the hitch pin (Item 3) [Figure 4] and retaining
pin to securely fasten the equipment hitch to the
tractor drawbar.
Note: Always use a hitch pin of adequate size and
strength and a retaining pin with a locking
device.
Figure 5
Raise the support jack (Item 1). Rotate and secure
the support jack in the storage position. Connect
the safety chain to the holes (Item 2) on the hitch
[Figure 5].
1
16 in.
410 mm)
3
2
1
1
2