601 Old Airport Road • Bristol, VA 24201 Phone (276) 669-4084 • FAX (276) 669-1869 • www.federalpacific.com • ISO9001:2015
SECTION IB-2A-210
INSTALLATION & OPERATION INSTRUCTIONS
TYPE PSE PAD-MOUNTED SWITCHGEAR
NOVEMBER 2017, REV 4.2
PAGE 4
Auto-Latch Door
Active Door (“Auto-Latch Door”)
The type PSE pad-mounted switchgear incorporates an active
door, which includes an automatic three-point latching system for
enclosure security. The features and operation of the auto-latch
active door are discussed below. See Figure 4a.
Passive Door
The passive door is overlapped by the active door, ensuring that
the auto-latch mechanism must first be released before accessing
the passive door. Once so accessed, the passive door is released
by raising the latch bracket from its engaged (latched) position.
See Figure 4b.
Features of the Auto-Jet Mechanism on the Active Door
The automatic door latching feature furnished on the active doors
provides ease in opening and closing of the doors. Features of the
Auto-latch system are:
• Automatic 3-point latching upon door closure (see Figure 4a).
• After opening, the door is automatically set for latching upon
door closure.
• Unlatching is only accomplished by an unrestrained rotation
(approximately 60° in either direction) of the captive pentahead
or hexhead actuator bolt.
• The door padlocking provision prevents unlatching the
mechanism until the padlock has been removed. Padlocking
secures the door to the cabinet enclosure.
• A stainless steel protective cover guards the padlock from
tampering. Also, access to and visibility of, the actuator bolt
is only possible after the padlock has been removed.
Auto-Latch Door Operation
Opening:
1. Remove padlock and raise protective cover exposing security
bolt. See Figure 5.
2. If equipped with the standard pentahead security bolt, use the
standard pentahead socket (or if equipped with an optional
hexhead bolt, use a 3/4” hexhead socket) to rotate the captive
actuator bolt head approximately 60° in either direction until the
latching mechanism has tripped, releasing the door. Do not use
power tools to operate the security bolt. See Figure 6.
3. Open the active door. Open the passive door by simultaneously
pushing on it and pulling up on the latch bracket. See Figure 4b.
Secure the doors with the doorkeepers.
Closing:
1. Replace or release door keeper and close and secure latch bracket
onto passive door. Then, release and replace door keeper and
secure the active door by firmly and briskly pushing it closed.
Mechanism will automatically latch.
2. Install padlock through protective cover tab and enclosure tab.
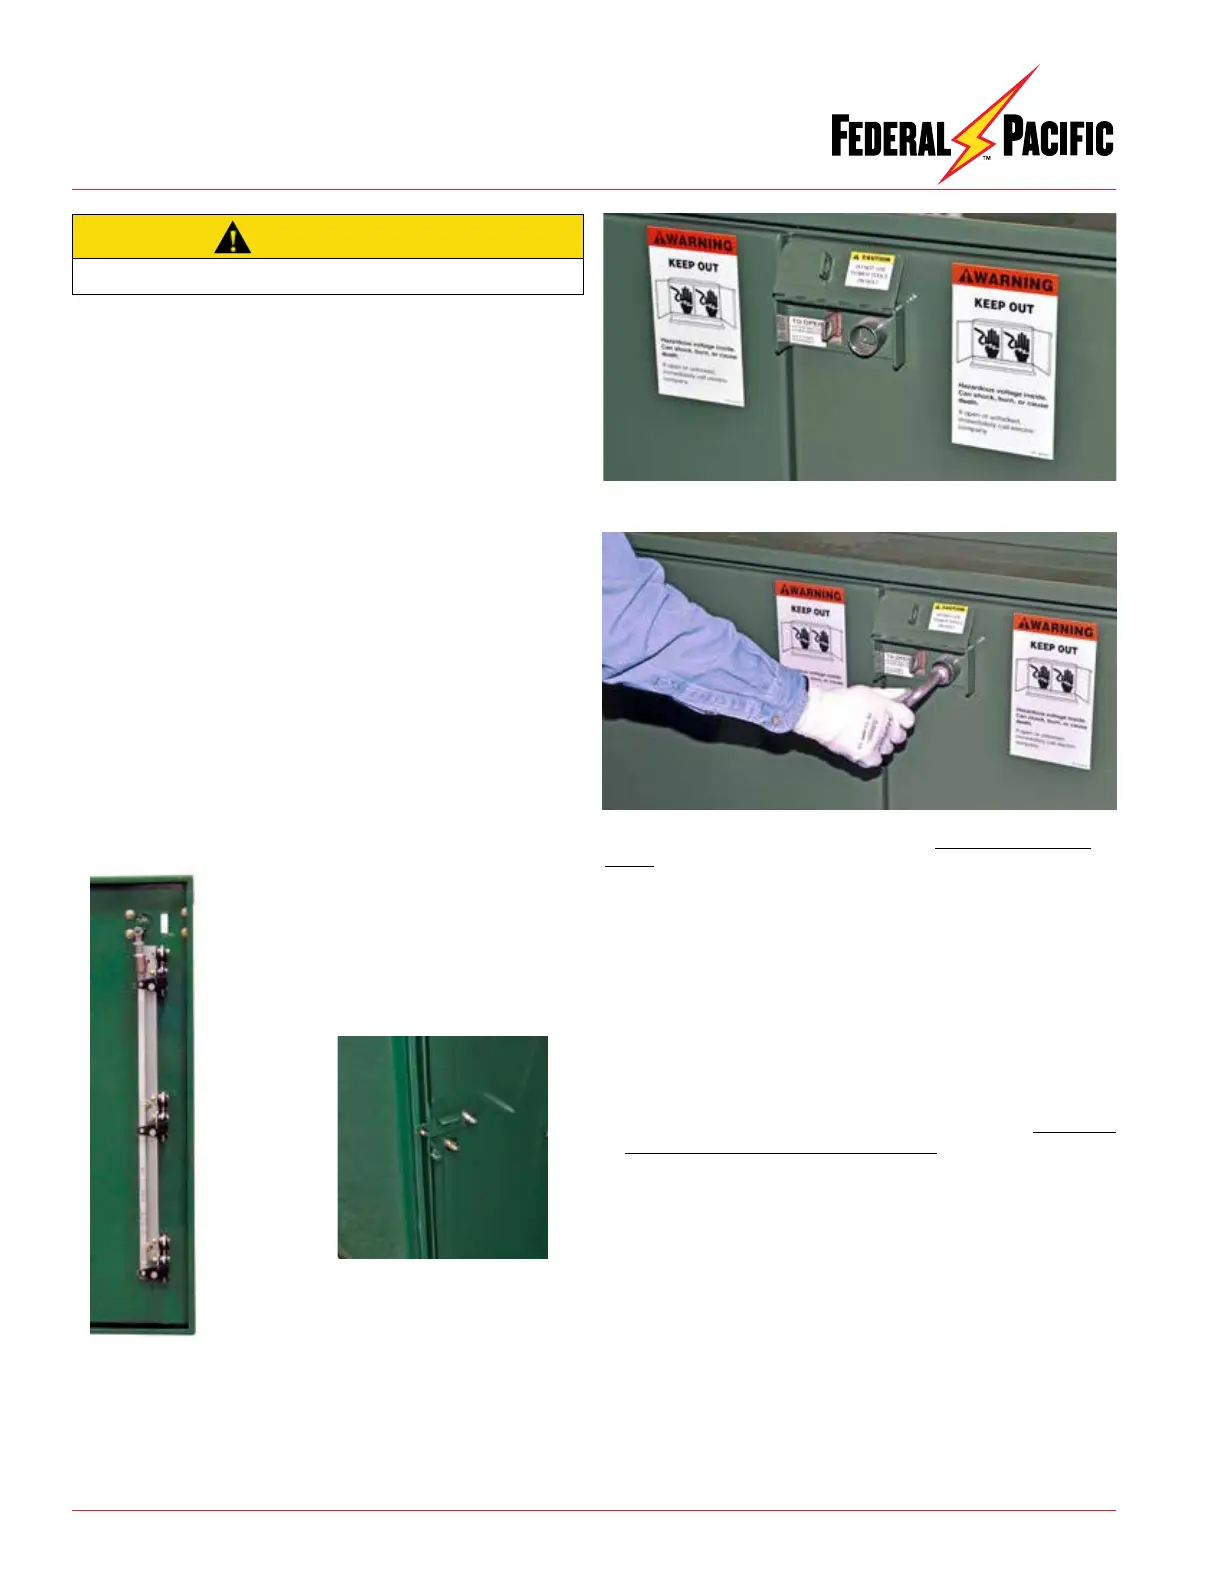
Figure 5. Raise cover to access security bolt. Review and understand
the “CAUTION” label on the underside of the cover.
Figure 6. Use a manual wrench with pentahead or hexhead socket as
applicable. As explained on the caution label, DO NOT USE POWER
TOOLS. Rotate the security bolt clockwise or counter-clockwise to
release three-point latch and charge for subsequent door closing. Do
not use power tools to operate the security bolt.
Figure 4a. Auto-latch mechanism with
3-point latching on door closure.
Figure 4b. Release passive
door by simultaneously
pushing on it and raising the
latch bracket.
CAUTION
Do not use power tools to operate the security bolt.