14
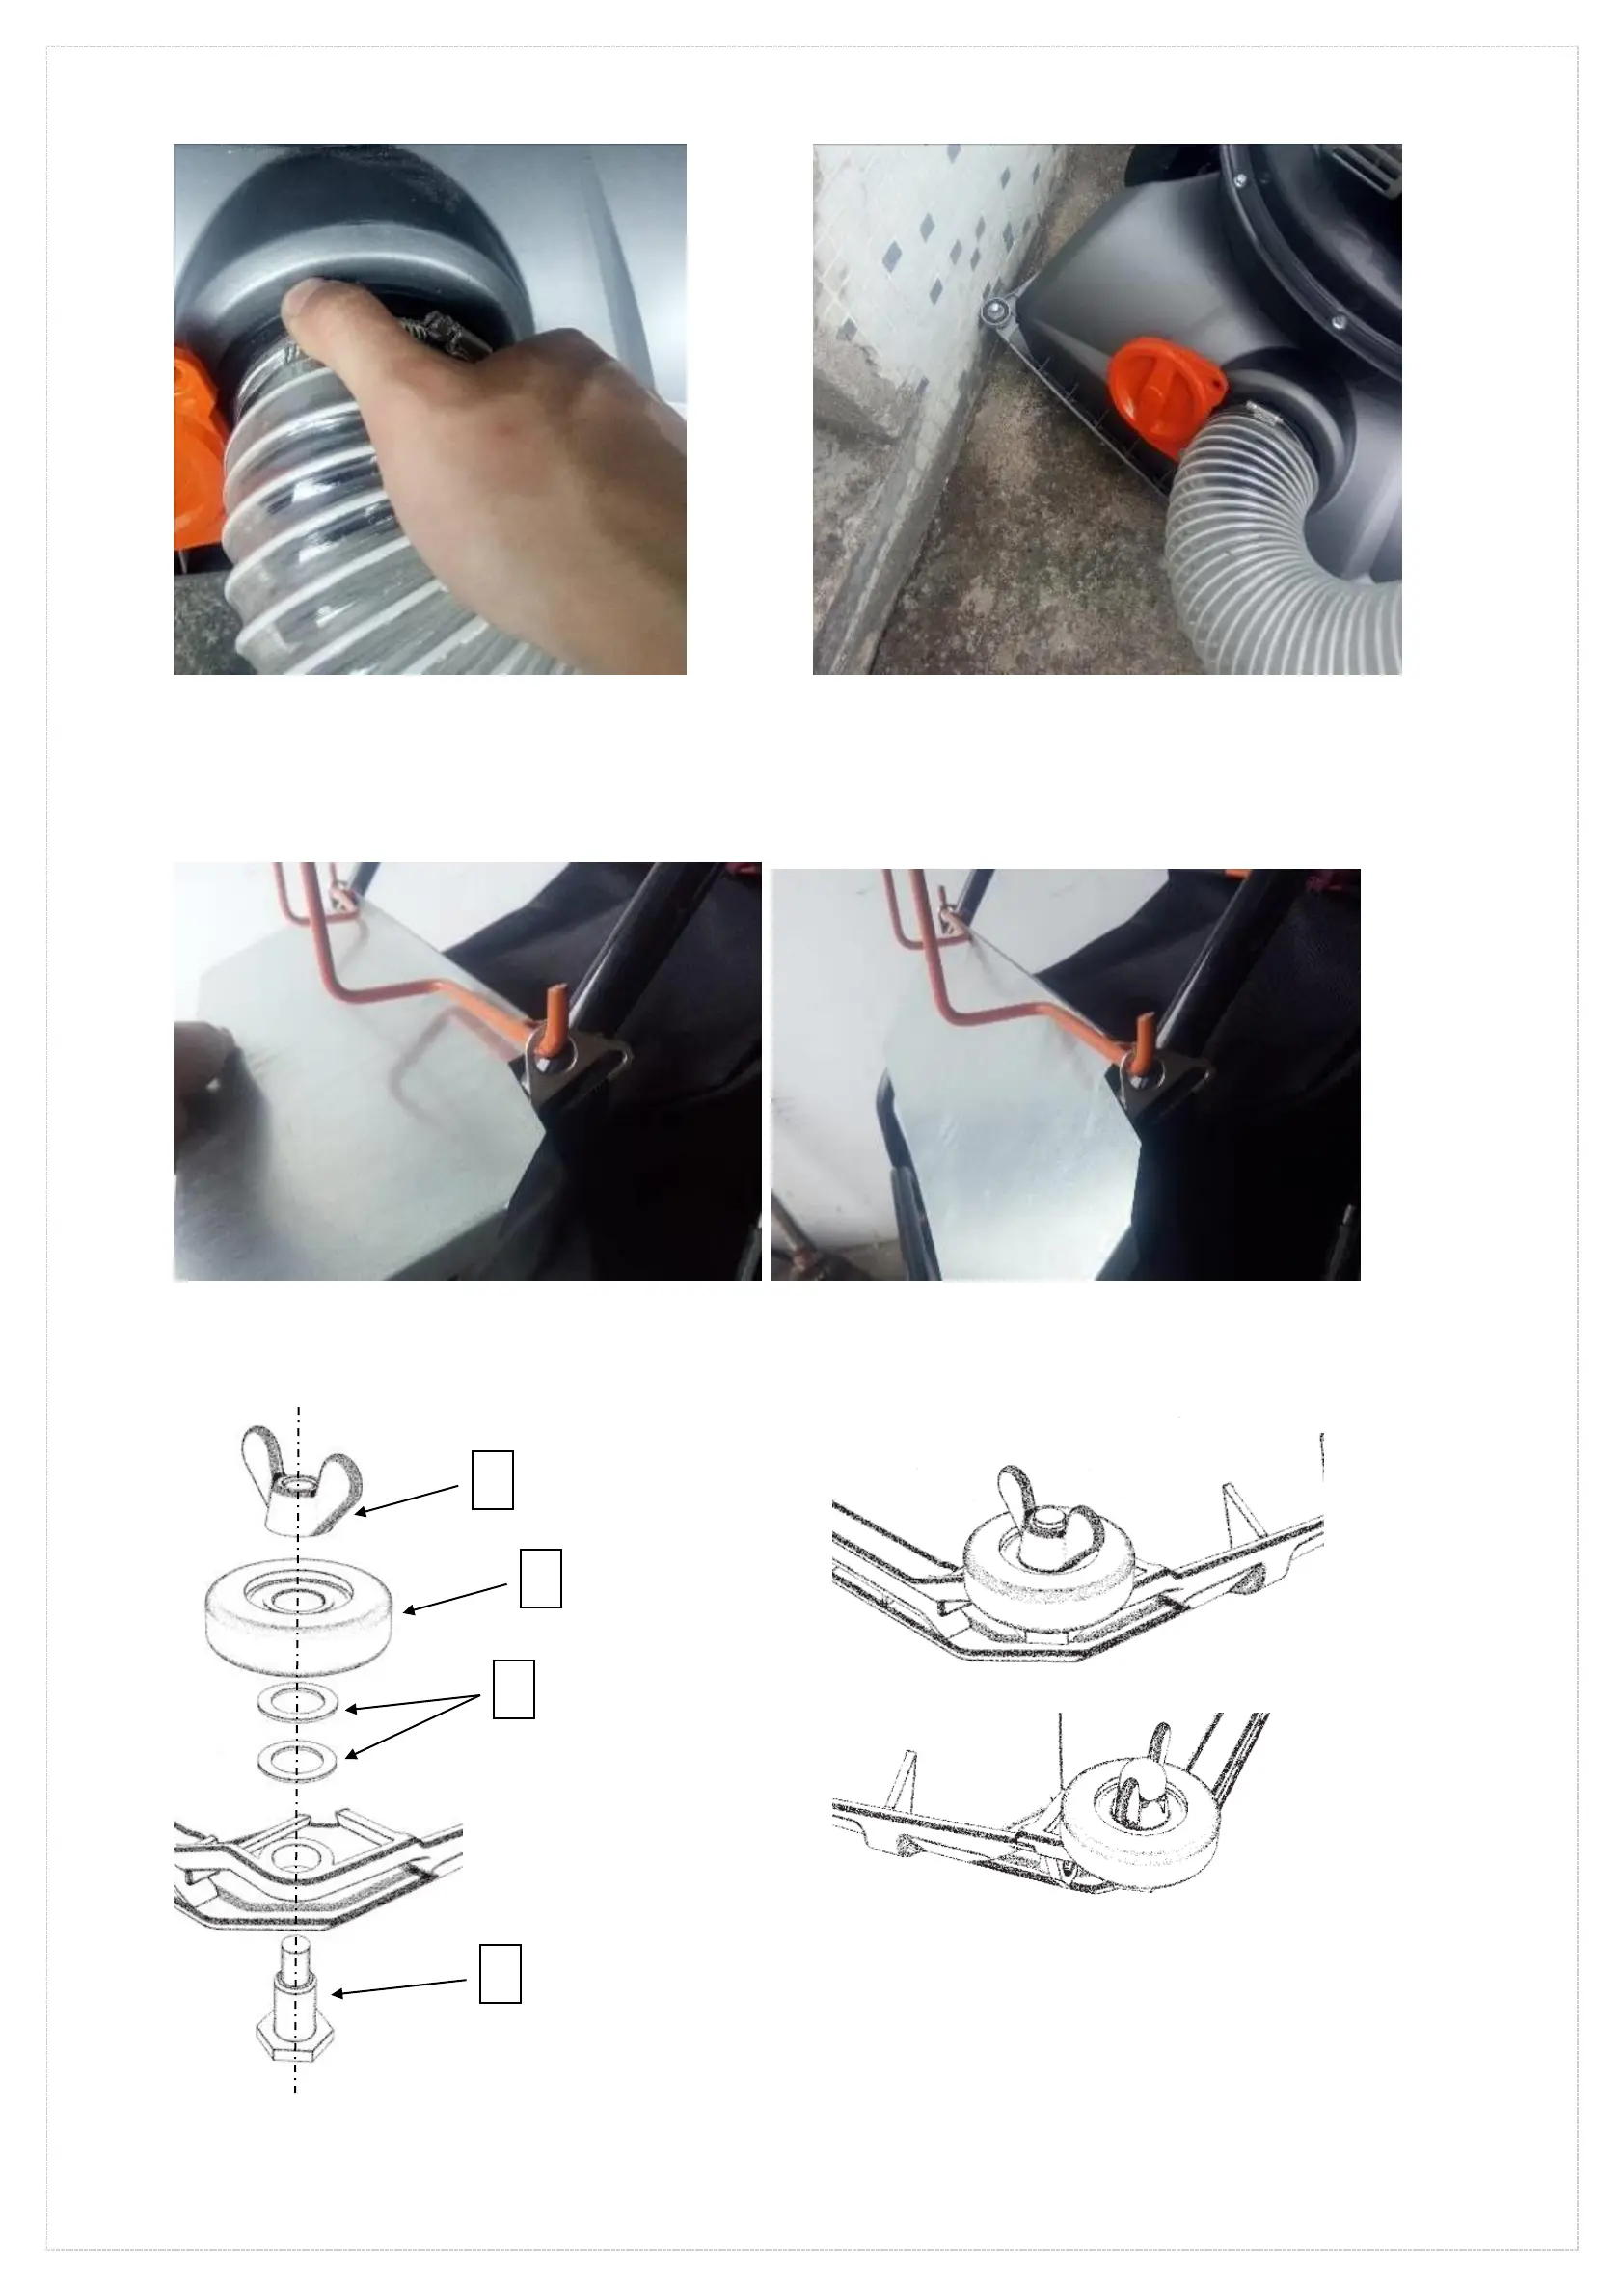
Fig.12-3 Screw the interface Fig.12-4 Complete the installation diagram
△Assembly step 8)Placement of the suction port baffle—Barbs the baffle on the hose fixing bracket。
●Note: This is where the baffle is placed when the hose is not being used for suction.
Fig.13-1 Hanging baffle Fig.13-2 Installation completion diagram
△Assembly step 9)pulley assembly—Assemble the pulley according to the instructions in the diagram and tighten the nut.
Fig.b-1
Fig.b-2 Right pulley installation completion diagram
Fig.b-3 Left pulley installation completion diagram
part 5- Butterfly nut
part 6- pulley
part 7- washer
part 8- fixed bolt