EN
10
4.5 USING THE UPPER SURFACE (Fig. 11)
ATTENTION: It is absolutely forbidden to use the
upper surface for cutting steel and aluminium.
To use the upper surface act as follows:
- Make sure stop knob 51 is disengaged (protruding).
- Lower the blade unit completely and lock it into place
with pivot 19
- Release levers 25 and select the height of the upper
surface, then lock the levers back into place.
4.6 USING THE END-STROKE GUIDE FOR THE
UPPER SURFACE (Fig. 11)
To use, act as follows
- Fit guide 17 in the upper surface.
- Select the cut width by means of the graduated scale.
- Lock guide 37, with lever 17, making sure that the guide
is aligned with the blade.
4.7 CUTTING SMALL PIECES
Working operations with small sized pieces must be carried
out using the special tools.
- On the lower surface: use the clamp to fi t the piece
and the end stroke shafts in order to attain the desired
measure..
- On the upper surface: use the special pushers in order
to move the piece forward (see fi gure of exsmple).
The pusher must be applied to a wooden support (see
Fig. 12).
4.8 INSTALLATION AND/OR REPLACEMENT OF THE
BLADE (Fig.13)
ATTENZIONE: these operations must be carried
out only after having stopped the motor of the
machine releasing the switch 2 and after having
removed the plug from the electric socket.
- Raise up the table up to its maximum height.
- Take the two hexagonal keys 6mm included in the
machine: insert one key in terminal 41 of motor shaft
and the other one in the blade fi xing screw 42. Now
unfasten the screw, paying attention that the thread is
from right to left.
- Take off the external fl ange 43, push the pawl 40 and
at the same time raise up the protection 11 and keep it
high in order to uncover the blade.
- Disassembly the blade taking it off from the inferior part
of the head and assembly the new blade.
- Pay attention through visual control to assembly the
blade with the teeth oriented on the same direction as
indicated from the arrow on the blade.
- Now release the protection 11, assembly again the
external fl ange 43, fasten again the screw 42 and
fasten it properly with the hexagonal keys included in
the machine.
- Pull down the table.
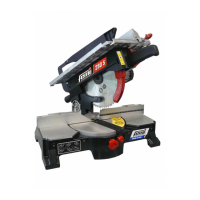
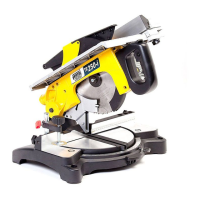
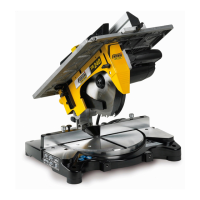
4 OPERATION AND USE
4.1 USING THE MITRE SAW (Fig. 8)
ATTENTION: Make sure that the pushbutton 51 is
released (protruding).
- Bring the upper surface up to the maximum height.
- Firmly fi x the material to be cut to the cutting top..
ATTENTION: when cutting aluminium sections
the use of a clamp is indispensable.
- Start up and wait for the blade to reach max. speed.
- gradually lower the blade unit and cut.
ATTENTION: Pressing on the handgrip stronger
will not reduce cutting time, but may cause
reduced effi ciency due to motor overload.
4.2 BLADE START AND STOP (Fig. 8)
ATTENTION: Check that the mobile protection 11
casings are correctly positioned when the blade
is in its rest position (raised)
The machine is equipped with a release pushbutton which
starts and stops the blade.
The pushbutton can be locked in “ON” position pressing key
51 when switch lever 52 is at the end of its travel and motor
is running (see switch operating instructions)
ATTENTION: The use of this locking device
disables the safety device provided by the
manufacturer and enables pushbutton start. we
advise that this device be used with maximum
care and ONLY when the machine is used as a
circular saw.
To unlock the switch, press the button 51 and release the
52 switch lever.
4.3 USING THE END-STROKE SHAFTS (Fig. 9)
To use the shafts act as follows:
- Insert shaft 26 in the support plate and lock into position
with knob 27.
- Loosen knob 28 and adjust shaft 29 according to the
length of the piece, referring to the ruler marked off in
mm. Lock into position with knob 28.
4.4 USING A CLAMP (Fig. 10) (OPTIONAL)
To use the clamp act as follows:
- position guide shaft 44 locking it with the screw.
- Fit clamp 46 into guide and lock it into place with lever
45.
- Adjust clamp opening by means of lever 45 or knob 47.
 Loading...