BLUEHELIX TECH RRT 24 H
192 EN
cod. 3541C662 - Rev. 00 - 09/2020
• Drain the water from the boiler heating circuit.
• Remove the flue connection (concentric or accessory for separate ducts)
• Remove the fan
• Remove the clips of the two pipes on the exchanger, pump and hydraulic unit
• Remove the 2 top screws “5” securing the exchanger to the frame (fig. 41)
• Loosen the 2 bottom screws “5” securing the exchanger to the frame (fig. 41)
• Remove the exchanger
• Fit the new exchanger on the bottom screws “5”
• For assembly, proceed in reverse order
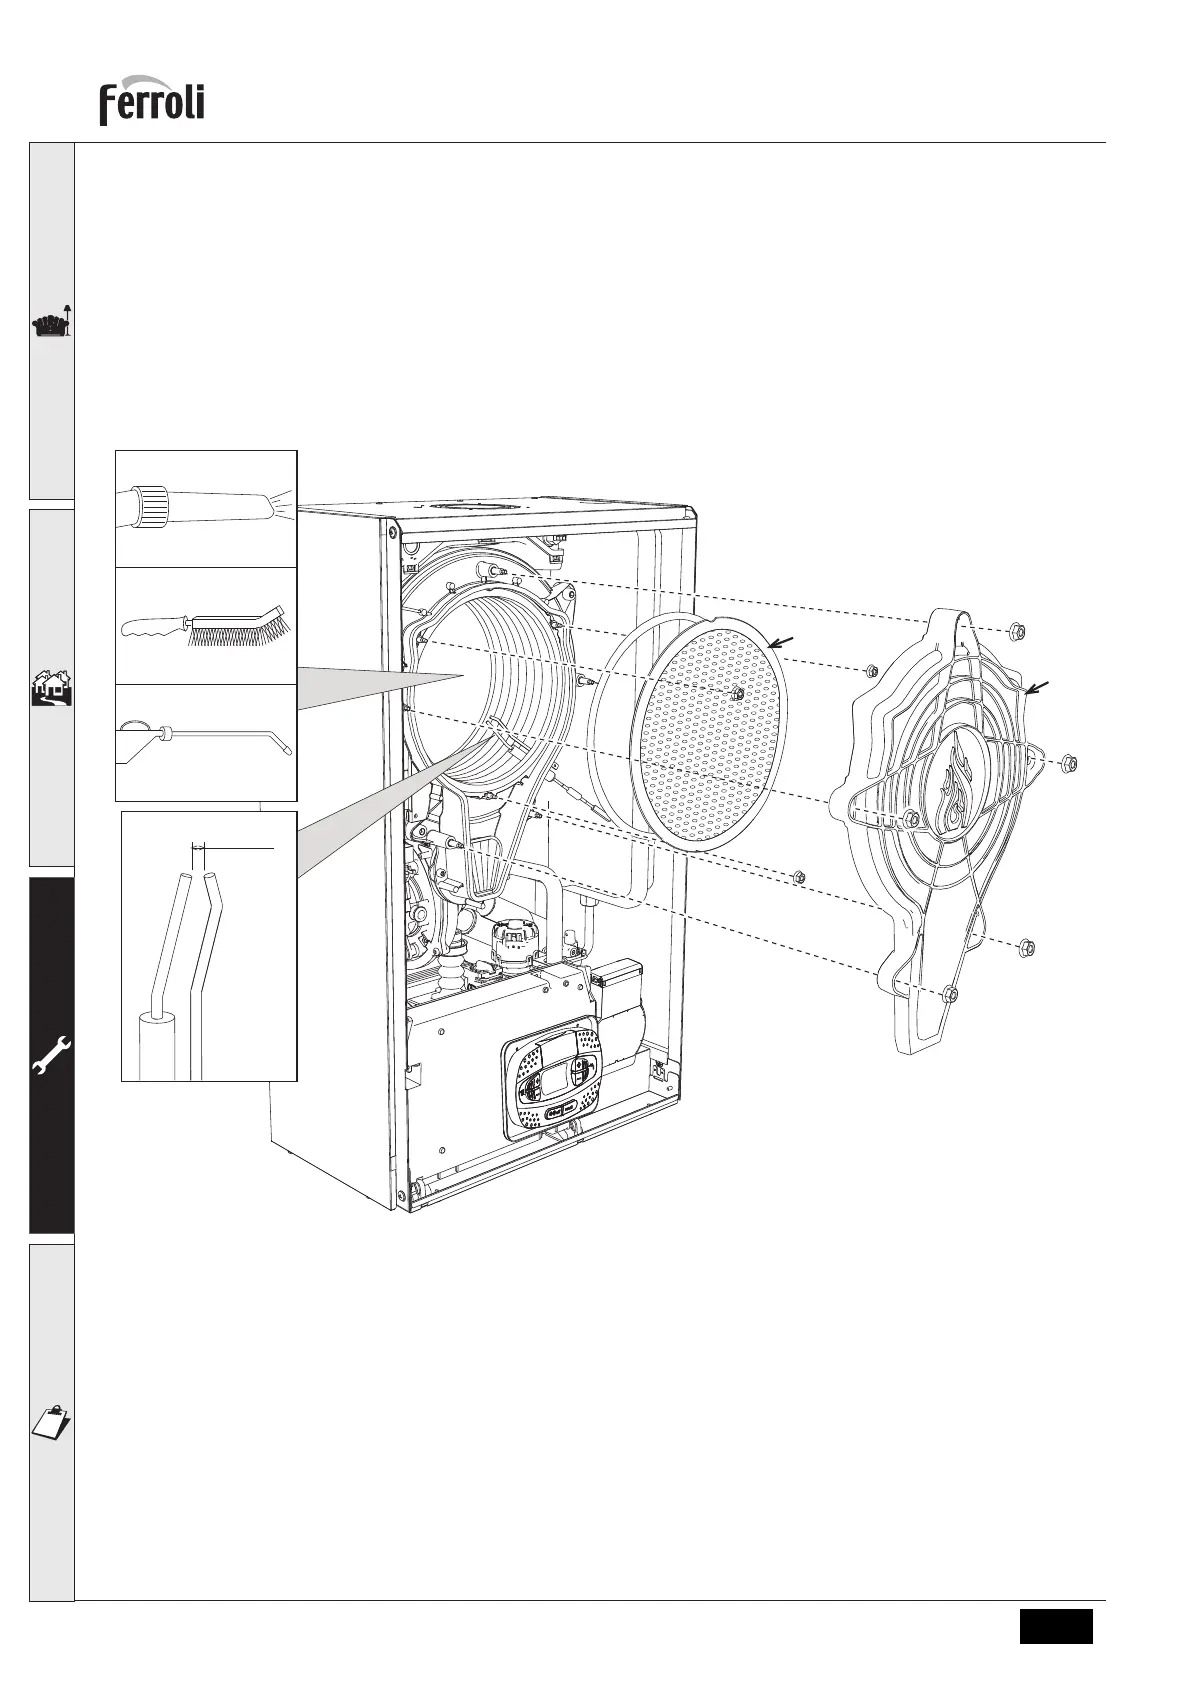
Disassembling the burner and cleaning the exchanger
fig. 42
• Disconnect the power supply and close the gas cock ahead of the valve.
• Undo the 5 screws securing the exchanger cover.
• Undo the 3 screws securing the burner.
• Check the correct distance of the electrodes.
• To clean the exchanger, it is advisable to remove the electrode (see fig. 45)
• Clean the inside of the exchanger with the accessories indicated in fig. 42.
Do not use metal brushes which could damage the exchanger.
 Loading...