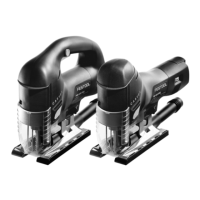
Recommended stroke rate (position of the ad
justing wheel)
Hard and soft wood, blockboard, ply
wood, chipboard
A
Fibreboard 4–A
Plastic 3–A
Ceramic, aluminium, non-ferrous met
als
3–5
Steel 2–4
9 Working with the electric
power tool
CAUTION
Materials which produce a lot of dust
Damage to the machine due to the ingress of
dust, risk of injury
► Do not work overhead.
WARNING
Risk of injury
► With the tool switched off and unplugged,
check for tight fit of the sawblade before
starting to work
► Always apply the pendulum jigsaw to the
workpiece with the sawblade running.
► Wait until the power tool stops completely
until placing it down. The tool can become
entangled and lead to a loss of control of
the power tool.
When working on small or thin workpieces, al
ways use a stable base.
When working, hold the electric power tool by
the handle and guide it along the desired cut
ting line. For precise cuts and smooth running,
use two hands to guide the electric power tool.
9.1 Free saw guidance along a scribe mark
The triangular pointer on the splinterguard
[5-1]
indicates the cutting line of the saw blade.
This facilitates sawing along a scribe mark.
9.2 Lighting
WARNING
Stroboscopic light could lead to misjudge
ment of the saw blade position
Risk of injury
► Ensure the work area is well illuminated.
A steady light or stroboscopic light is installed
to illuminate the cutting line:
Up to approx. 2100 min
-1
: Steady light
From approx. 2100 min
-1
upwards: Stroboscopic
light
In the overhead position (+/- 45°), the
lighting is switched off completely.
If required, you can adjust the lighting:
► Plug in the electric power tool.
► Press both buttons [1-2] simultaneously
and hold for approx. 10 s until a beep
sounds.
► Release both buttons [1-2].
► Press the left button (on the pendulum
stroke side) the specified number of times
to set the desired mode:
Mode Indication dur
ing configura
tion
Behaviour during op
eration
1 Light flashes With stroboscope
(standard)
2 Light on Steady light without
stroboscope
3 Light off Light switched off
► Press the right button to save the setting.
9.3 Extension Cord
If an extension cord is required, it must have a
sufficient cross-section to prevent an excessive
drop in voltage or overheating. An excessive
drop in voltage reduces the output and can lead
to failure of the motor. The table below shows
you the correct cord diameter as a function of
the cord length for this tool.
Cord Size in A.W.G
Tool`s Ampere Rating Cord Length in Feet
25 50 100 150
3-6 18 16 16 14
6-8 18 16 14 12
8-10 18 16 14 12
10-12 16 16 14 12
12-16 14 12 - -
English
13
 Loading...
