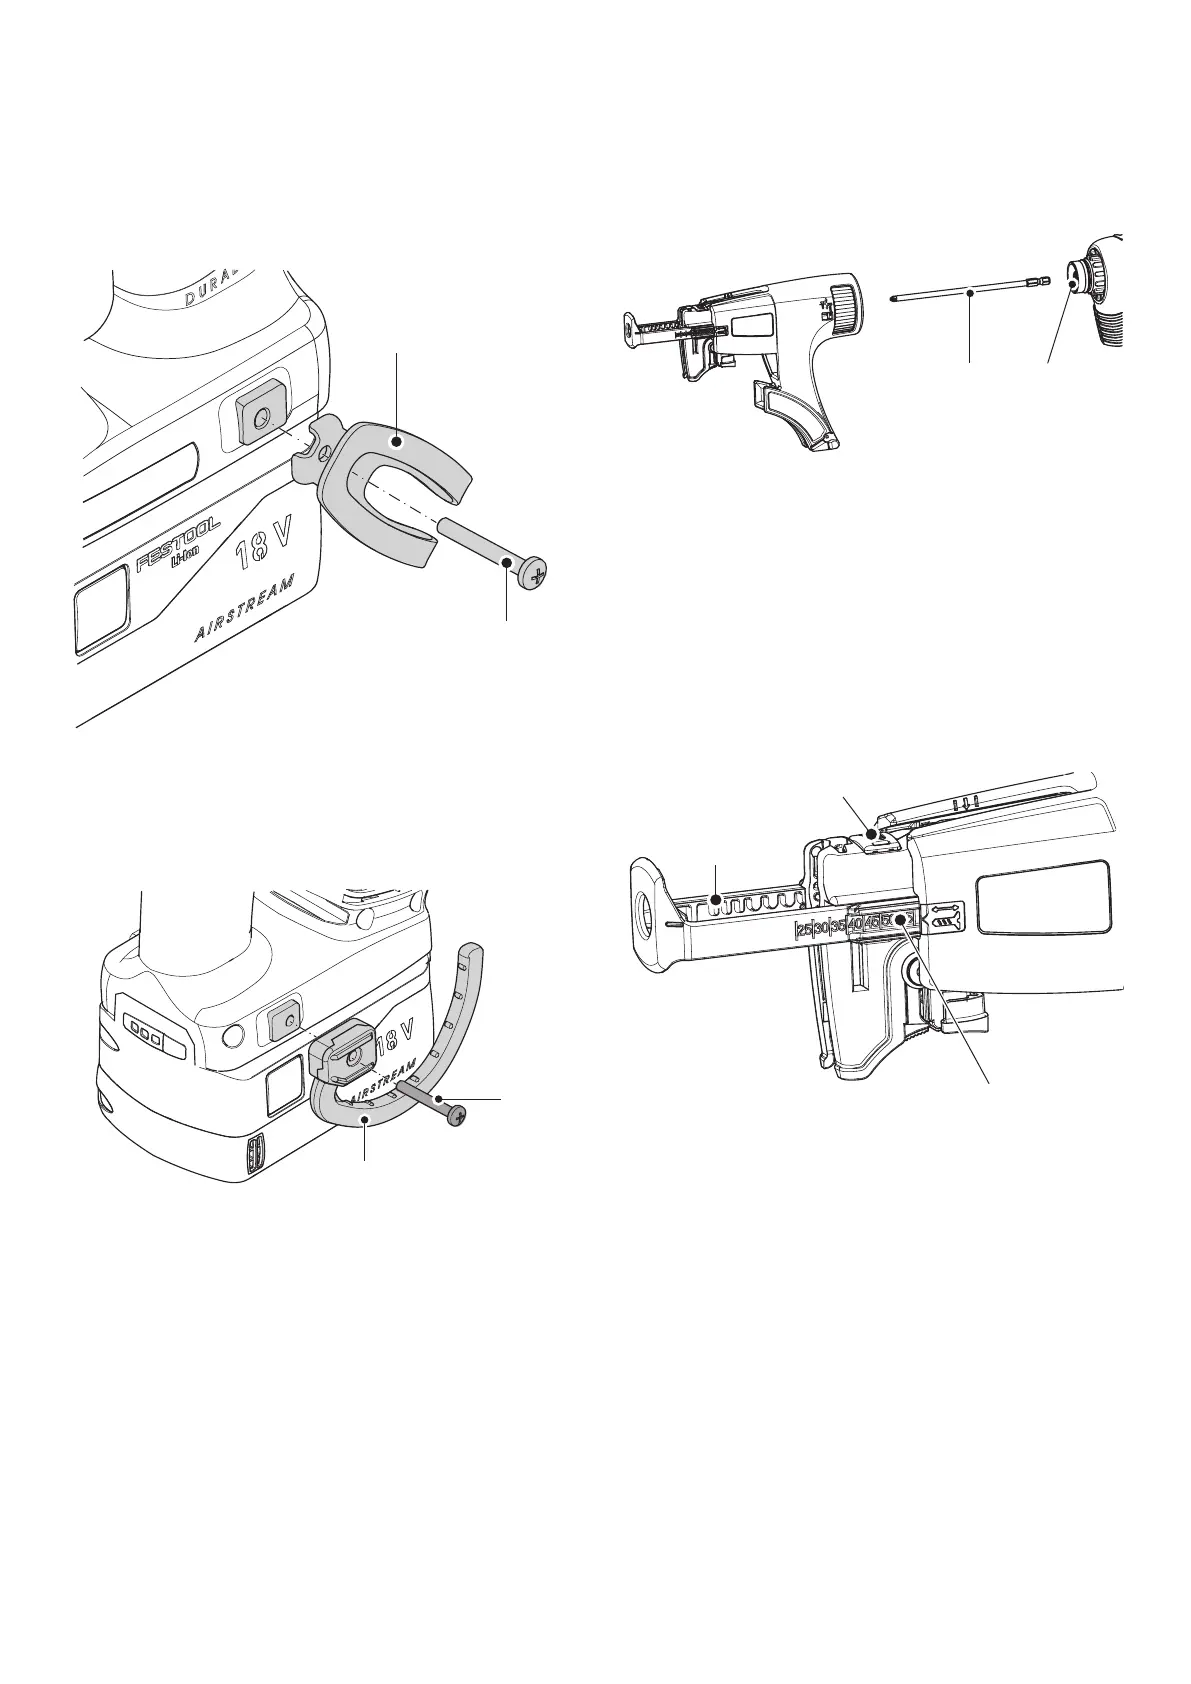
10.3 Frame hook and belt clip
The belt clip [6-1] can be used to attach the tool
to working clothes temporarily – it can be af
fixed to the left or right-hand side of the tool
using a screw [6-2], making it suitable for
right-handed and left-handed operators – see
figure [6].
The tool also has a hook [7-1], by which the tool
can be hung, as required. It can be affixed to the
left or right-hand side of the housing using the
screw [7-2] – see figure [7].
10.4 Magazine attachment
The magazine attachment enables the operator
to work continuously without unnecessary
pauses.
Fitting the magazine attachment
► Remove the depth stop [5-1] on the bit
holder [3-2] using the bit, as described in
section
9 .
► Move the selector switch [1-4] to the MAN
position.
► Push the long bit [8-1] into the tool hold
er [8-2] until it clicks into place.
► Then affix the magazine attachment to the
transmission housing. The magazine at
tachment must audibly click into place.
► The magazine attachment can be positioned
at 30° increments.
Removing the magazine attachment
► Take the magazine attachment out of the
transmission housing by pulling firmly.
Adjusting the screw length
► Pressing on the button [9-1] slides the
depth stop [9-2] in or out, so that it can be
adjusted to the required screw length.
The screw length setting is visible on the sides
of the depth stop [9-3].
Inserting collated screws
► Firstly, draw the belt of collated
screws [10-3] through the lower magazine
guide and then thread them into the car
riage guide until a screw clicks into the
working position.
Make sure that the screws are correctly
positioned and secure by pulling gently on
the belt of collated screws.
Check that the first screw is lined up in the
screwing axis – see figure [10].
► Use the adjusting wheel [10-1] to set the
required insertion depth.
► Clockwise rotation will countersink the
screws further in, while anticlockwise rota
tion will countersink the screws further out.
English
13

 Loading...